

How to Paint Trees in a Landscape Painting > To avoid trees that look generic or pasted on, follow these tips for painting compelling contours, varied sky holes, and details at a range of distances.
By John MacDonald
featured in the art video workshop “Creating Dynamic Landscapes” and the newly released “Poetic Landscapes”
Unless you live in the desert or tundra, if you want to paint landscapes, you must be able to portray trees convincingly — which, despite their apparent simplicity, can be devilishly tricky to do. Here, we’ll explore ways to deal with the unique challenges of painting this ubiquitous landscape feature.
How to Paint Trees
GETTING INTO SHAPE
Let’s start with the most important visual component of a tree — its contour. Two simple “rules” can help ensure that your trees have dimension and character, without being overly complex.
Simplify but don’t stylize: The visual form of a tree, establishing both its species and its unique character, is defined by its contour, its outline. The “stuff” inside the edges isn’t nearly as important, especially for trees in the distance.
The outside edge of a tree is extraordinarily complex; various groupings of leaves and branches in different densities move in all directions in space — an endless profusion of details that attract and confuse the eye. Underneath the complexity, however, an overall shape unifies the details and reveals the tree’s unique character. This is the shape we need to see and then paint.
To see the overall shape of a tree, squint at it. Squinting simplifies the values, flattens form, eliminates details, and softens color contrasts. It reveals the major shapes, which we need in order to make intelligent choices about what to include and what to omit in our paintings.
[Related > MYSTERY SOLVED: Solutions To 2 Major Issues That Most Landscape Painters Struggle With …]
When blocking in the value and shape of the tree, we need to simplify the contour. The key is to reduce the complexity, while keeping the sense of a living, unique tree. Carry the simplification too far, and the tree ends up looking stylized — it becomes an interpretation of an idealized tree rather than a portrayal of a specific one. If your trees begin to look like generic rather than real trees, you’ve moved from simplification to stylization.
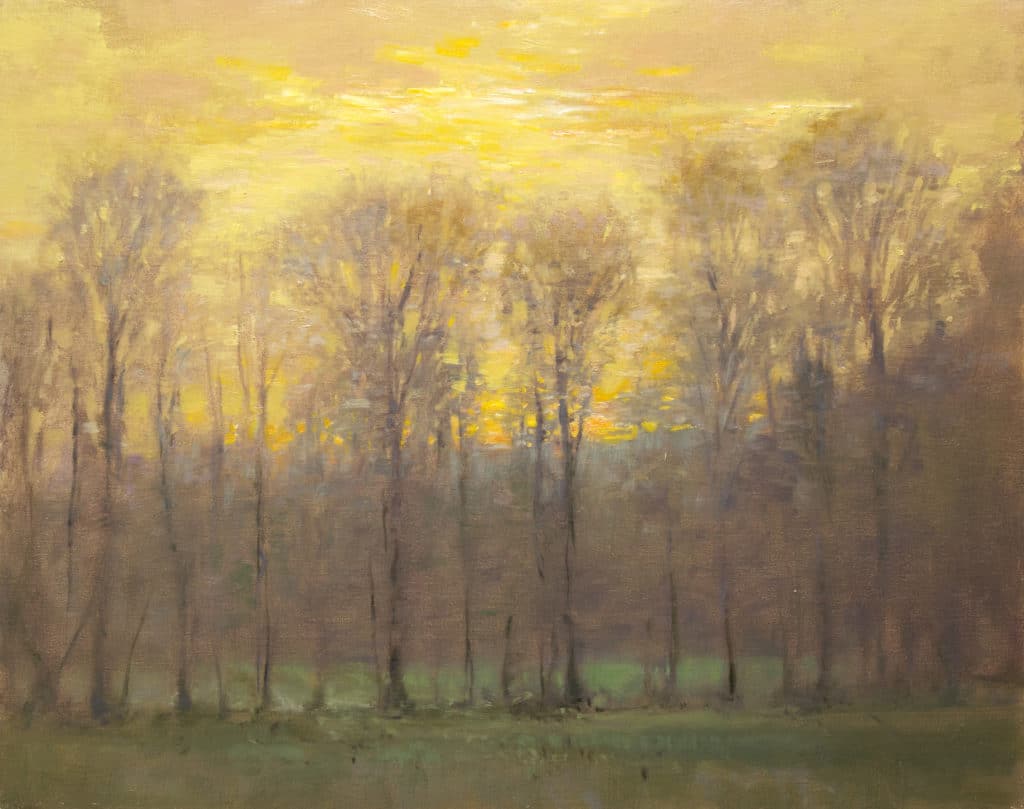
To avoid this, simplify but don’t be too quick to eliminate the specific twists and turns of a trunk or an odd indentation in the contour of the tree. Capturing some of those quirks in the shape can ensure that the tree appears real, a natural occurrence in a real location, as the trees do in “Field Farm Sunset.” Once the outline is working satisfactorily, it often takes very little detail or subtle variation of value within the outline to complete it.
Soften but add variety: Study the trees of masters, such as Jean-Baptiste-Camille Corot, Claude Monet, and George Inness, and you’ll find that they all keep the contour edges soft. Whether seen against background hills or sky, the contour of a tree is almost always softer in appearance than we think. Bare trees have extremely soft edges, but even a tree in the height of summer, in full foliage, has a soft edge.
A tree painted with too sharp an outline appears as a flat, cutout shape pasted on the landscape. A soft edge is much more realistic, but the softness needs to be broken too. A tree that consists of nothing but soft edges can appear equally flat, the only difference being that it appears out of focus. Somewhere along the contour, it’s important to create a few sharp, hard edges.
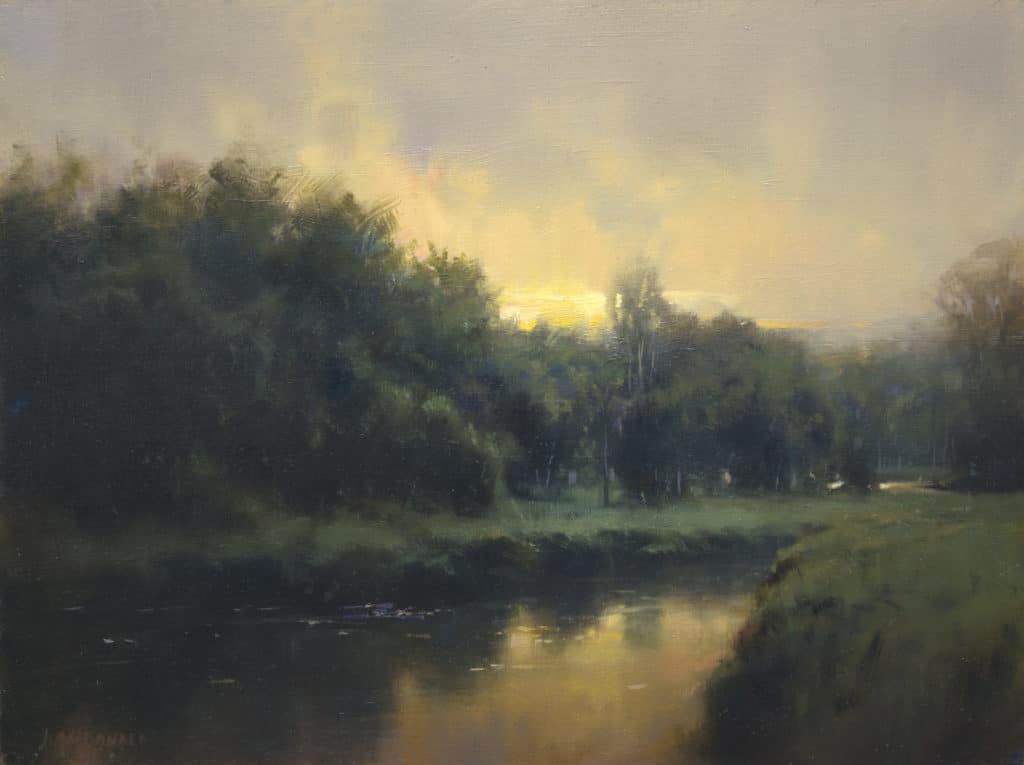
A variety of edges creates the illusion that some areas of the tree’s contour are closer to the viewer and some are further away. It hints at the tree’s three-dimensionality. This isn’t just a gimmick; it imitates what we see in nature. In some areas along the contour, the foliage is dense, and in some areas it’s sparse. Some leaves pick up reflections from the sky, lightening the edge, while others create shadows that darken the edge. In “Twilight, Study,” I suggested this complexity by manipulating the hardness and softness of edges — without having to paint every leaf on every twig.
HOW TO PAINT TREES: LETTING THE SKY SHOW THROUGH
Sky holes convey the unique character of a tree, hint at its three-dimensionality, and, depending on the size of the tree in our composition, offer us opportunities to create interesting value patterns.
Prioritize importance: Study how sky holes appear in nature. They are not random, but are related to the form of the tree (the masses of foliage and the growth of branches). It’s extremely difficult to invent sky holes that look natural. Instead, study trees in the landscape, and then choose the sky holes that are most essential to the composition. Some sky holes will be important (usually the larger ones), some secondary, and some can be omitted entirely.
Darken values: Sky holes are small, light-value shapes surrounded by darker values. If painted the same value as the sky, the darker values of the tree will make the sky holes appear much lighter than the larger sky. For this reason, it’s necessary to darken the value of the sky holes, especially the holes surrounded by dark shadows.
Create variety: Sky holes shouldn’t all be the same value, nor should they have identical edges. By varying the values and edges of the holes, you can create the illusion of light shining through different thicknesses and densities of foliage, thus enhancing the three-dimensional quality of the tree. For instance, a sky hole adjacent to a large branch or trunk will have a harder edge where it meets solid wood, but softer edges where it meets leaves.
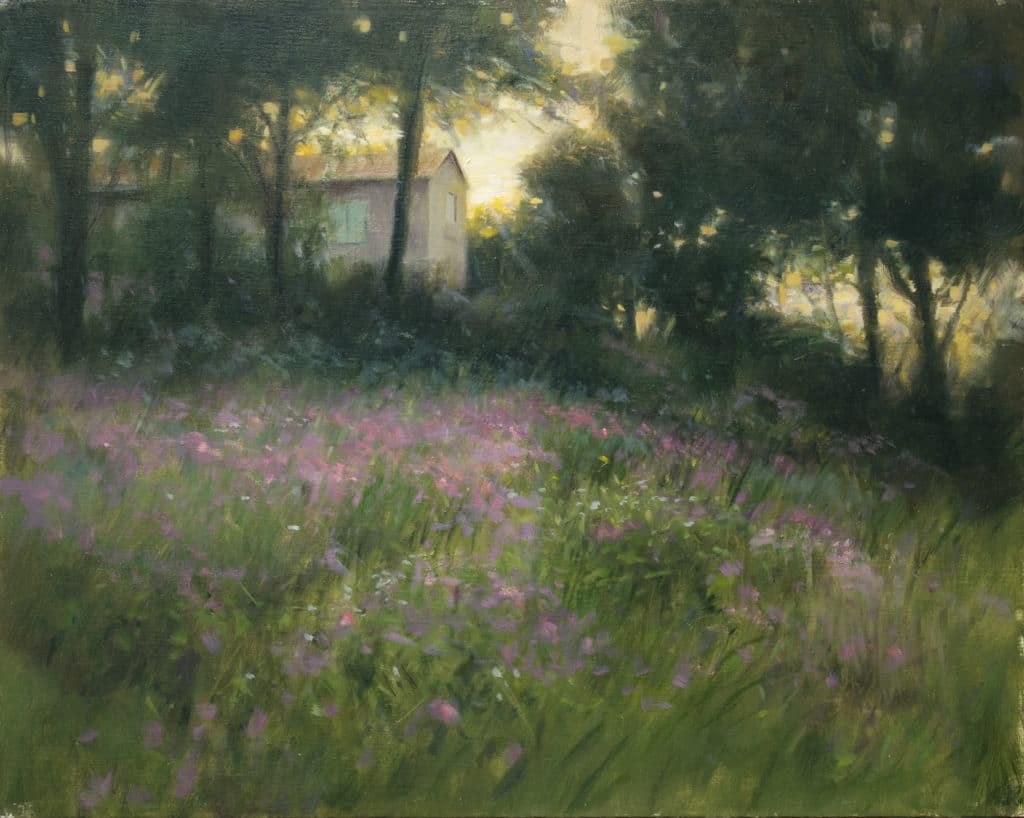
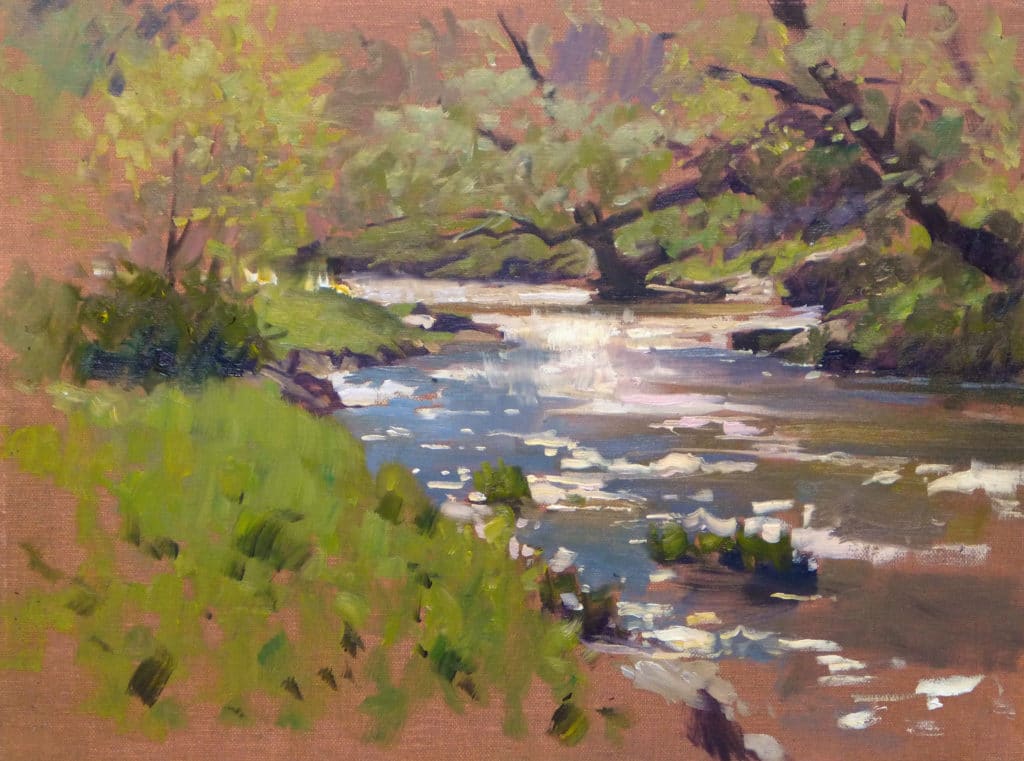
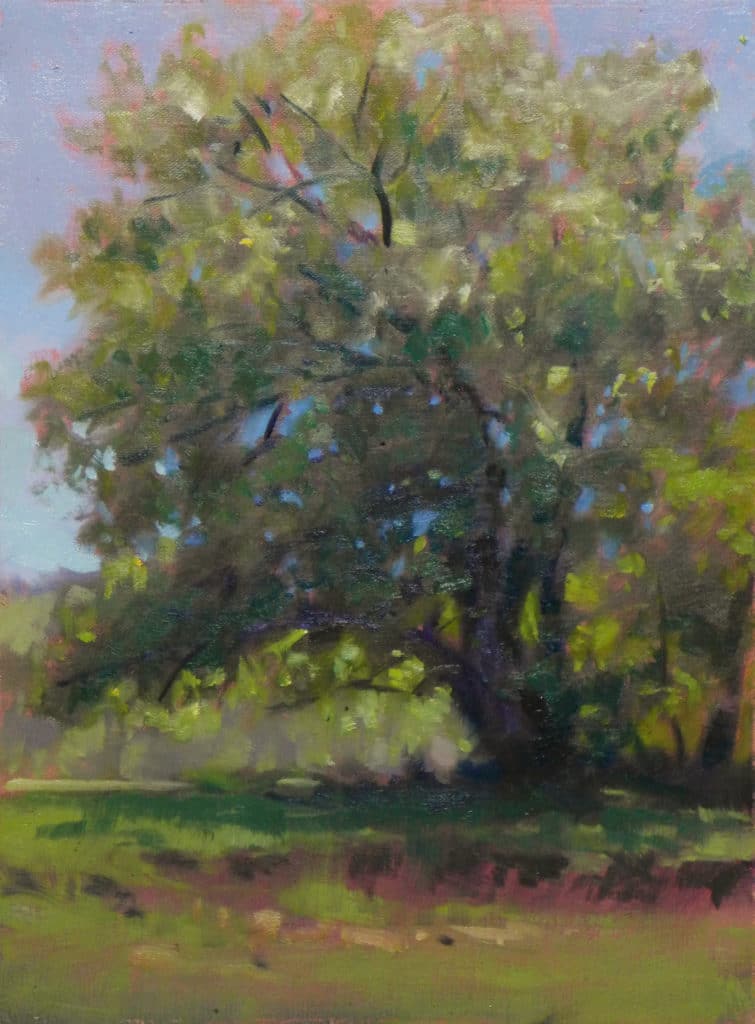
Vary the values, sizes, colors, and edges of the sky holes and, when painting multiple trees, vary the number of sky holes in different trees, as I did in “Hillside in Provence.” But don’t vary them randomly. Some trees have dense foliage, some sparse. Sky holes function as details that attract the eye and need to be taken into consideration when composing the painting. Use them to create an attractive design that leads the eye where you want it to go.
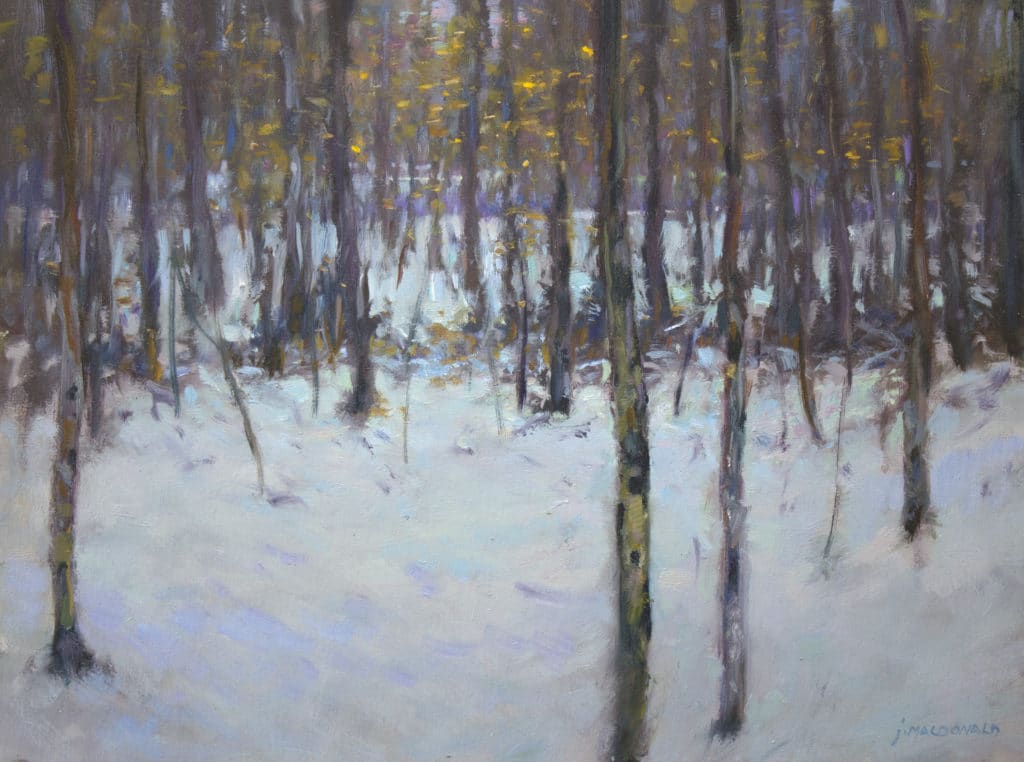
“This piece isn’t about contour, foliage, or sky holes,” MacDonald says. “It’s about pattern. I’m playing with verticals against horizontals, all the while trying to create a realistic sense of light and space.”
GOING THE DISTANCE
A tree in the foreground should read as three-dimensional, but the farther a tree recedes in the distance, the more it appears as a flat, patterned shape. Calling too much attention to the three-dimensional quality of a distant tree can hurt the illusion of deep space in the painting.
Adjust levels of detail: Typically, the closer the trees, the more visible are the trunks, branches, and individual clusters of foliage or twigs. In this instance, the internal “stuff” becomes important to creating the illusion of reality in the painting. But as a tree moves into the distance, the outline of the entire tree becomes more important and its detailed, three-dimensional appearance less so.
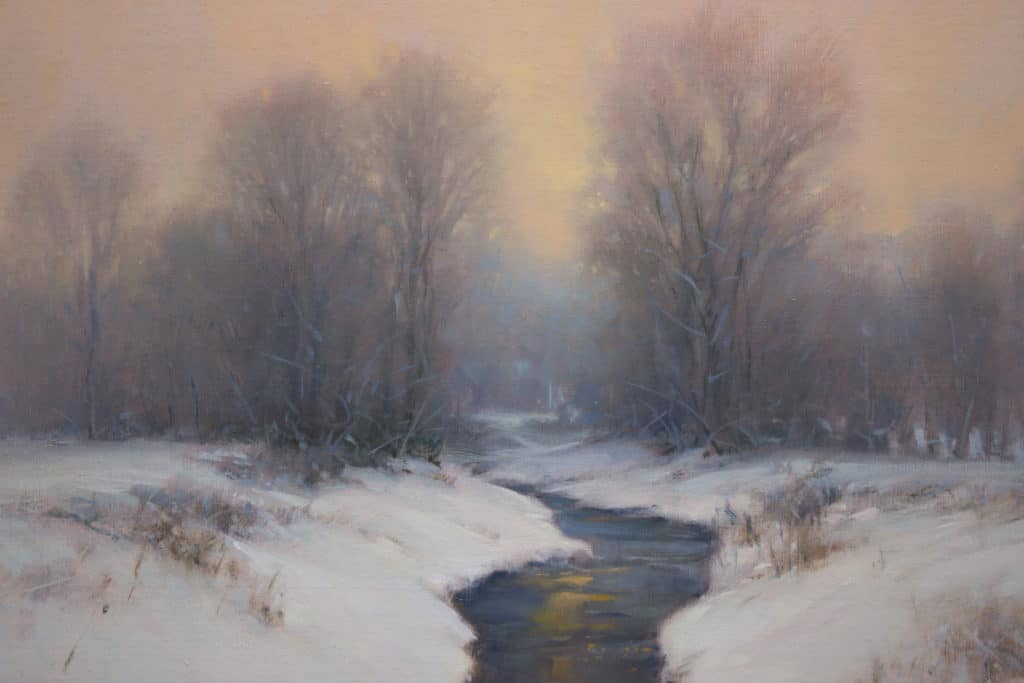
In “Winter Evening Fading,” (shown at top) you can see that for distant trees, a simple, varied edge and a few sky holes may be all that are needed. As trees move to the horizon, they tend toward a single value with little to no detail — just an overall soft edge with a few hard-edged spots and a little variation in the contour.
Learn more about how to paint landscapes with John MacDonald’s “Creating Dynamic Landscapes” art video workshop (preview it below!).
And browse more free articles here at OutdoorPainter.com


Love his work!!! I do not see the price???
Hello! Please visit his website to learn more about purchasing his art; there should be gallery and/or contact information available. Thanks for checking!
John’s website: http://jmacdonald.com/
His “Creating Dynamic Landscapes” video: https://lilipubsorders.com/products/john-macdonald-creating-dynamic-landscapes
So there are two MacDonald instructional DVDs on the market, “Dynamic Landscapes” and “Poetic Landscapes.” Two questions, if you please. 1.) Which came first? And, 2.) Which do you feel best expresses the technical aspects of MacDonald’s approach to the basics (Values, edges, composition, etc.) Thank you!
Hi Stephen! I’m not sure, so I’ll check with our video team and find out for you. Will be in touch!
Hi again! Dynamic Landscapes came out first (in November 2017), and Poetic Landscapes was just released in March. Both videos cover similar approaches, and my understanding is that the biggest difference is the subject being painted. Thank you for asking!
Just spent five days studying with John MacDonald. He’s a great teacher and artist. Both videos are very good. Also he has a free newsletter you can download from his website which is really full of great information.
This was the best article I’ve ever read on painting trees, which ARE ‘devilishly tricky’ for beginners.
Enjoyed learning about tree painting from John MacDonald. Thank you for the article.
This was a fantastic explanation for tips on painting trees – a subject I have challenges with!
Thanks!!