
In this step-by-step landscape painting demo, Kyle Buckland walks us through the evolution of “May Along the Creek” — from its first energetic marks to the final refinements that hold the viewer’s eye. Rather than getting lost in early detail, he builds the composition by establishing big shapes, clear value relationships, and purposeful brushwork. Along the way, Buckland shares how he thinks about movement, focus, and visual pacing, revealing how each stage plays a role in guiding the viewer through the finished painting. Enjoy!
Step 1
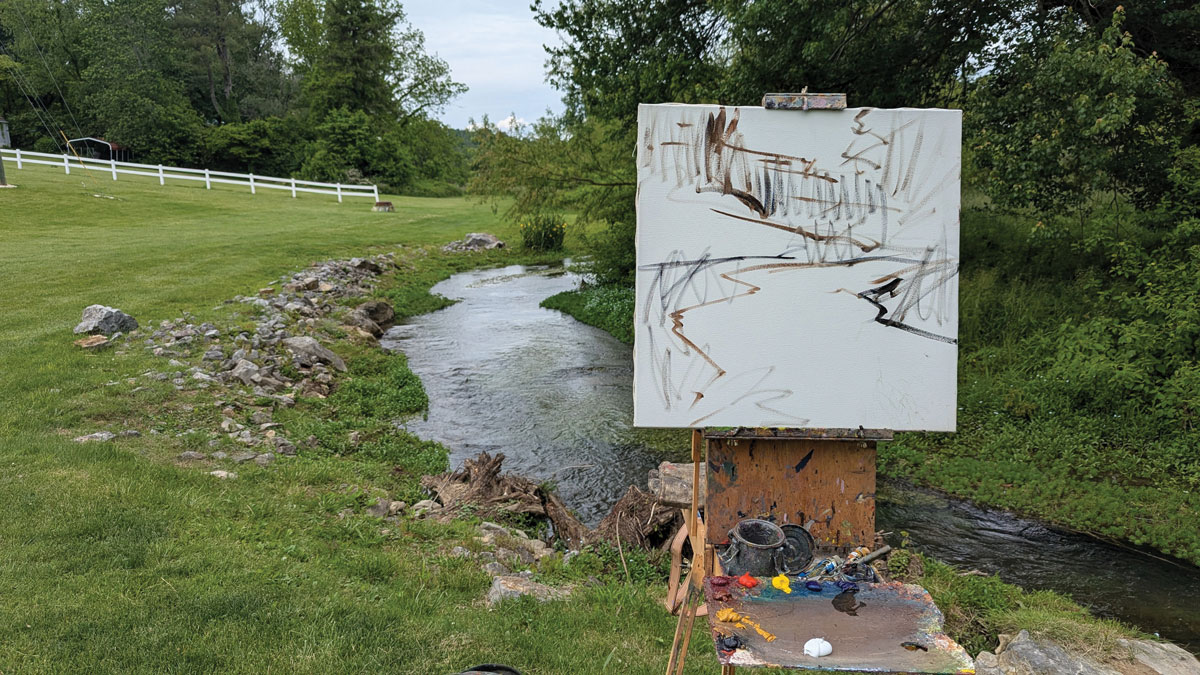
“I did a quick drawing right onto the white canvas, sketching in the main shapes with a mixture of burnt sienna and ultramarine blue deep,” says Buckland. “I tried to look past all the detail and see the big, underlying shapes. I’m a sucker for these early stages — it’s a constant goal of mine to preserve their energy all the way through to the finished painting.”
Step 2
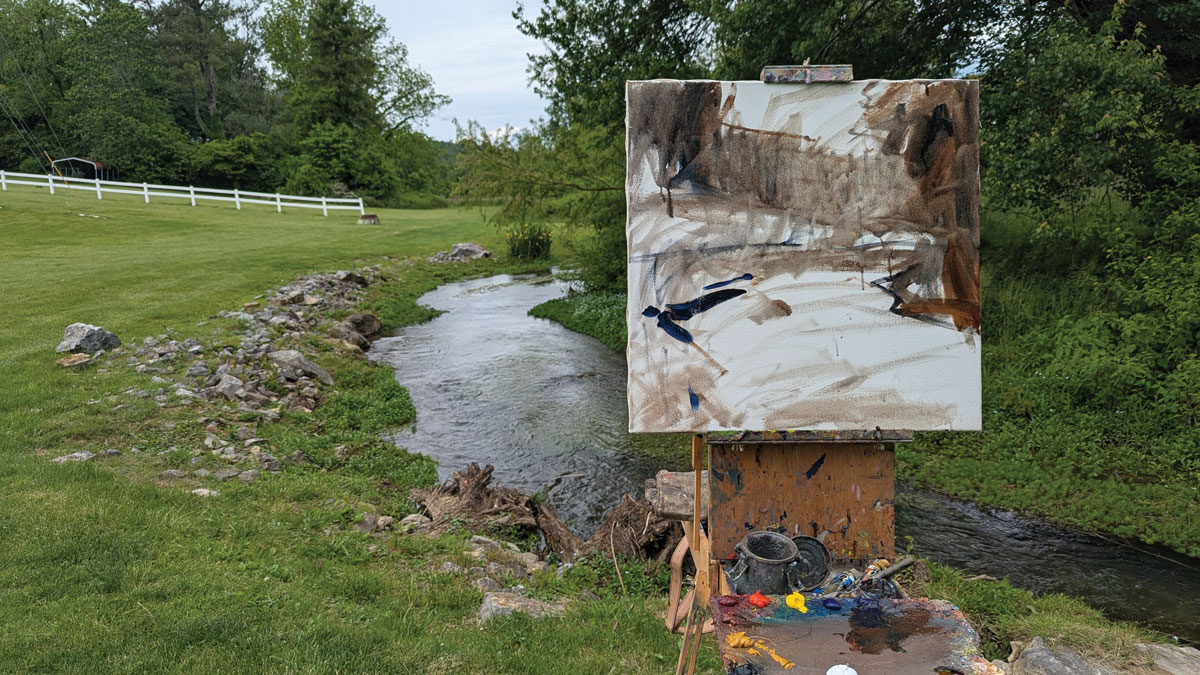
“Here, I laid in big shapes with a thin stain, focusing on the relationship of values. I established that the trees are dark, and the field is a little lighter than the trees, but not as light as the sky and the water. Also, I started to do some drawing, and I wanted to make sure I didn’t lose that angle along the bank of the creek on the left so I hit it with a nice dark accent.”
Step 3
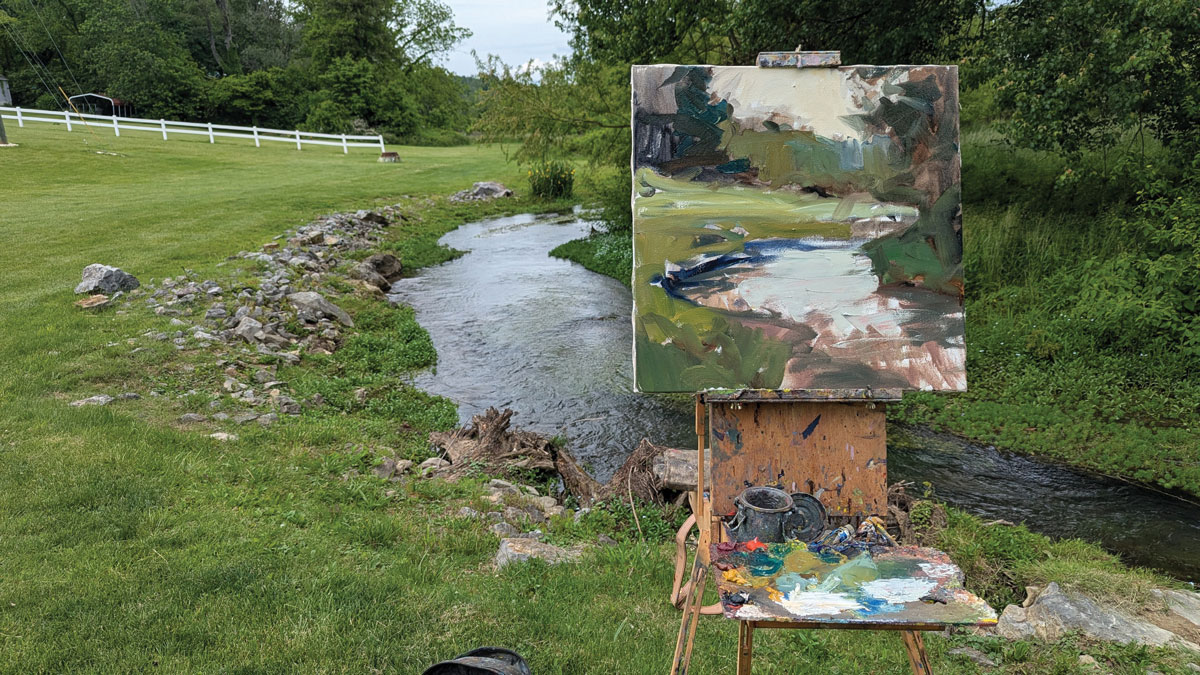
“At this stage, I really started to layer up the color. I still kept the shapes as big as possible, but I broke up the green grass into three distinct areas — lighter green in the distance, a medium value in the middle, and a darker green in the foreground. I stood back from the easel and held the paintbrush more like a sword than a pencil, which gave me more active brushstrokes.”
Step 4
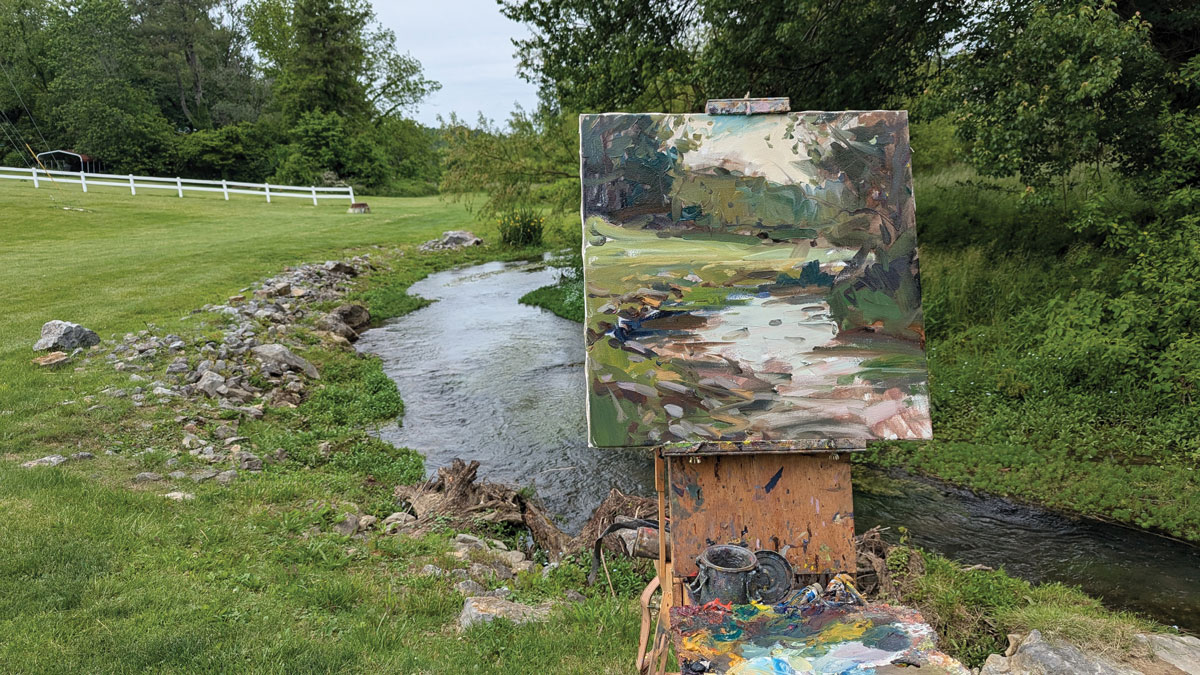
“Paying attention to smaller areas now, I brought the rocks into focus in the foreground and added reflections in the water, still sticking with big to medium-size brushes. And I considered how I could guide the viewer on a walk around the composition. I wanted to create a bridge from one part of the painting to another.”
Step 5
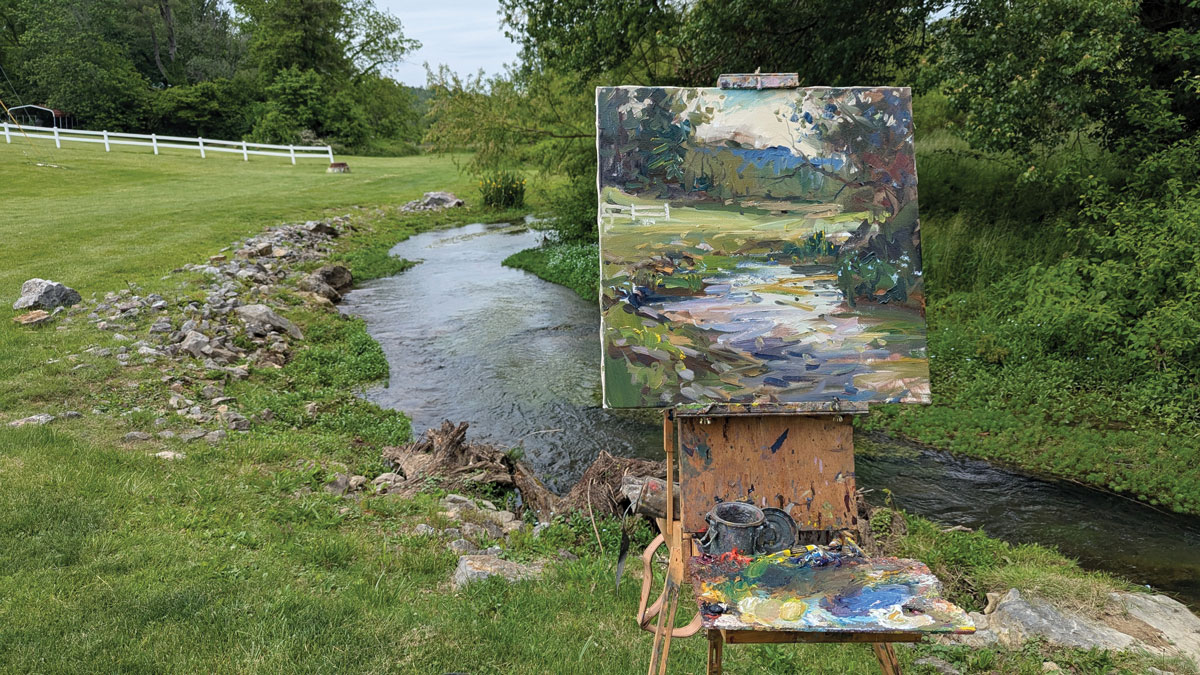
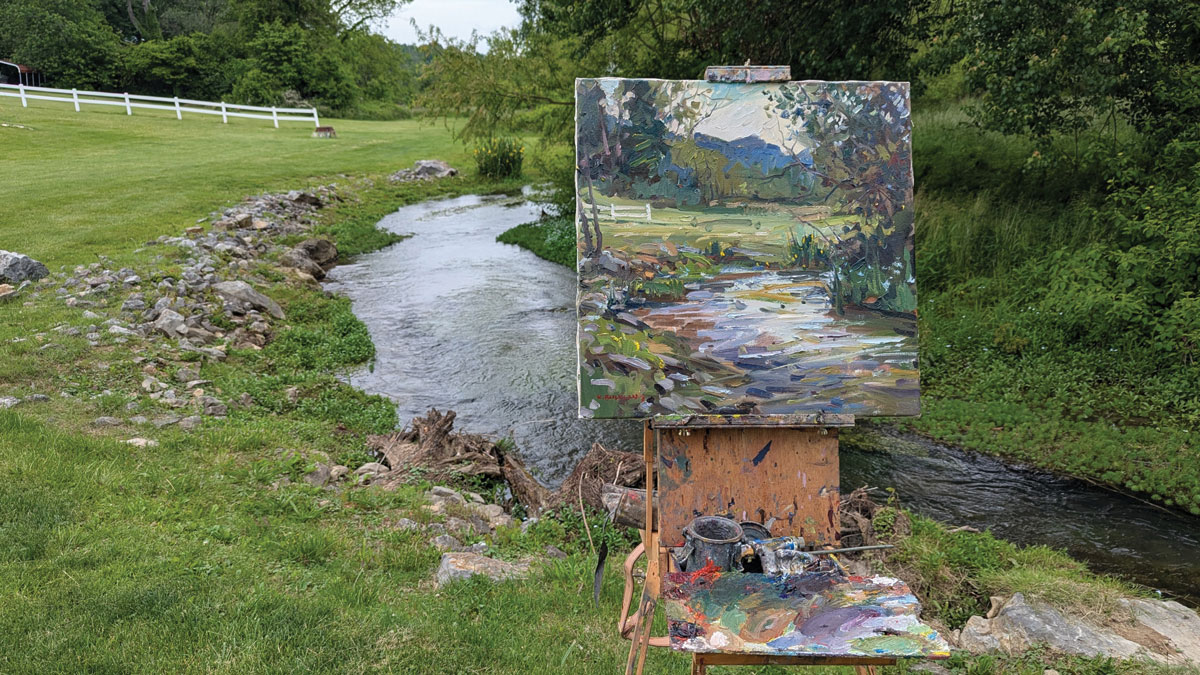
“I started to decide how much detail I wanted in different areas and began to focus on what I call the little jewel areas. I added flowers and the fence, and I defined the rocks a bit more. All the while, I continued to work on the zigzag motion that pulls the eye through the composition. The sweet spot of this painting is the tiny yellow flowers right below the horizontal tree branch, but I didn’t want the viewer to get stuck there.”
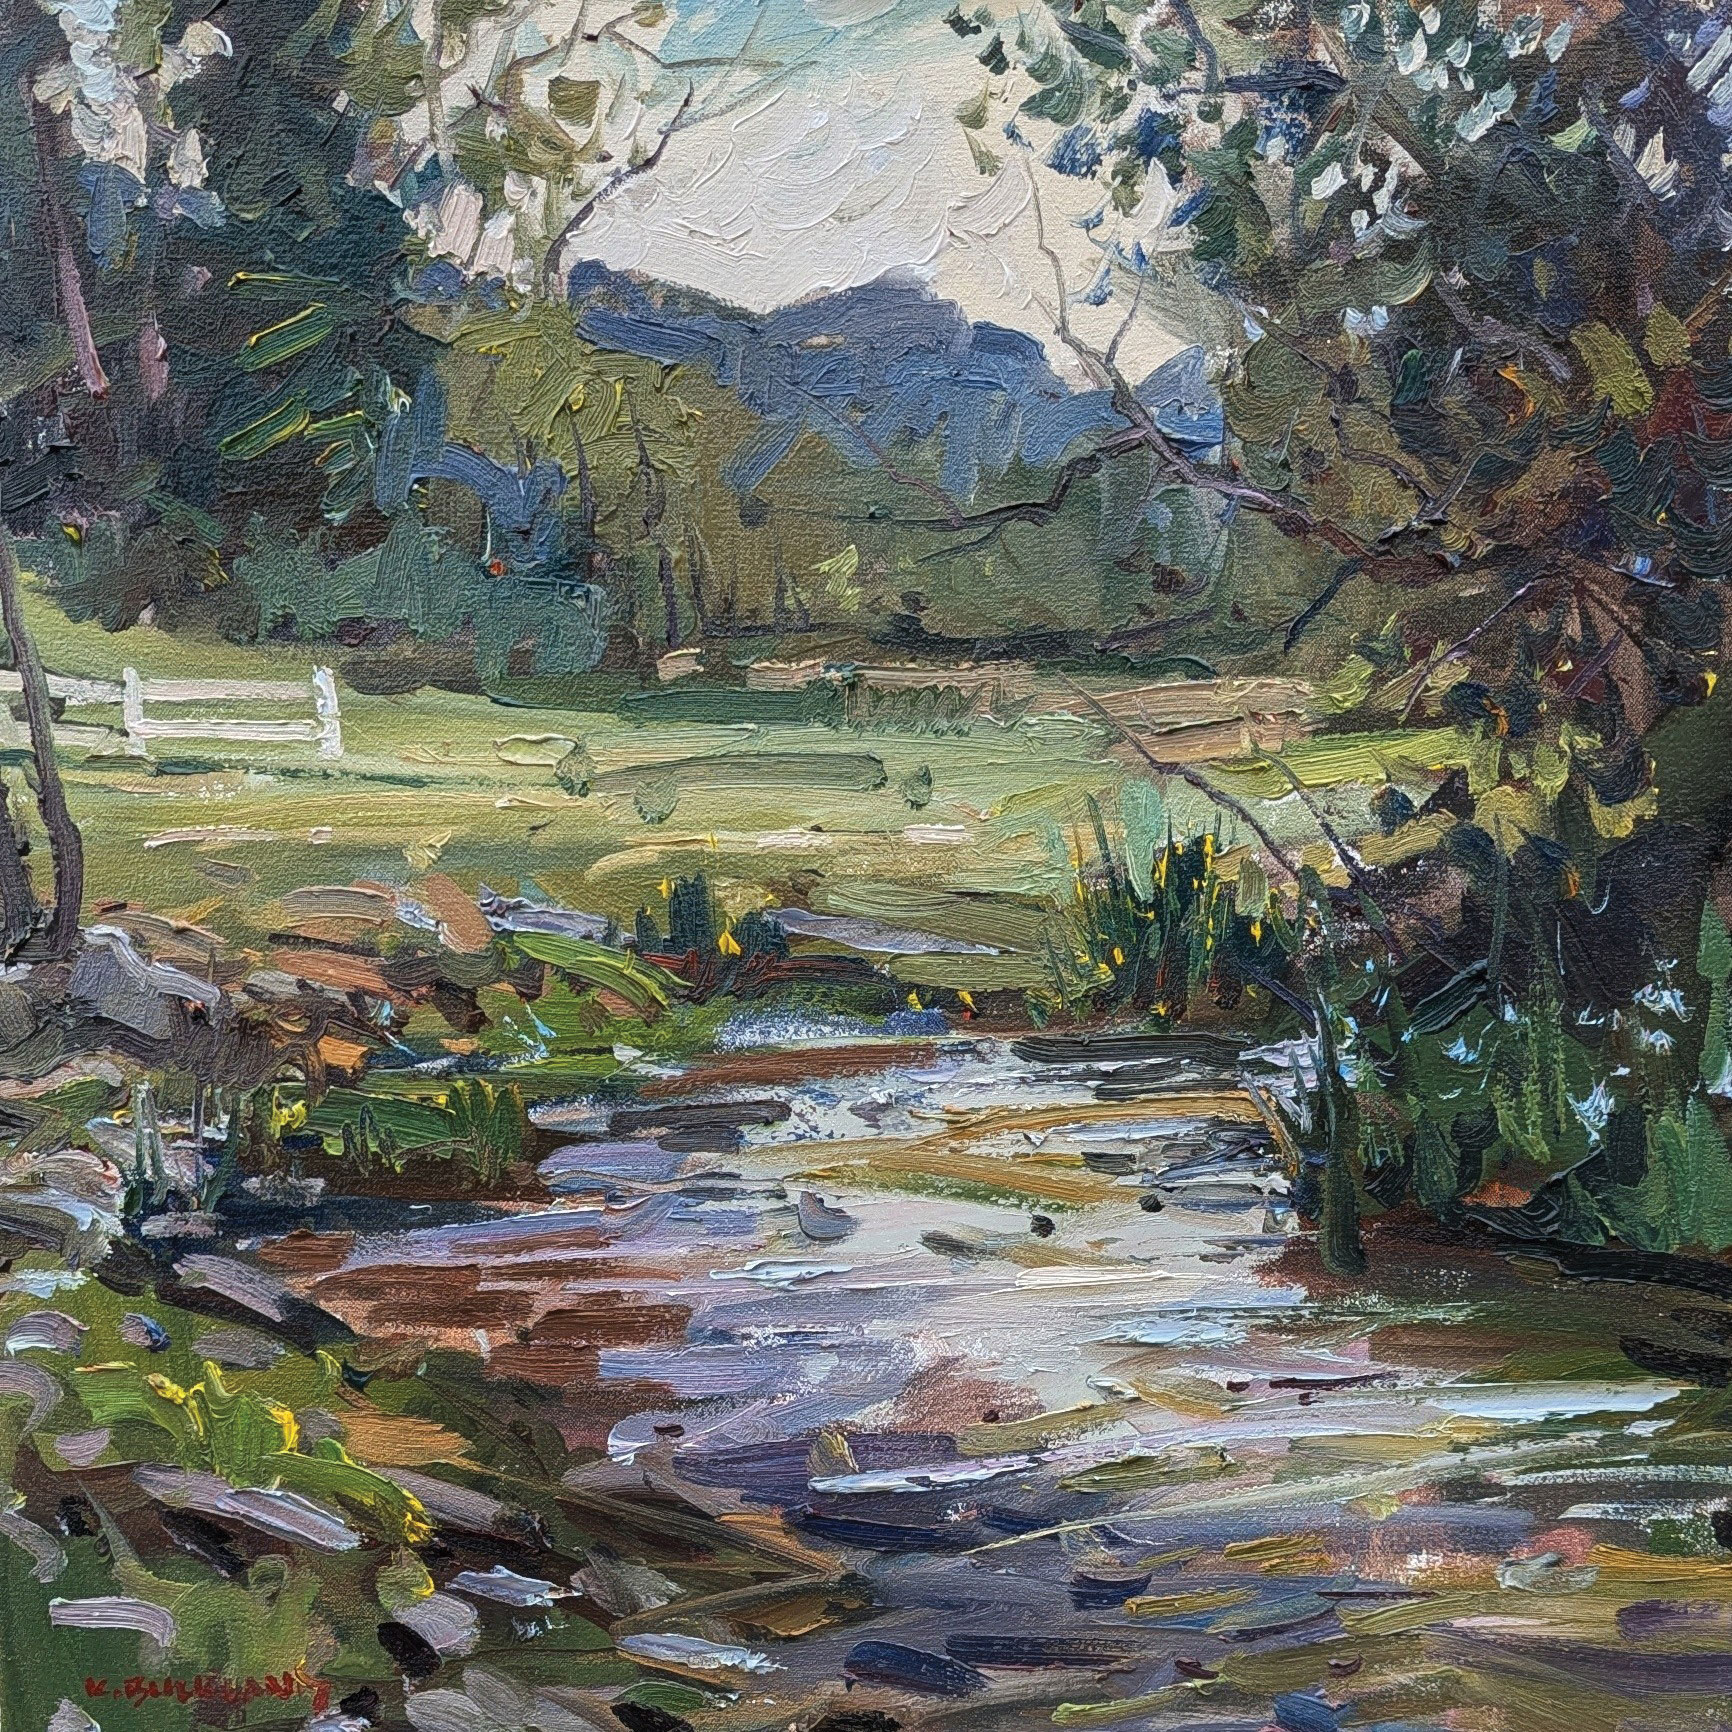
Final Step
“At this point I looked for things that bothered me and worked to fix them. One example is the little tree I added on the left. It acts like a speed bump to keep the viewer’s eye from flying off the left side of the painting. I wanted to slow the viewer down and let them experience the painting for as long as possible.”
Connect with the artist at kylebuckland.com.


