
Patricia Watwood, a classically trained artist and expert living in Brooklyn, New York, is generous in sharing her expertise with other painters. She arranged for models to pose in the landscape for some plein air figurative work, and commented on the process.
Watwood invited some artist friends to join her on private land along the Delaware River in Northeast Pennsylvania for a weekend of painting the figure in the landscape, with a professional model taking two three-hour shifts each day. “The first session was from 9:30 a.m. to 12:30 p.m., taking advantage of the morning light and cooler temperatures,” Watwood recounts. “We had a long break during the middle of the day, and re-convened for painting again from 4-7 p.m. The late-afternoon light is actually the most consistent, with lovely side angles and warm color that stays relatively steady until sunset begins.”
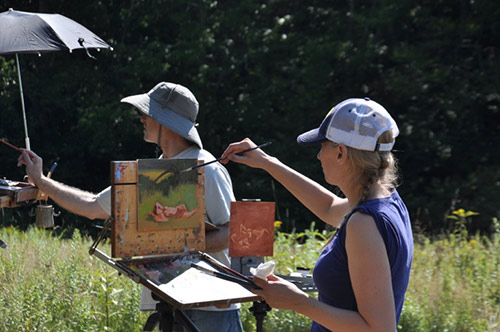
Watwood tried a variety of poses in different settings, carefully monitoring the amount of sun that the model was getting. (She used plenty of sunblock.) The scenario was a tricky one for model and artists alike, but the benefits were big. “The strong contrast between the bright warm skin tones and sharp cool shadows was more dramatic than anything I’ve ever experienced in the studio,” says Watwood.
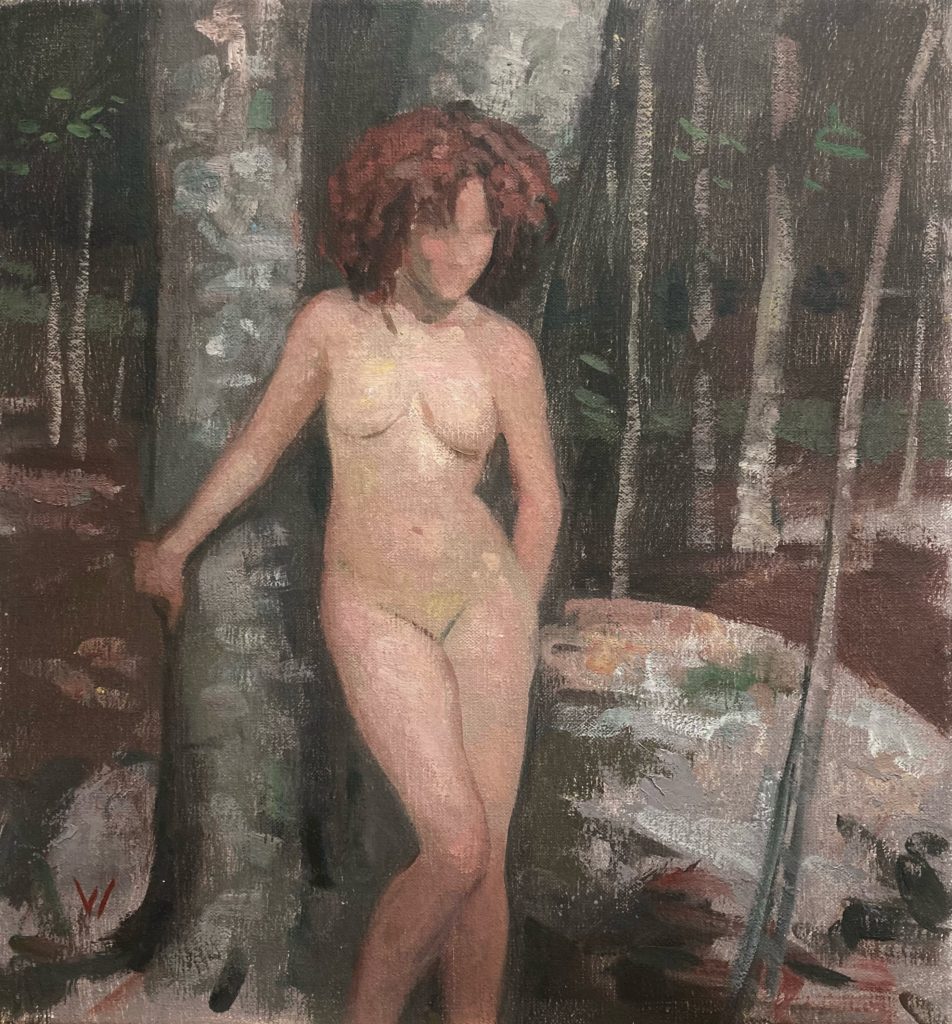
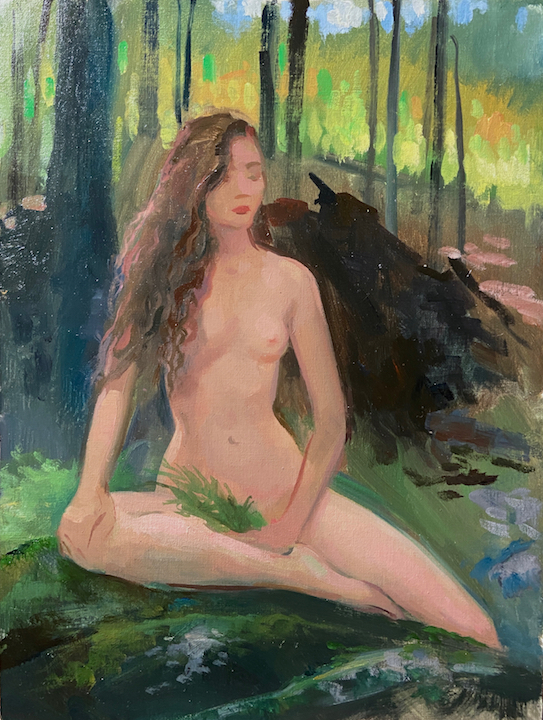
In the end, one pose stood out, and Watwood shared the stages of her painting of it. “One of my favorites was a woodland pose with the model leaning against a grand old tree, where the light on her was sometimes indirect from the light through the leaves (making it very cool and green!), and then we had patches of sunlight that would pass across the figure,” she says. “The light on the figure was constantly changing, which created a challenge, but also gave me the opportunity to design how the dappled sun patches crossed the figure and trees in the foreground.”
Step-by-Step: How to Paint a Nude Figure en Plein Air
Step 1
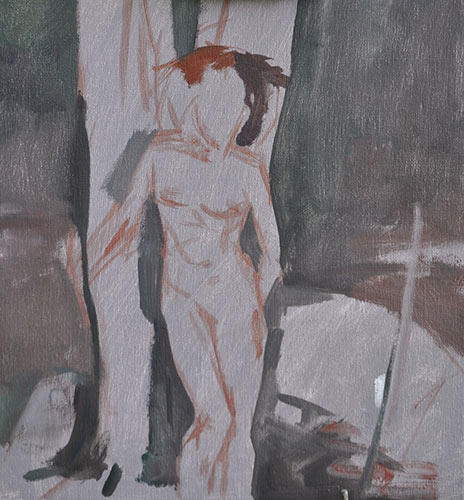
“Before I think about the figure, I decide how I want to organize the composition, and make notations on my canvas,” says Watwood. “I like to work on a (dry) toned canvas, with either a light gray or a light rose-gray ground. I find this makes it easier to get good effects in one pass when I’m working alla prima.
“I start by making a drawing on the canvas with thin paint and a No. 4 filbert brush. I draw in the major lines of the composition with a thin paint of burnt sienna and solvent to lay down the drawing for the picture, keeping the lines light, and the values high. For this artwork, the imprimatura was a light gray.”
Step 2
“Next, I sketch in the figure. Using the filbert and a thinned-out burnt sienna, I sketched in the major shapes of the figure. I kept the drawing to a block-in of the exterior shapes and noted the major landmarks, giving me enough of a road map to begin laying in some color.”
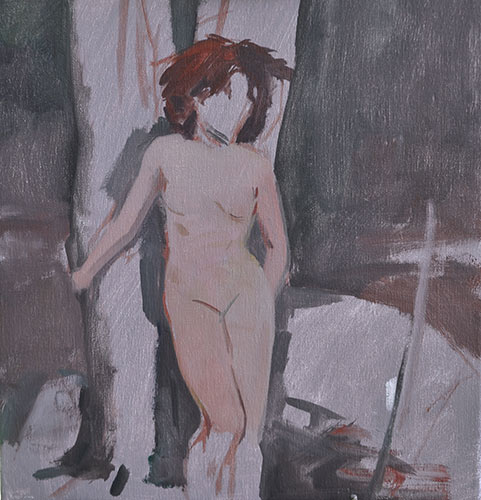
Step 3
“I then block in the major value tones of the composition. Before I start bringing up the light values and colors, I lay in blocks of tone for the dark notes in the picture. In this painting, the forest around her was a dark value against her luminous pale skin. I laid in a simple flat color — mostly burnt sienna, ivory black, and a touch of white for opacity — to make a dark tone around the figure. At this point, I left out the touches of bright green in the woods, as I find it works better to keep the tone more unified early on, and add the chromatic notes later.
“Once a darker tone was laid in for the background, I laid in the shadow shapes of the figure using a warm tone mixed primarily with the venetian red and white, and the cinnabar green to neutralize it. I kept the mixture for the shadow tones a bit thinner with a bit of solvent added for flow. With the shadow tones laid in, I blocked in all the light tones. I like to lay them in with almost a single flat color — in this case a mixture of white, radiant yellow and the venetian red and the white mixture. You can easily modify the pinkness or yellowness of this tone by adjusting the percentages here.
“I ignored the highlight (and occasional sunlight patch) and painted a base tone that was cooler and darker than the lightest parts of the figure. The light gray ground was a good base color for the lighter tones of the tree trunks and the rocks, so I left those untouched for the moment. I put in some simple dark and light color tones for her hair.”

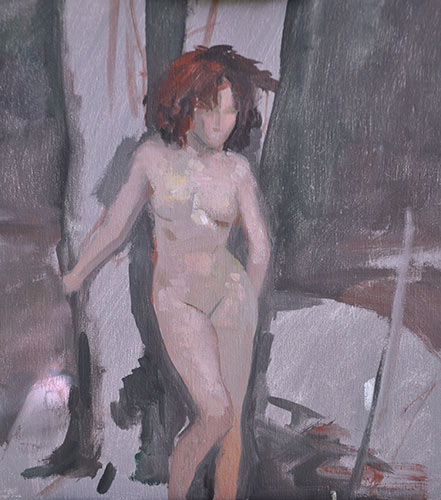
Step 4
“Next, I shaped the figure. When working with the model in this situation, I always want to focus on painting her while she is posing. I left the surrounding details for later, knowing that I can return to the location another time if I want to resolve it further. The dappled light presented a challenge: Sometimes she would be lit evenly and with a very cool indirect light. Then a blast of sunlight would peek through the branches, and a bright patch on her skin would dazzle our eyes.
“My strategy was to paint ‘underneath’ the sunlight. I wanted to paint the form and colors of the figure with a base of colors that suited the cool indirect light, so I keyed my colors whenever that light effect was present. Working into the flat tones I laid down, I painted back into the base and corrected and shaped each part of the figure, adding lighter colors on top of my base.”
Step 5
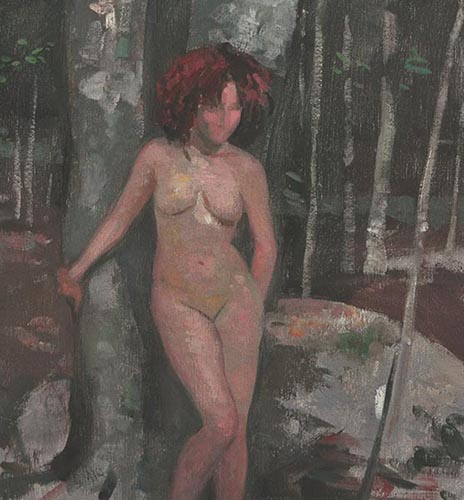
“In the last step, I worked on popping the dappled light notes that would pass across her. Using a thicker paint, with a more definite brushstroke, I dabbed in some high-key patches of the skin in the sunlight. The dappling of the thick brush marks makes a nice visual effect like the sun patches themselves.
“I also then used some bright notes to touch in some of the tree trunks that would catch the broken light, so that the effect of the light sprinkling through the woods would activate some of the background areas of the canvas. I design the placement of these notes more based on the composition I like, rather than their ‘real’ placement in my visual field. I finally got into my green paint as well, dabbing in some bright chromatic notes for the places where the sunlight hit the leaves.”
This was a study from life en plein air (final image is shown below). Watwood took plenty of photos during the weekend, and she plans on hiring the model for some sittings in her studio so she can refine and further explore some of the poses she began outdoors. The artist says she felt the experience was well worth the effort.
“As a figurative artist, I have always been inspired by the dazzling plein air sketches of masters like Anders Zorn, John Singer Sargent, and Joaquín Sorolla,” Watwood says. “The bold color and energy of the figure in an outdoor setting is enticing, and I’ve always wanted to try my hand at that challenging subject matter. The work I did outdoors has pushed me to explore some new colors, bolder textures, and fresh compositions that will keep me inspired over the winter months.”
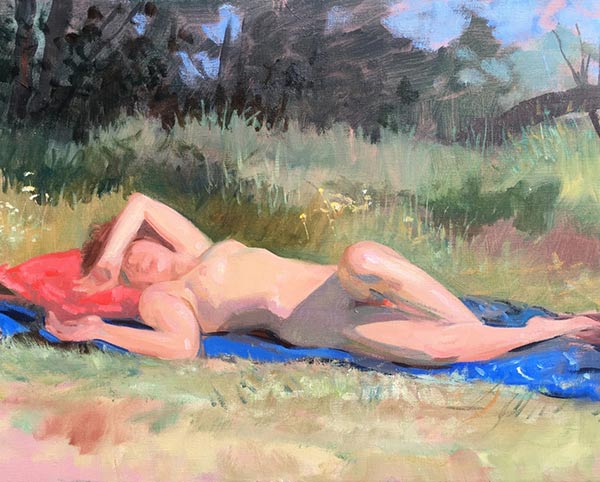
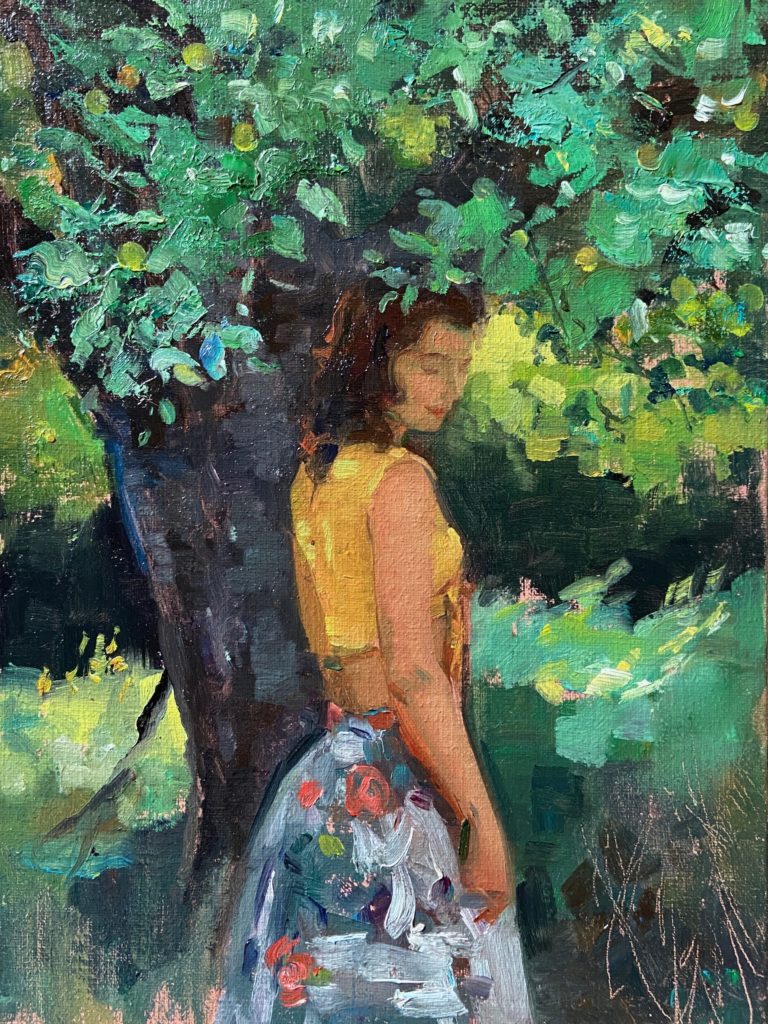
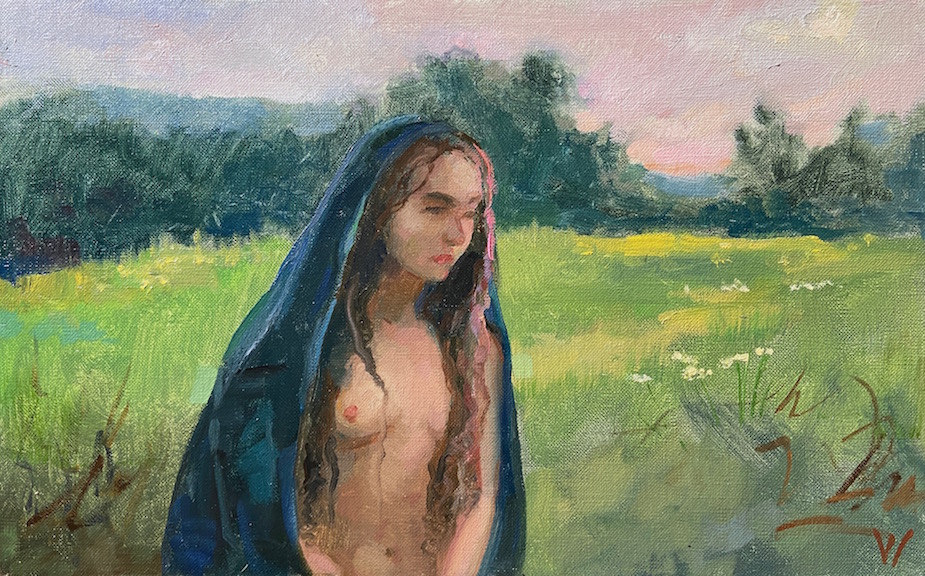
Additional Plein Air Figure Paintings by Patricia Watwood:
Connect with Patricia Watwood:
Website | Instagram
This article was originally published in 2016 and recently updated
Related Article > Why This Works: Figures as Supporting Players
Preview Patricia Watwood’s Streamline Premium Art Video Workshop, “Creating Portraits From Life” here:
Discover How to Create Beautiful, Expressive, and Lifelike Portraits
This 8 Hour video tutorial shows a complete portrait demonstration and teaches you how to break down the complex process of creating a portrait into three basic steps of a charcoal drawing, an underpainting in 3 colors, and then a final pass in full and naturalistic oil colors. Learn the classical techniques of the French Academy with a modern palette and contemporary style. Start here with “Creating Portraits From Life” with Patricia Watwood.
> Subscribe to Plein Air Today, a free newsletter for artists
> Subscribe to PleinAir Magazine so you never miss an issue


