
There are many ways to execute a landscape painting, and all do not follow the same procedure from start to finish. Sometimes an artist may choose to use a massed in approach, or an impressionistic block-in. One could choose to do a monochromatic start, or jump right into the painting with color.
The approach is often dictated by such things as the needs of the painting, how much time you have to paint (like right before sunset), or even your mood on a particular day. In a sense, one could say that the final result should dictate the type of approach you use, and that may be true, but I also find that the process itself has its own set of rewards.
For this demonstration I have chosen to use a direct application of paint with very little preparatory drawing and no initial tone on the canvas. Using this approach I am able to go directly into color choices that I perceive in the scene, while building texture as I go.
Come with me as I paint a scene of the Greys River in Wyoming on a semi-sunny October day.
Landscape Painting Step 1: Preliminary Lines
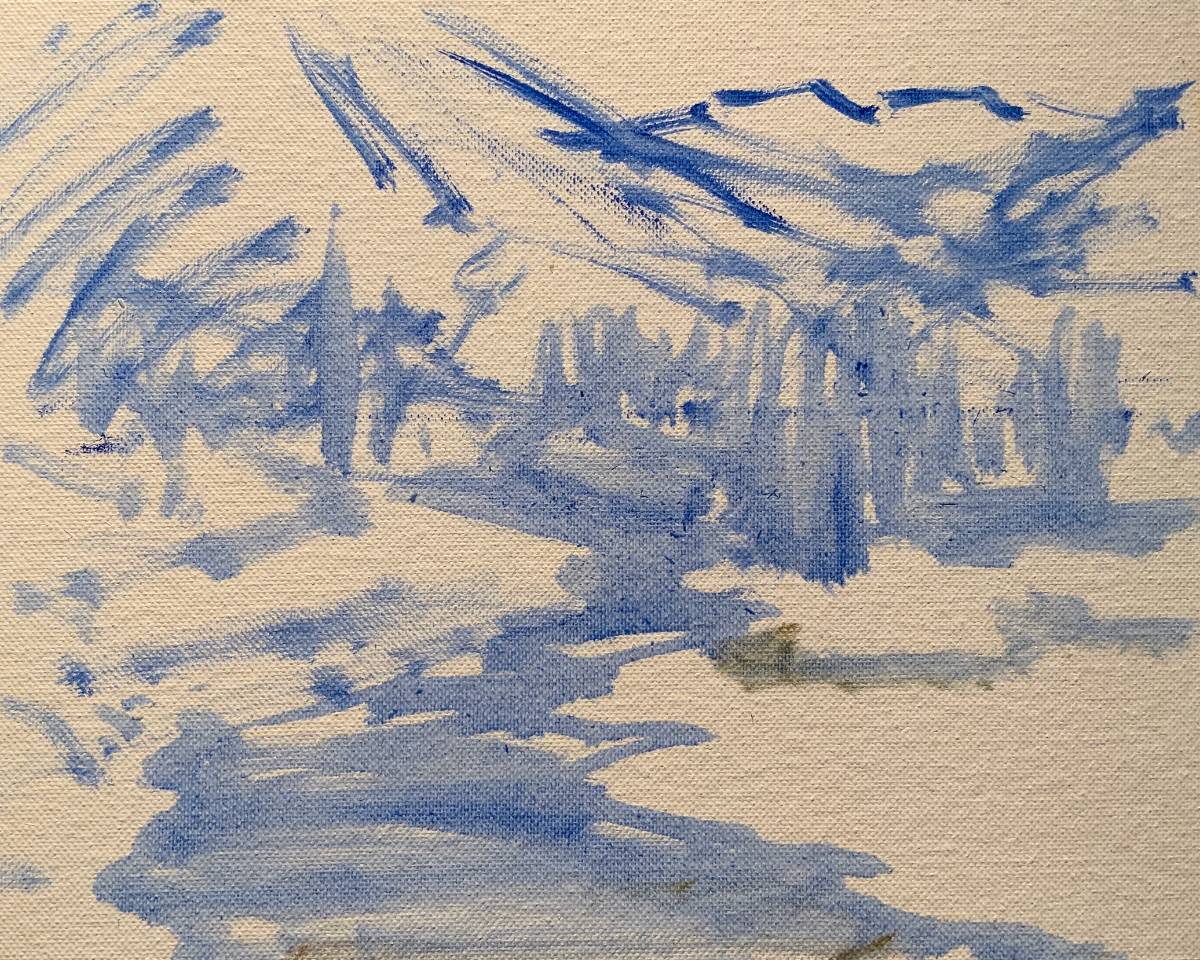
I will often draw preliminary lines using Yellow Ochre, but today I decide on some Ultramarine Blue, which shows up nicely on the linen canvas and won’t overpower additional paint applications as the work proceeds. Keep in mind that these early marks only serve the purpose of delineating the overall placement of the various design elements in the scene, while also indicating some of the major darks.
As you can see here the paint is thinned down a bit using mineral spirits, which is not too runny and will evaporate quickly. The scene itself needs little by way of alteration (a situation which doesn’t often present itself, but is a huge plus when it does happen!). Needless to say though, slight alterations will happen as the painting progresses. Once the drawing is to my liking I can move right into color.
Step 2:
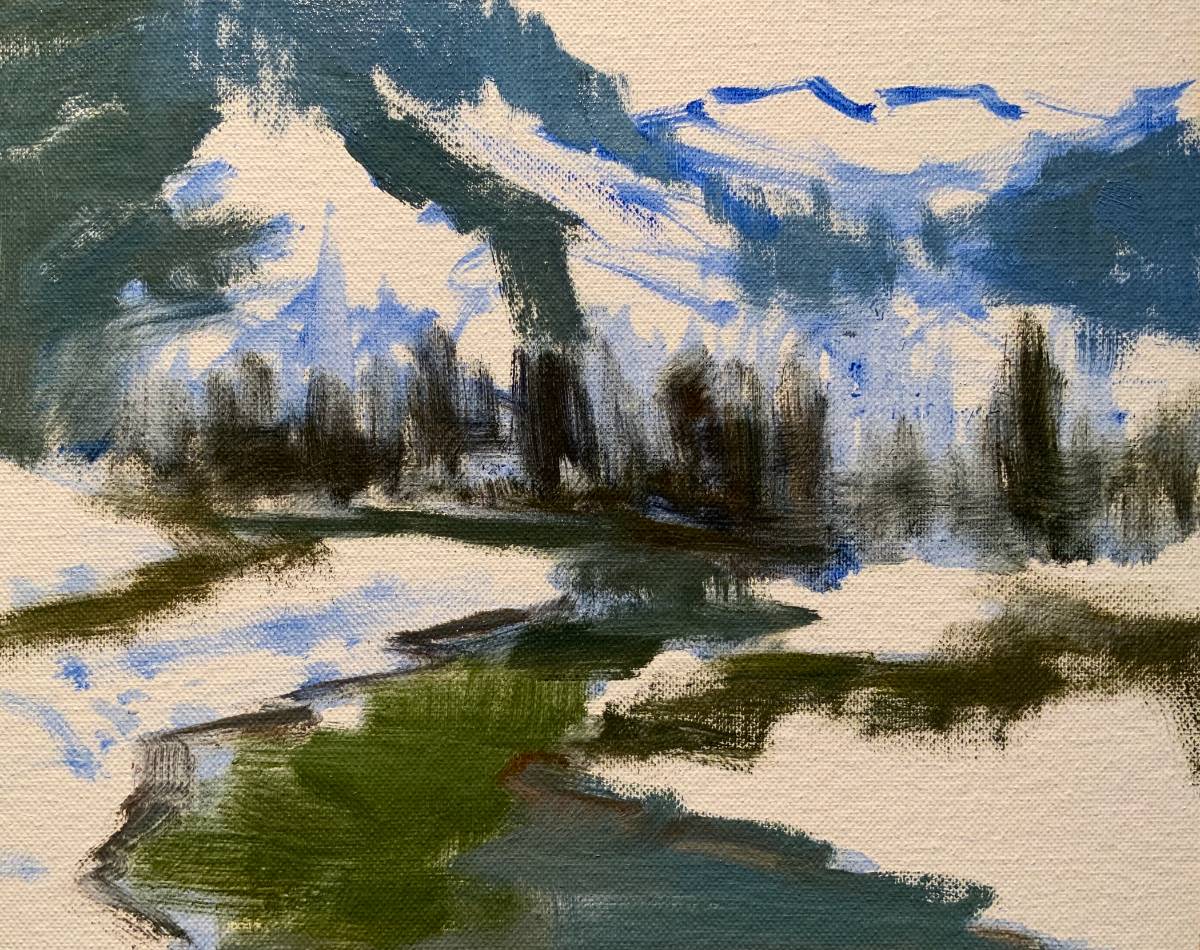
In step 2, I place the major darks of the scene (which sets up the overall design), as well as put down a beginning (value key) in the dark pines to get the process going. Since painting is a series of comparisons, of one color next to another, it’s important to set the stage right from the beginning in order to get off to a good start right out of the shoot!
Step 3:
I’m almost to the point of covering the canvas with colors that are representative of what I perceive at the site, even if somewhat brighter than reality. It’s never a bad idea to overstate the color in the beginning stage, rather than try to lift a mostly completed painting out of a desaturated state near the end.
You never know when a touch of exciting color will poke through a passage of grayed-down thick pigment, and be just enough to lend the sparkle needed to keep a painting from sinking into Mudsville!
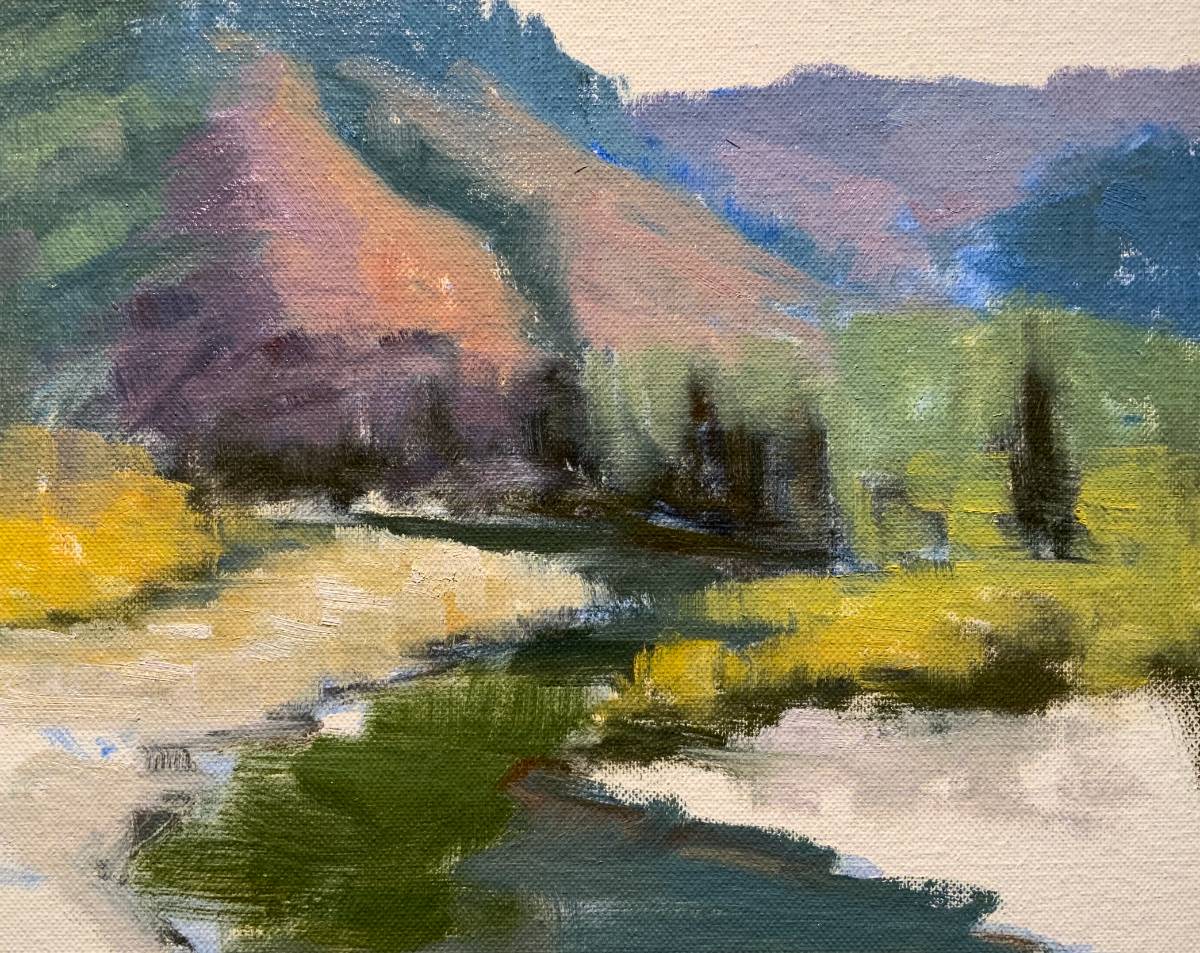
Step 4:
As the piece progresses, thicker passages of paint are applied in order to model the initial forms and refine areas that need attention. Some of the shapes are further broken up into sub shapes, such as the foreground bushes on the right. It’s important not to let these divisions get too busy by handling them as separate objects, which have little or no relation to the objects next to them.
Another thing to be aware of as painting modifications are made, is that the overall composition has to be kept in mind as we constantly work towards the goal of design unity. Remember the principle which I’ve stated many times in my articles over the years: too much of anything is chaos and not enough is boring! It’s always a balancing act, and that’s the essence of being an artist. There’s no sure formula, we all react differently in these decisions and must train our sensibilities to align with what we are trying to portray in paint.
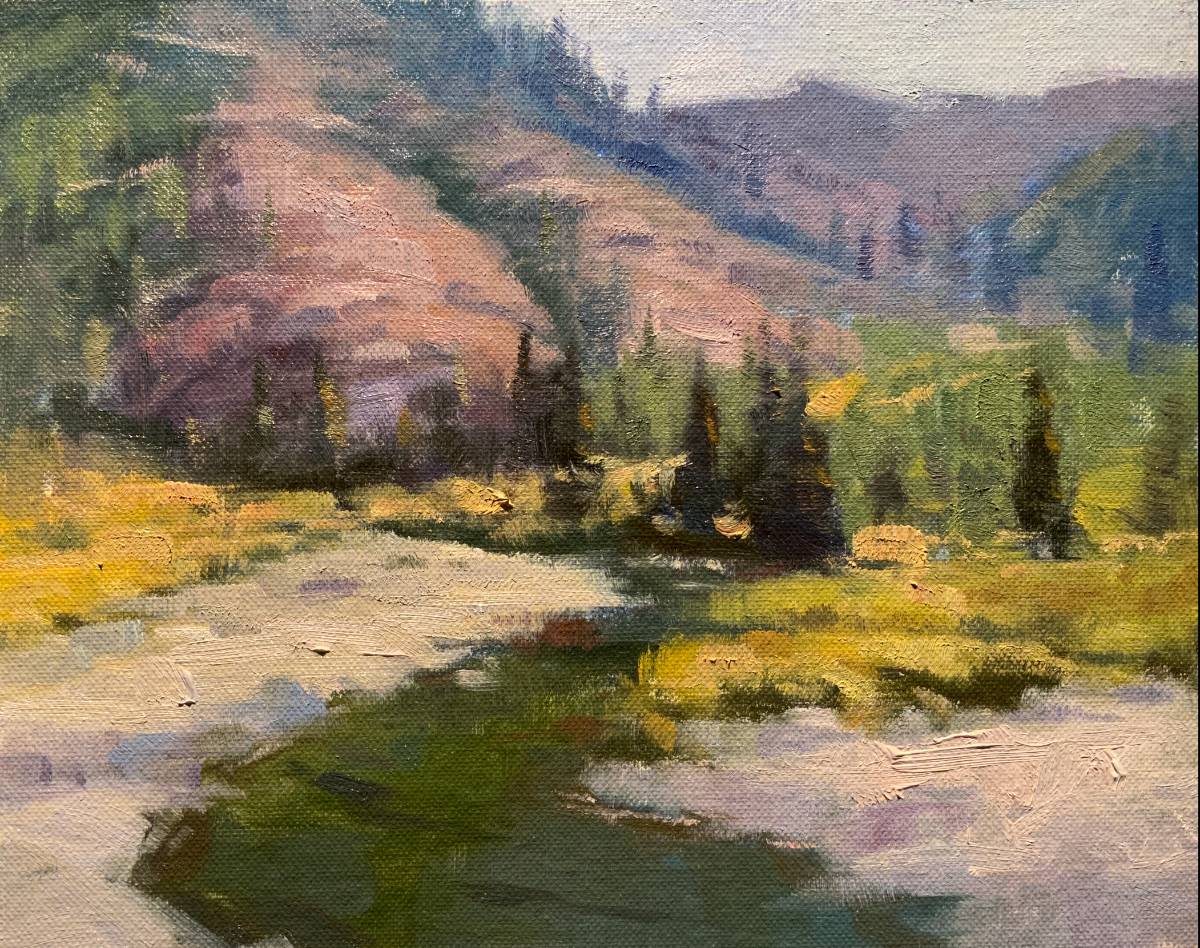
Step 5: Pulling the Plein Air Landscape Painting Together
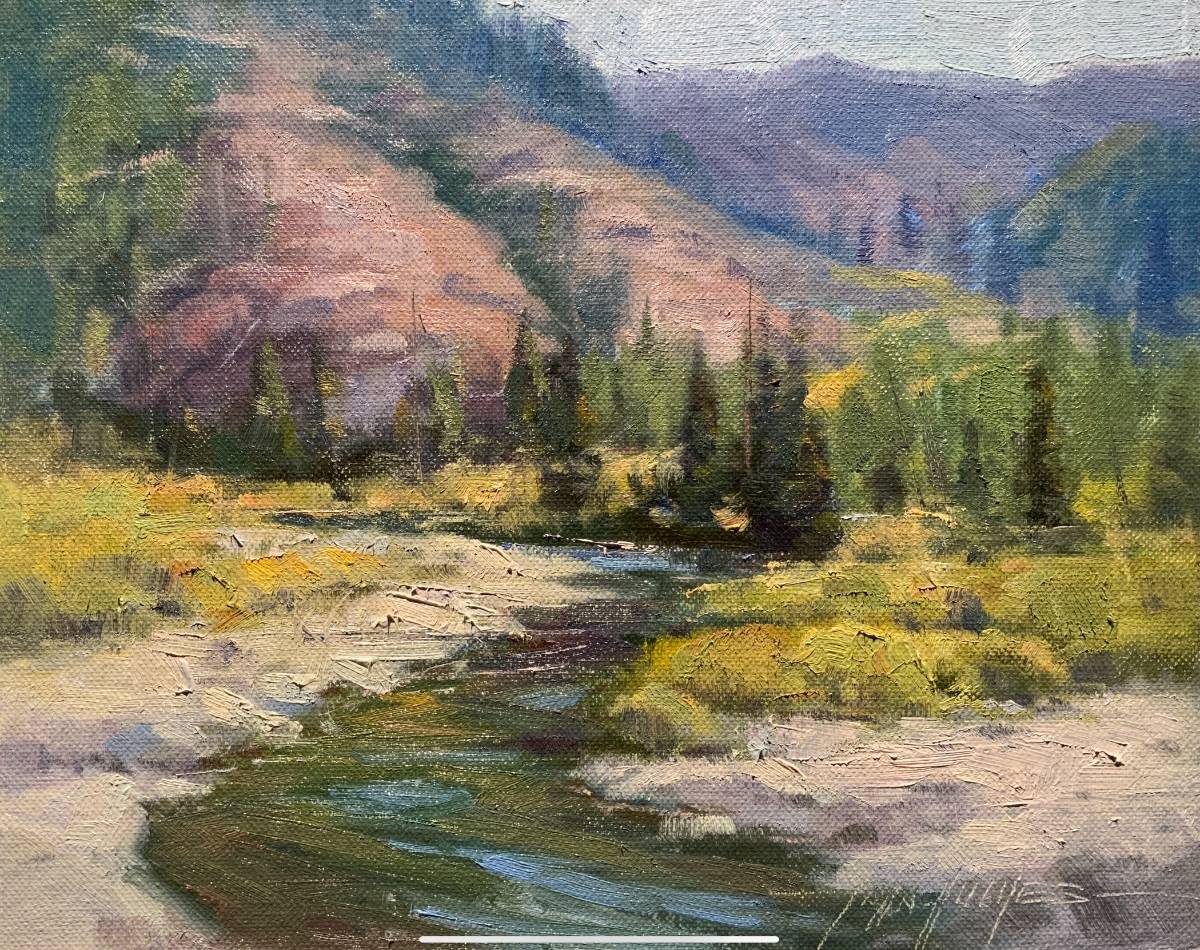
In this final step, I work toward pulling the overall relationships together, adding textures and hard edges where I want the eye to finally end up on its journey to the focal point. In this painting, that would be the main group of pines just to the right of center.
As I work, my eyes scan the perimeter of the canvas and I soften edges in areas that should not attract undue attention – like the sandbank on the lower left. I also notice that the same sandbar on the left has a rather uniform shape in step four and I decide to break into it with bushes in order to reshape and break-up an otherwise boring passage.
These are all the types of considerations that go into a typical landscape painting experience. For now, I’ll set it aside in the studio and look at it over a period of days, or even weeks for that matter, and make any final edits as I see fit, with a fresh eye!
If you liked this article and would like to see more, let us know in the comments section below, and browse more articles by John Hughes here.
> Subscribe to Plein Air Today, a free newsletter for artists
> Subscribe to Plein Air Magazine so you never miss an issue


This was great! A very good article and demo by John.