
This landscape painting demo is part of a series featuring a leader in the art community who will be joining us on the faculty of the Plein Air Convention & Expo, May 19-23, 2025, at Lake Tahoe / Reno, Nevada! In this free lesson, Jim Wodark walks you through how to paint a beautiful landscape, starting with a thumbnail sketch. The following is Part II of his article titled “Design Makes All the Difference.”
The star of the PaintTube TV video, “Composition for Painters,” Jim has dedicated himself to painting for the past 30 years and counting.
Free Landscape Painting Demo: Establishing Value and Design at the Start, with Jim Wodark
BY ROBERT K. CARSTEN
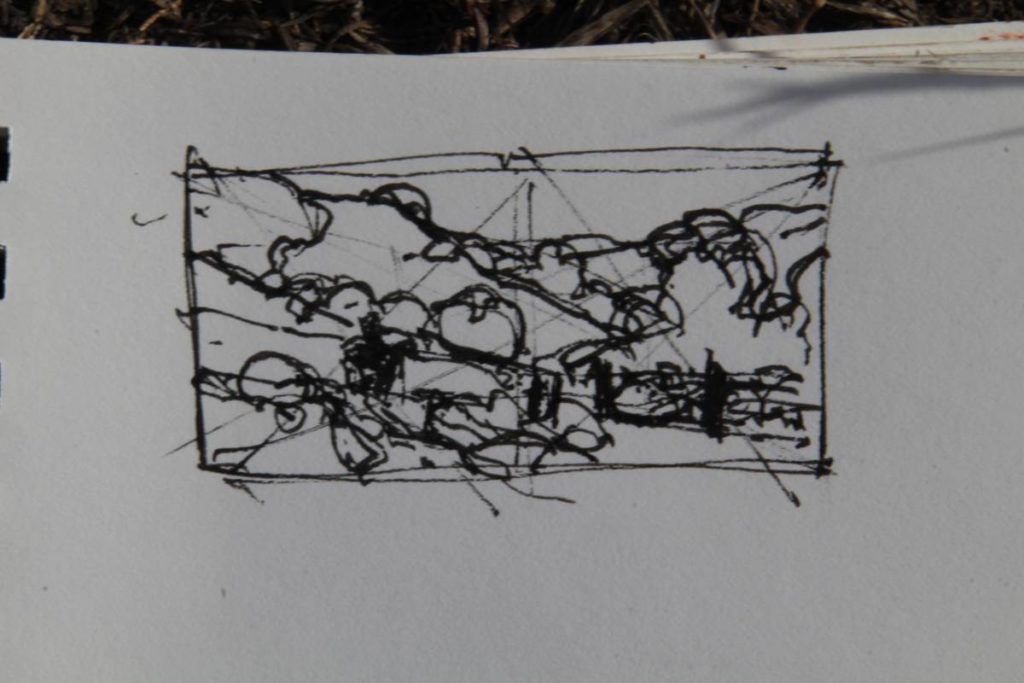
Step 1
Jim begins by working out a rough thumbnail sketch:
***
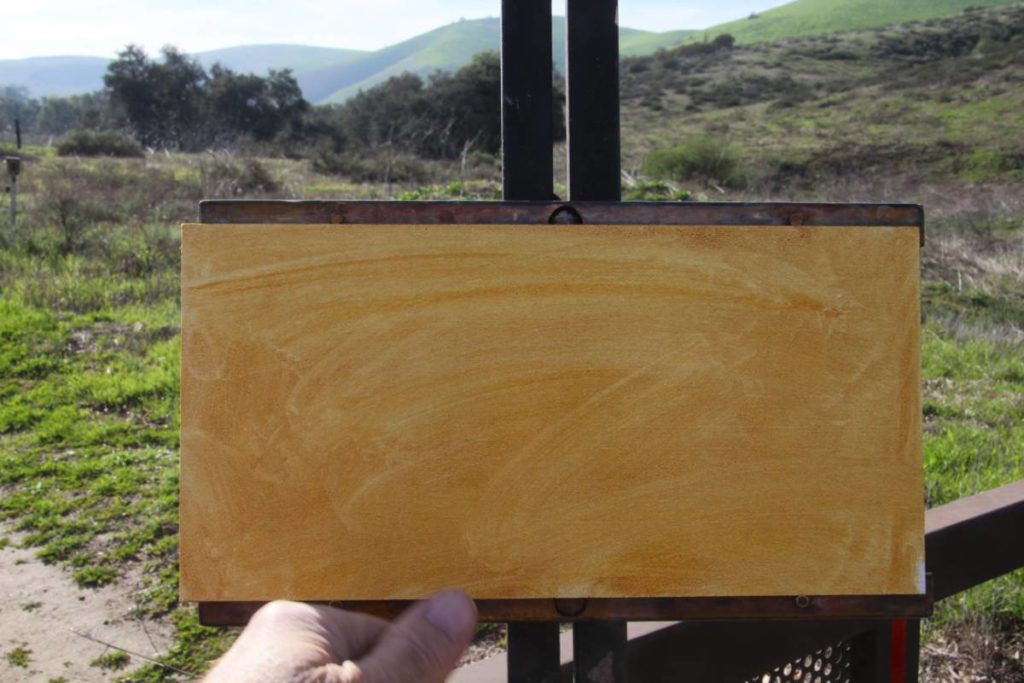
Step 2
Using a rag or paper towel, he applies a thin mixture of cadmium yellow medium, quinacridone red, and ultramarine blue in roughly a middle value color to the panel. Because the landscape has a lot of green, he uses a complementary reddish-brown (sepia) for the imprimatura:
***
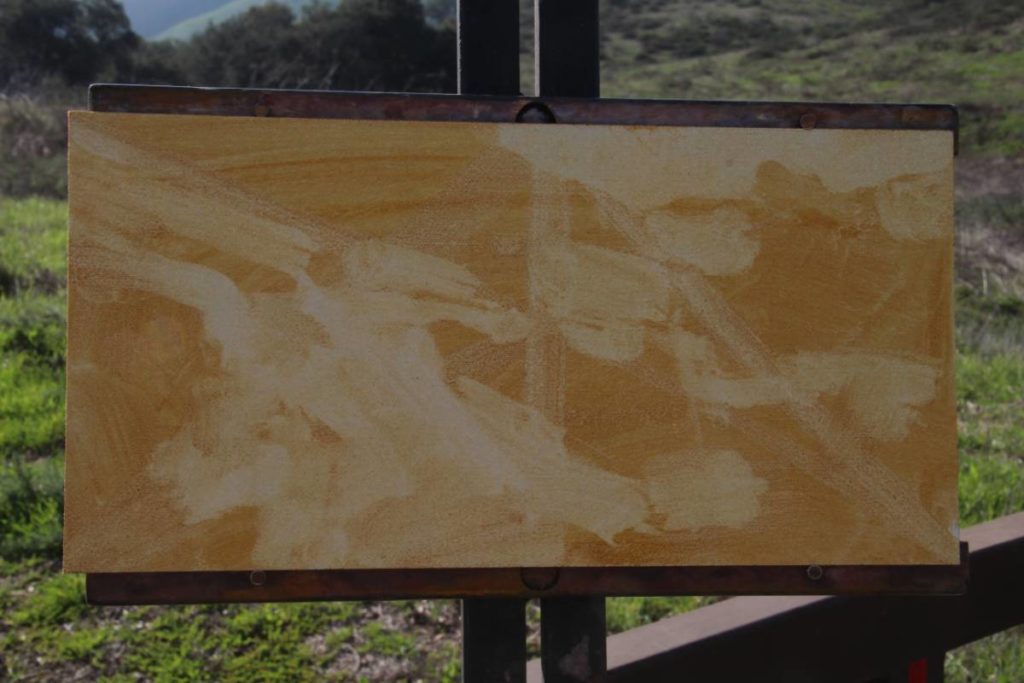
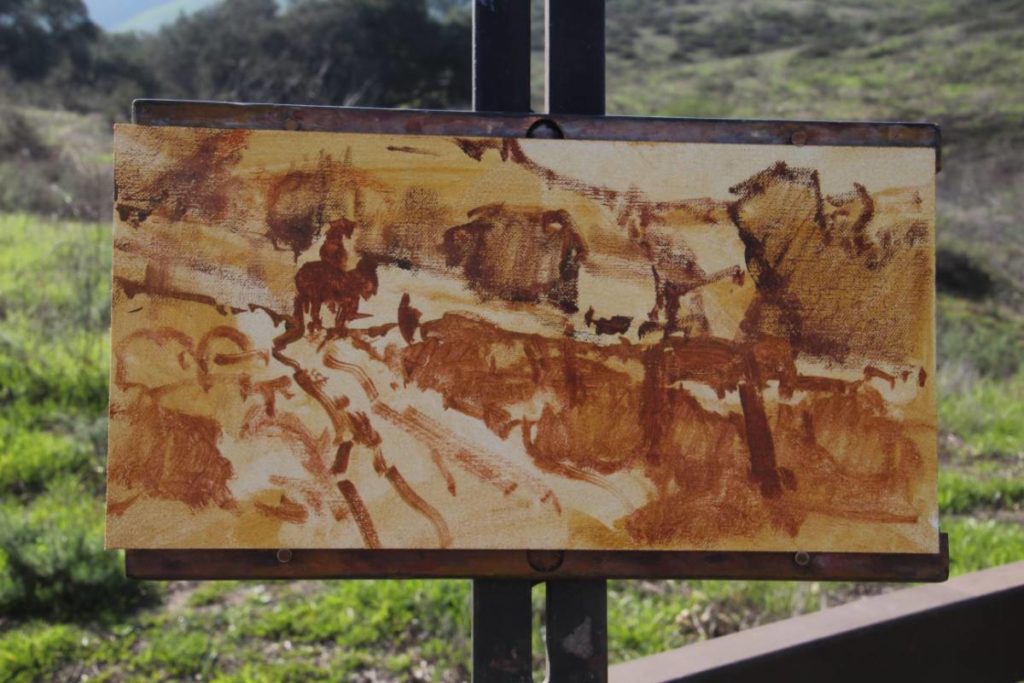
Step 3
Adding mineral spirits to the rag, Jim lifts out the lighter values of the design. “This way, I get a rough design and value study all within five minutes and I can better tell if it’s going to work as a painting,” he says.
***
Step 4
Using a brush and the sepia tone, the artist then lays in the darks and paints in the shapes more accurately, adding a horse and rider along with some cows to the scene:
***
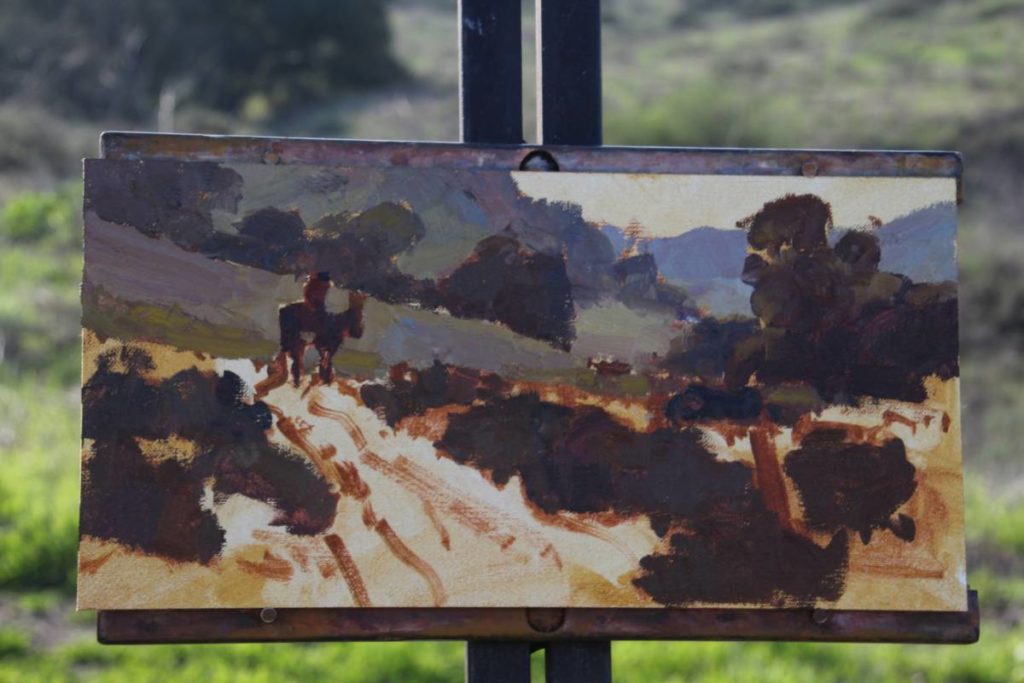
Step 5
He continues to establish the value structure of the design by painting his darkest darks and lightest lights first:
***
Step 6
Jim focuses attention on his main subjects by graying the greens throughout the painting — except for those near the cows — and by intensifying the value contrast between the horse and the background. He explains, “I created these contrasts to attract your eye to the rider and then to lead it along the path to the cows, whose reddish color is complemented by the higher-chroma green of the grasses.”
***
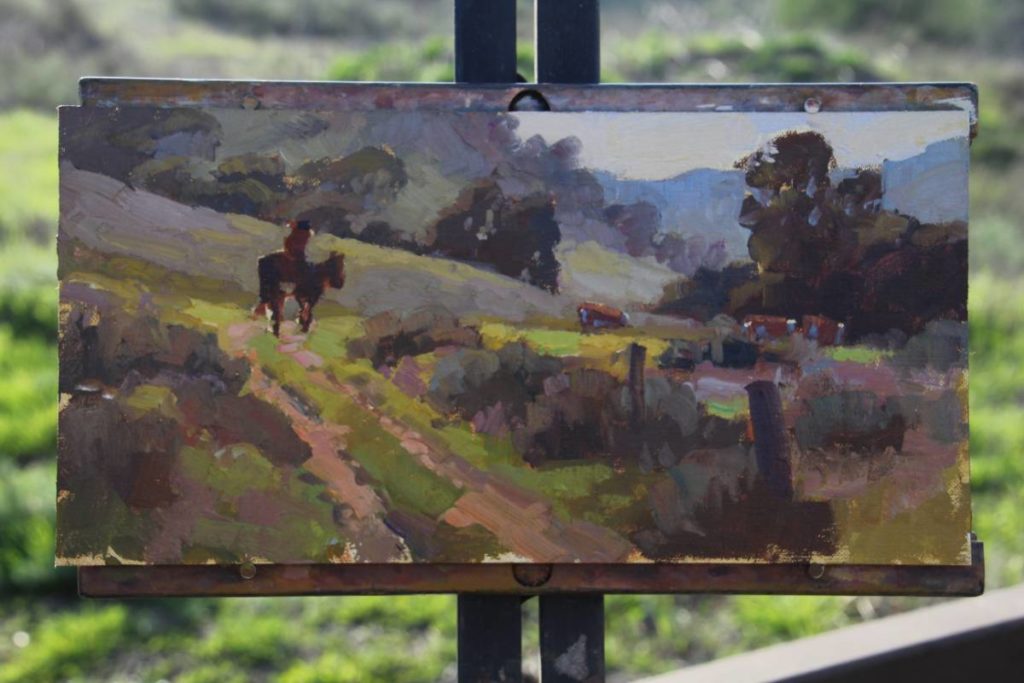
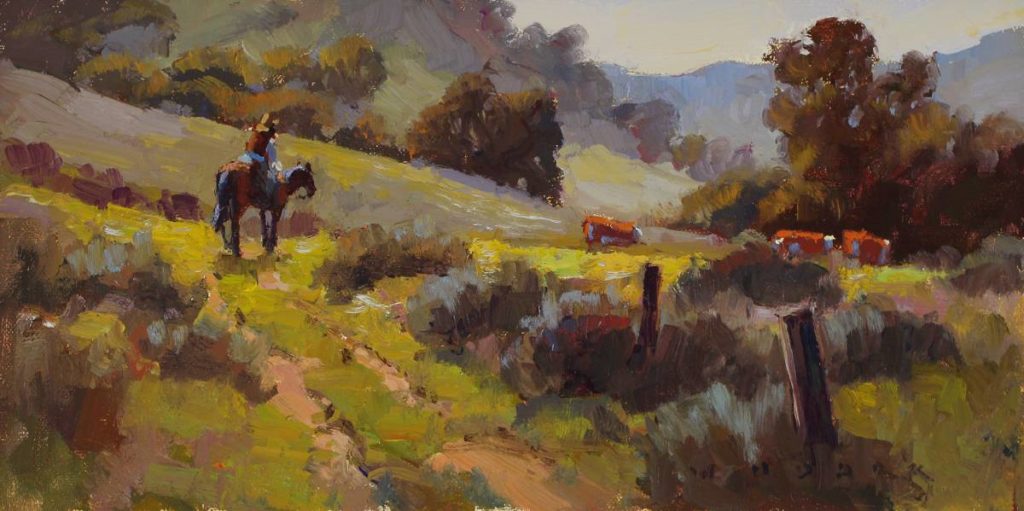
Final Step
The artist refines shapes, edges, values, and color temperatures, then adds brush-strokes of impasto to complete the painting:
ARTIST’S TOOLKIT
Easels: Joshua Been Daytripper Easel for smaller paintings, a Take It Easel for larger plein air pieces, and a BEST easel in the studio
Palette: Gamblin oil colors — flake white replacement, titanium white, manganese blue, ultramarine blue, quinacridone red, cadmium red light, Indian yellow, and cadmium yellow medium. He uses the lead-free flake white replacement in conjunction with titanium white, explaining, “It doesn’t change the value of the color you’re mixing as much as titanium does. So when I’m making a large pile of a certain color, I will add more flake white to it than titanium.”
Medium: Gamsol for paint thinning and cleanup Brushes: Rosemary & Co flat brushes in sizes 4, 6, and 8 and also a rigger brush for fine lines Surface: Raymar #15 single oil-primed linen panels Varnish: Gamvar
Sketching pen: Faber-Castell Pitt artist pen, black #199, medium nib
How to Paint Landscapes
Preview “Composition for Painters” (a five-hour workshop) with Jim Wodark here:


