

How to Paint Clouds > The challenge is that they’re in constant motion. Learn how to choose the right moment for painting clouds en plein air.
by Kim Casebeer
(featured in the “Dramatic Light” video workshop on how to paint)
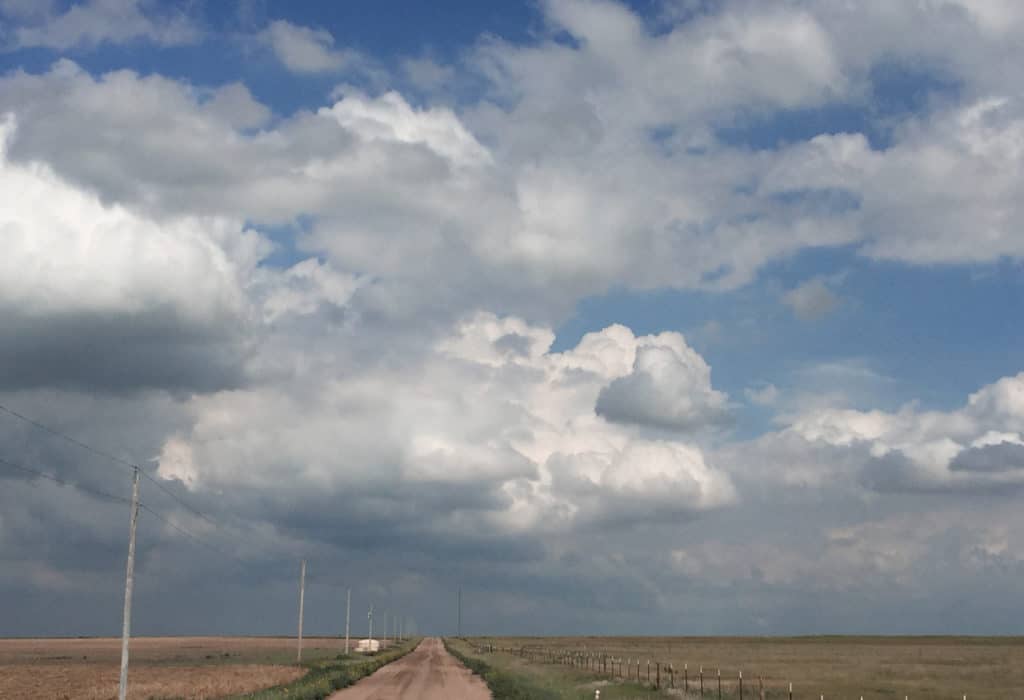
When I was a less experienced plein air painter, I would head out on those wonderful Kansas days when layers of clouds move across the sky and create dramatic shadow patterns on the land, but with no plan for how to capture either in my compositions. The beauty of a big, open landscape with rolling hills is that you can get to a place where you can see 10 miles away, and I wanted to paint it all. I’d start with the shapes in front of me, but soon the clouds would move and I’d think, maybe these shapes are better than what I started with, so I would change them. Then the cloud shapes would move again, and as they did, their shadows on the ground changed, too. You see the problem.
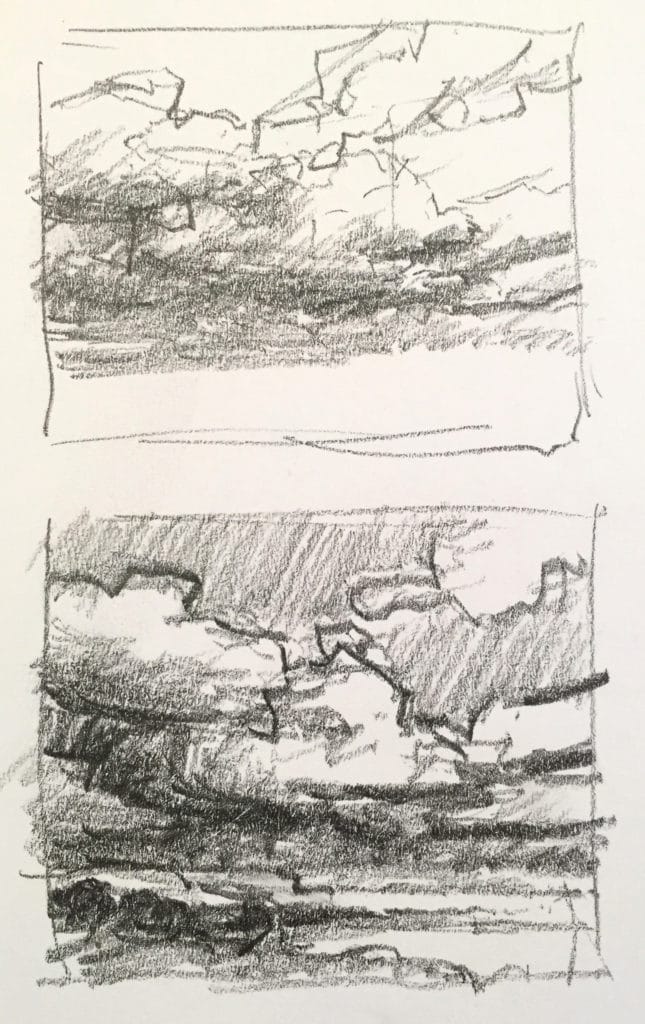
I had a lot of exciting material to work with, but I didn’t have a plan. After attempting this type of composition over and over, but fumbling each time, I finally realized the necessity of starting with black-and-white thumbnail sketches. Thumbnails are a quick way to make decisions about your composition, so that you have something concrete to stick with when forms and light change.
PLANNING SHAPES IN A PAINTING
Even in landscapes where the clouds are background for other subject matter, their shapes are important and need to work with the rest of the shapes in the painting. When I first started, I had trouble getting my shapes to work together because I would just paint the clouds as I saw them at that moment, without regard to the overall sense of movement in my painting.
For my students, I often equate movement with directional lines. Horizontal lines create a feeling of calm or quiet, vertical lines stop the eye, and diagonal lines move it. As the designer, you need to orchestrate how the viewer’s eye is going to move through your landscape painting — and clouds play an important role in helping you do this.
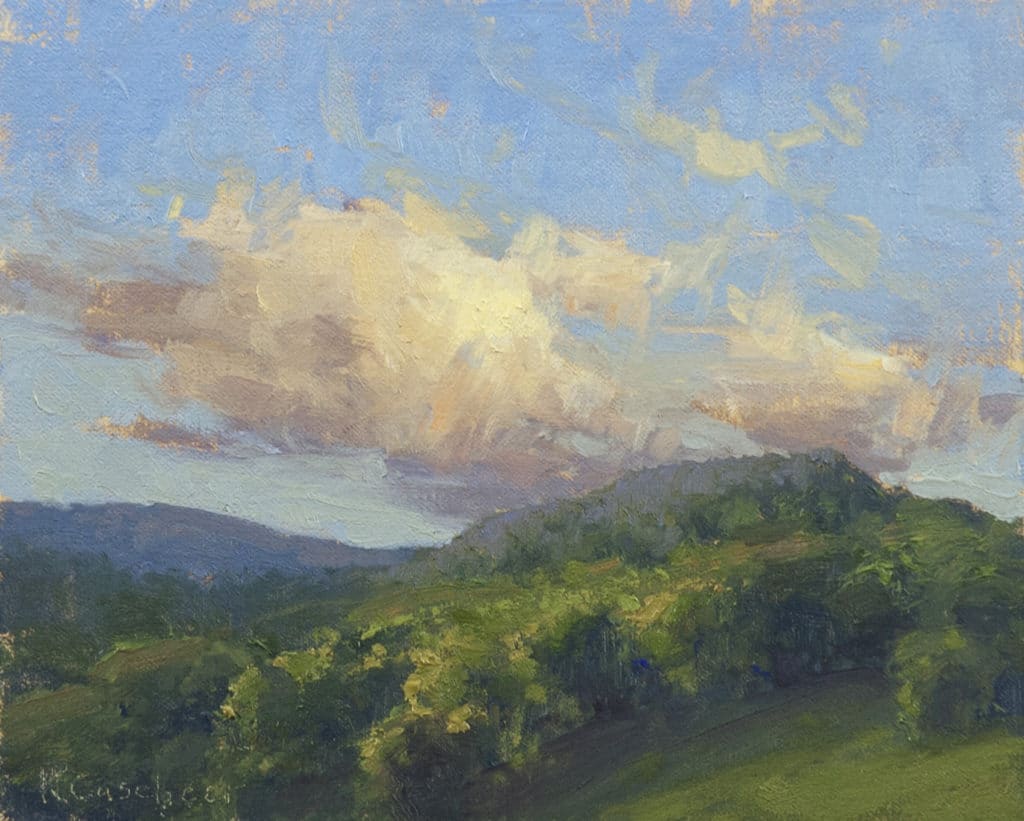
To start, you need to make sure that your clouds connect to the rest of the painting. When you look abstractly at your cloud shapes, most of them should touch. The farthest clouds, those closest to the earth, should also connect to the land. Without that connection, it’s difficult to find harmony in your work. So, even if the shapes that you see in front of you don’t connect, you need to make them do so in your painting. Often, you can look elsewhere in the landscape to find good shapes to mimic and duplicate if the shapes of the clouds in your subject range aren’t very compelling.
If the day boasts a gorgeous sky, and I want to establish a low horizon line, making the clouds my subject, I’ll start by looking around the sky for strong shapes. If I see something I like, I’ll immediately sketch those cloud shapes in a thumbnail. If I don’t see something I like right away, I’ll find the form of the land I want, and that will determine the direction in which I set up my easel. That, in turn, will determine the direction of the light in my painting.
I always use the same light source for the land and sky, even if I’m looking elsewhere in the landscape to find cloud shapes. In that case, I simply adjust the light on my cloud forms by looking at the clouds directly above my subject for a true representation of the light, ignoring the form.
[Sign up for the Plein Air Today newsletter here for more painting advice like this!]
CREATING FOCAL POINTS
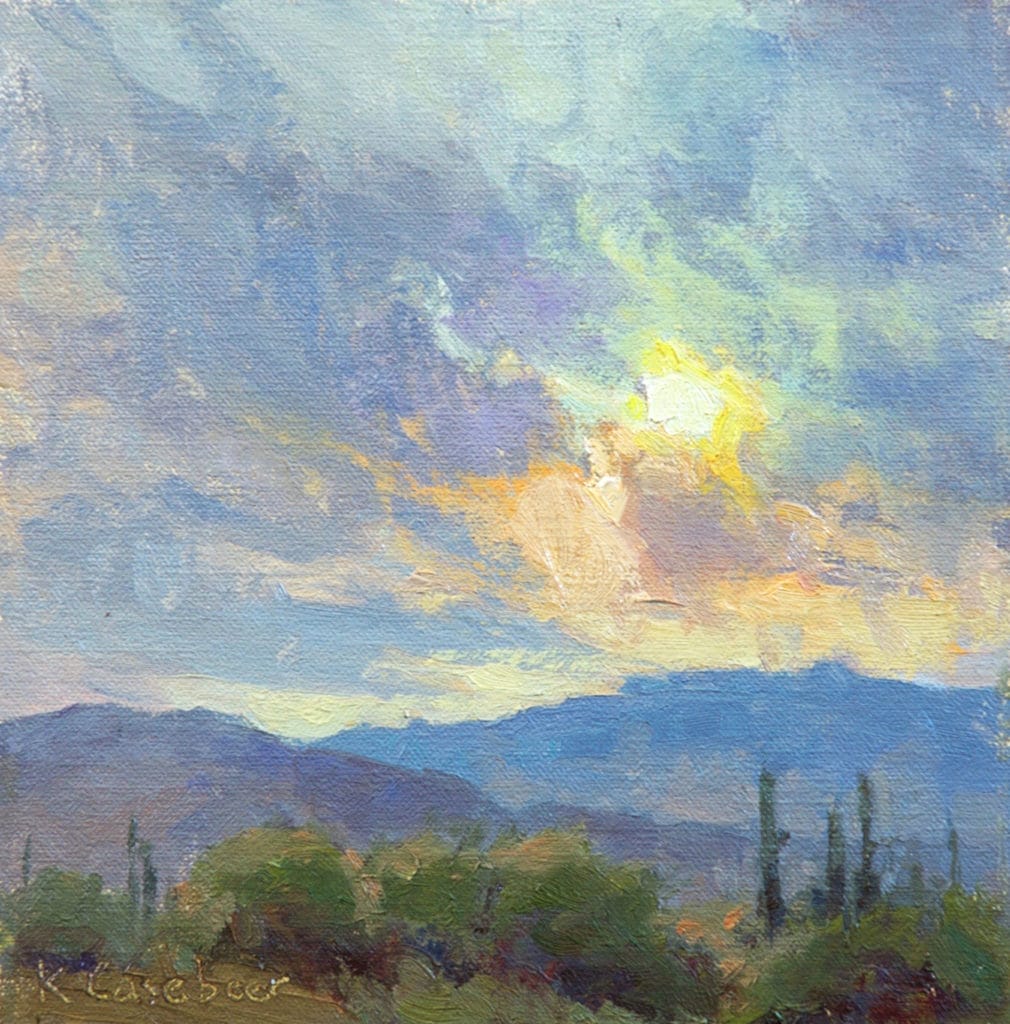
If the sky dominates your painting, you’ll also need one or more points of interest to catch the viewer’s attention. A common mistake I see artists make when painting clouds is to use too much white, making them all uniform in color. If you incorporate a range of color in your clouds and reserve the lightest values or highest chroma for just a few areas, then those spots of color can create several areas of focus in the sky.
How to Paint Clouds: A Demonstration
Step 1: Thumbnail Sketches
I set up my easel so that I have an interesting, open vista in view. From this location, I also have a good line of sight on most of the sky, which is important for cloud viewing. I watch the sky for a while, creating a couple of thumbnail sketches. In the first thumbnail, I’m unsure of the direction I want to take, but by the second, I feel much more comfortable with the shapes and directional lines.
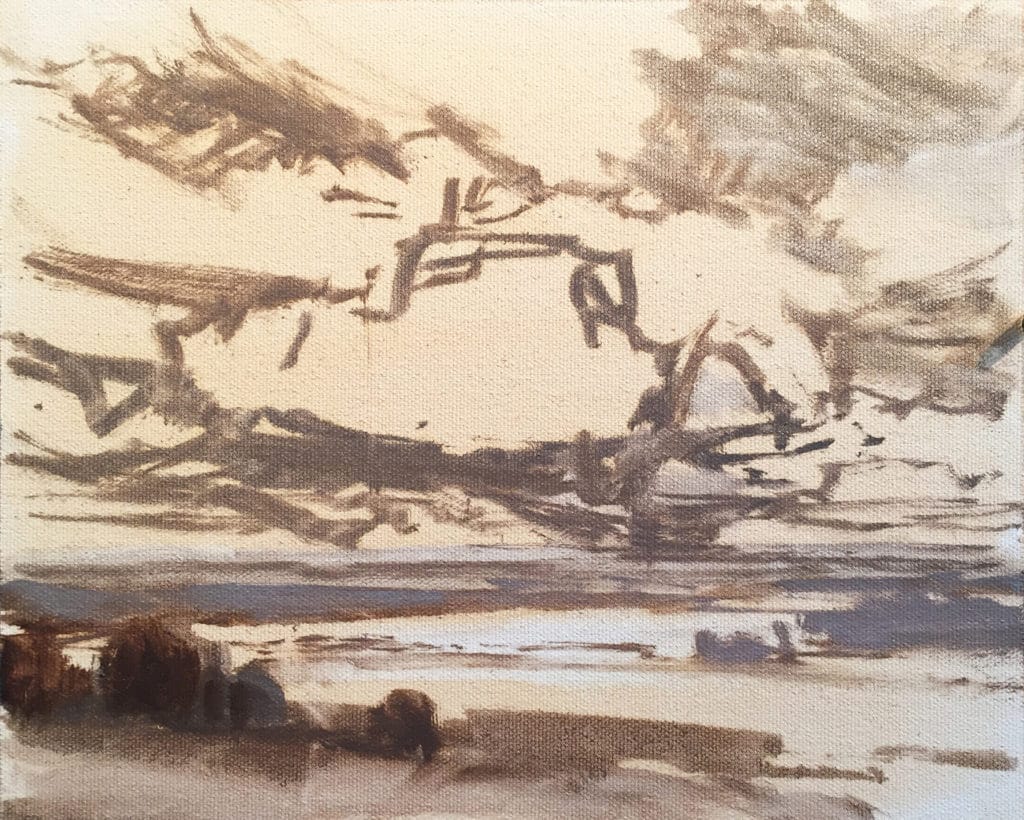
Step 2: Drawing the Composition
Using the second thumbnail, I draw my composition on canvas with thinned paint. I’m concentrating on design, so I’m not looking at the landscape, only at the thumbnail drawing in front of me. Until the drawing feels right, I won’t move on to the painting.
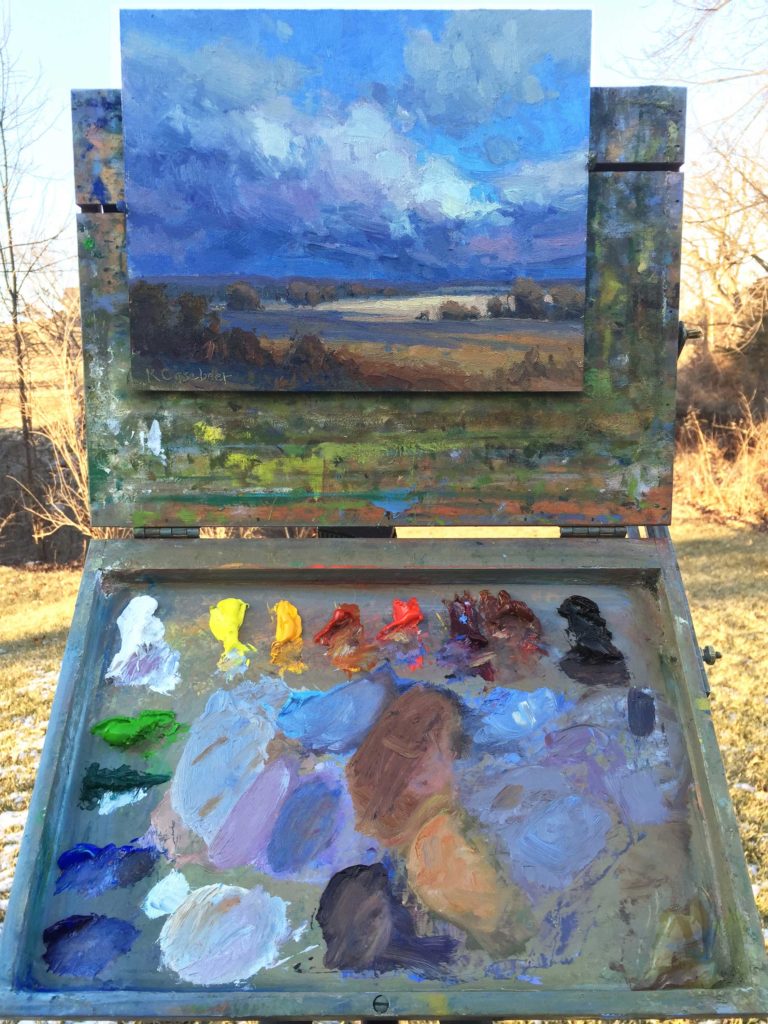
Above: My palette, all Gamblin oil paints, from bottom left to top right: ultramarine blue, cobalt blue, viridian green, permanent green light, titanium white, cadmium lemon, cadmium yellow deep, transparent orange, cadmium red light, alizarin permanent, burnt sienna, and asphaltum. I’m using the warm gray mix shown below the asphaltum for the drawing in Step 2.
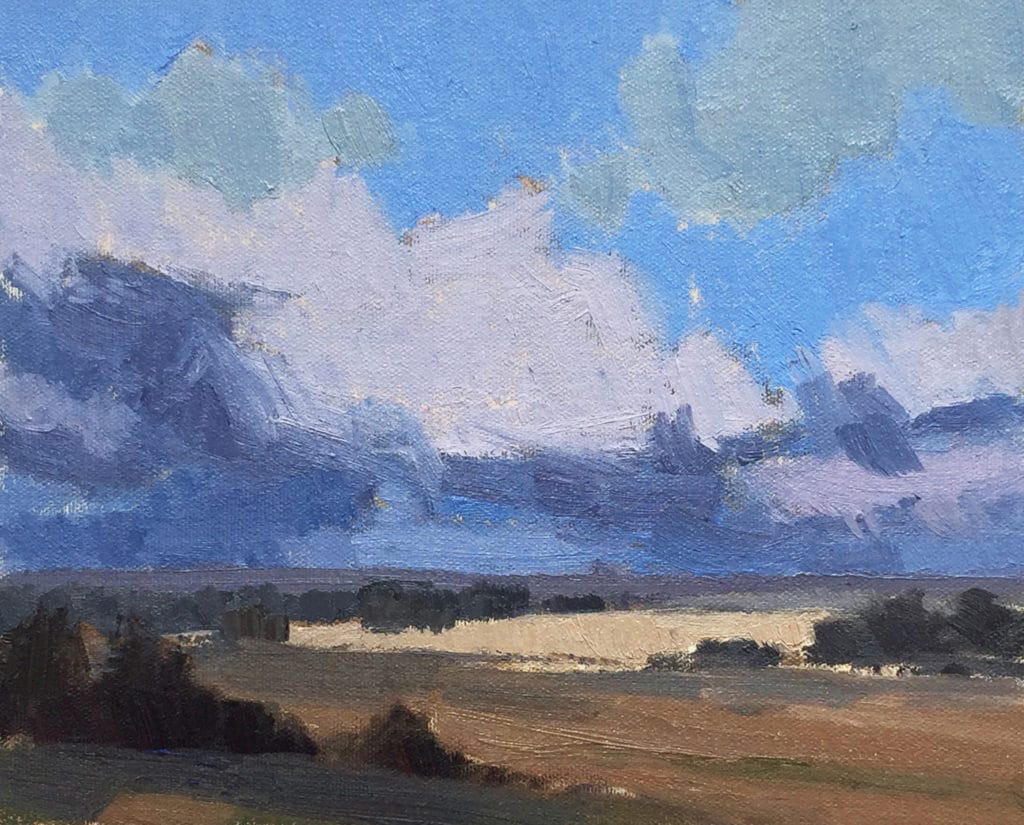
Step 3: Massing in Shapes
Once satisfied with the drawing, I begin massing in the large shapes. Looking to the landscape for light and color temperature, I find the average color in each large shape. I premixed most of the sky colors to compare value and temperature on the palette and keep momentum while painting. The sky must inform the color of the land, so I use the mixes for the sky to mix the colors in the land.
Step 4: Define the Cloud Forms
Once the canvas is covered, I begin to define form in each mass, focusing on shadow and light. It’s important to show the direction of movement in the clouds at this stage, and to keep that movement consistent. When breaking up large shapes into smaller shapes, I want to keep values tight in some places and show greater contrast at several points to direct the eye. I use white sparingly.
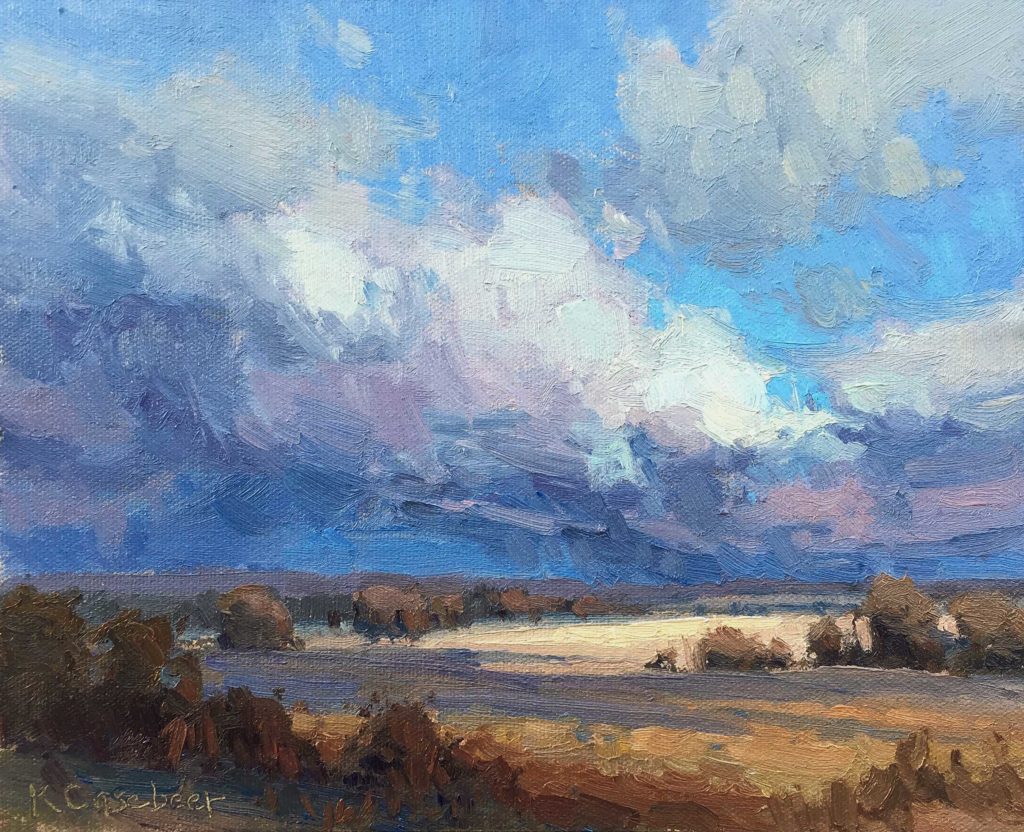
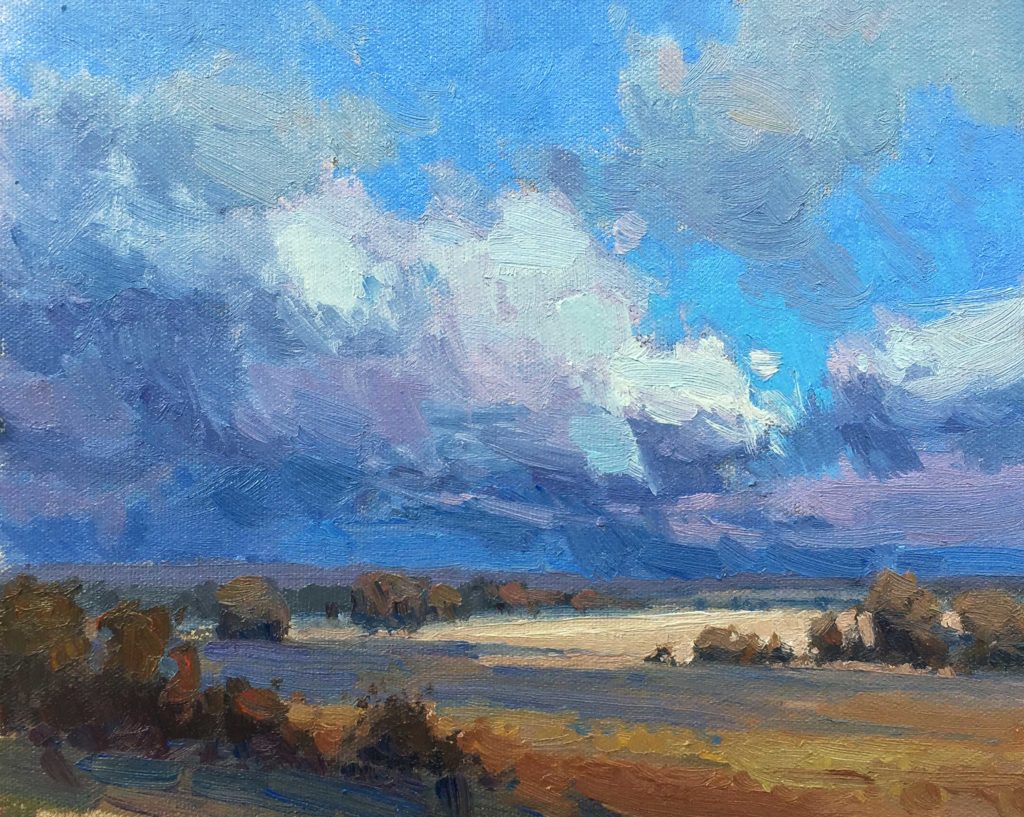
Step 5: Adding Contrast
In the final stages of the painting, I adjust edges, making some softer and some stronger. I push contrast in select areas, such as the highlight in the cloud and the light on the back hill. I tighten the contrast in other areas, such as the cloud to the right of the highlight. I also add some taller grasses in the lower right corner of the painting to stop the eye.
8 Tips for Painting Clouds
- Decide on the composition in a thumbnail. When satisfied, stick to that composition. Using the thumbnail reference, draw the composition on your canvas.
- Connect your clouds to each other and to the land.
- Make sure your light source remains consistent, even though you may look elsewhere for cloud shapes.
- Be aware that clouds and their shadow patterns on the land must work together.
- Premix colors so that you can compare value and chroma on the palette and not interrupt your momentum once you begin painting.
- Show cloud movement and keep it consistent (think: directional lines).
- Don’t use too much white in your clouds; instead reserve the lightest values for points of interest.
- Push contrast in some areas and tighten it in others to help lead the viewer’s eye through your painting.
“I’m about to show you how to overcome wimpy painting problems so you can bring in strong light, an exciting feel, and create art that begs people from across a crowded room to come take a look!” Preview Kim’s “Dramatic Light” art workshop here:
.
KIM CASEBEER lives in Kansas and draws her inspiration from the simplicity of the Flint Hills, an area of wide open ranch land.
https://kimcasebeer.com/
https://www.instagram.com/kimcasebeerartist/


Excellent article—thank you for sharing your knowledge!
Great article on clouds and landscape painting! Beautiful demo and painting. Thank you!
Thank you for sharing this Plein Air Magazine. I hope this demo is helpful to many 🙂
I enjoyed your workshop last week and also found this demonstration helpful. Hope to see you again.
I love the way each stage of the painting is complete in itself. Each could be a finished painting.