
Step-by-Step Watercolor Tutorial: Building a Façade with Textured Washes
by Mat Barber Kennedy
matbarberkennedy.com
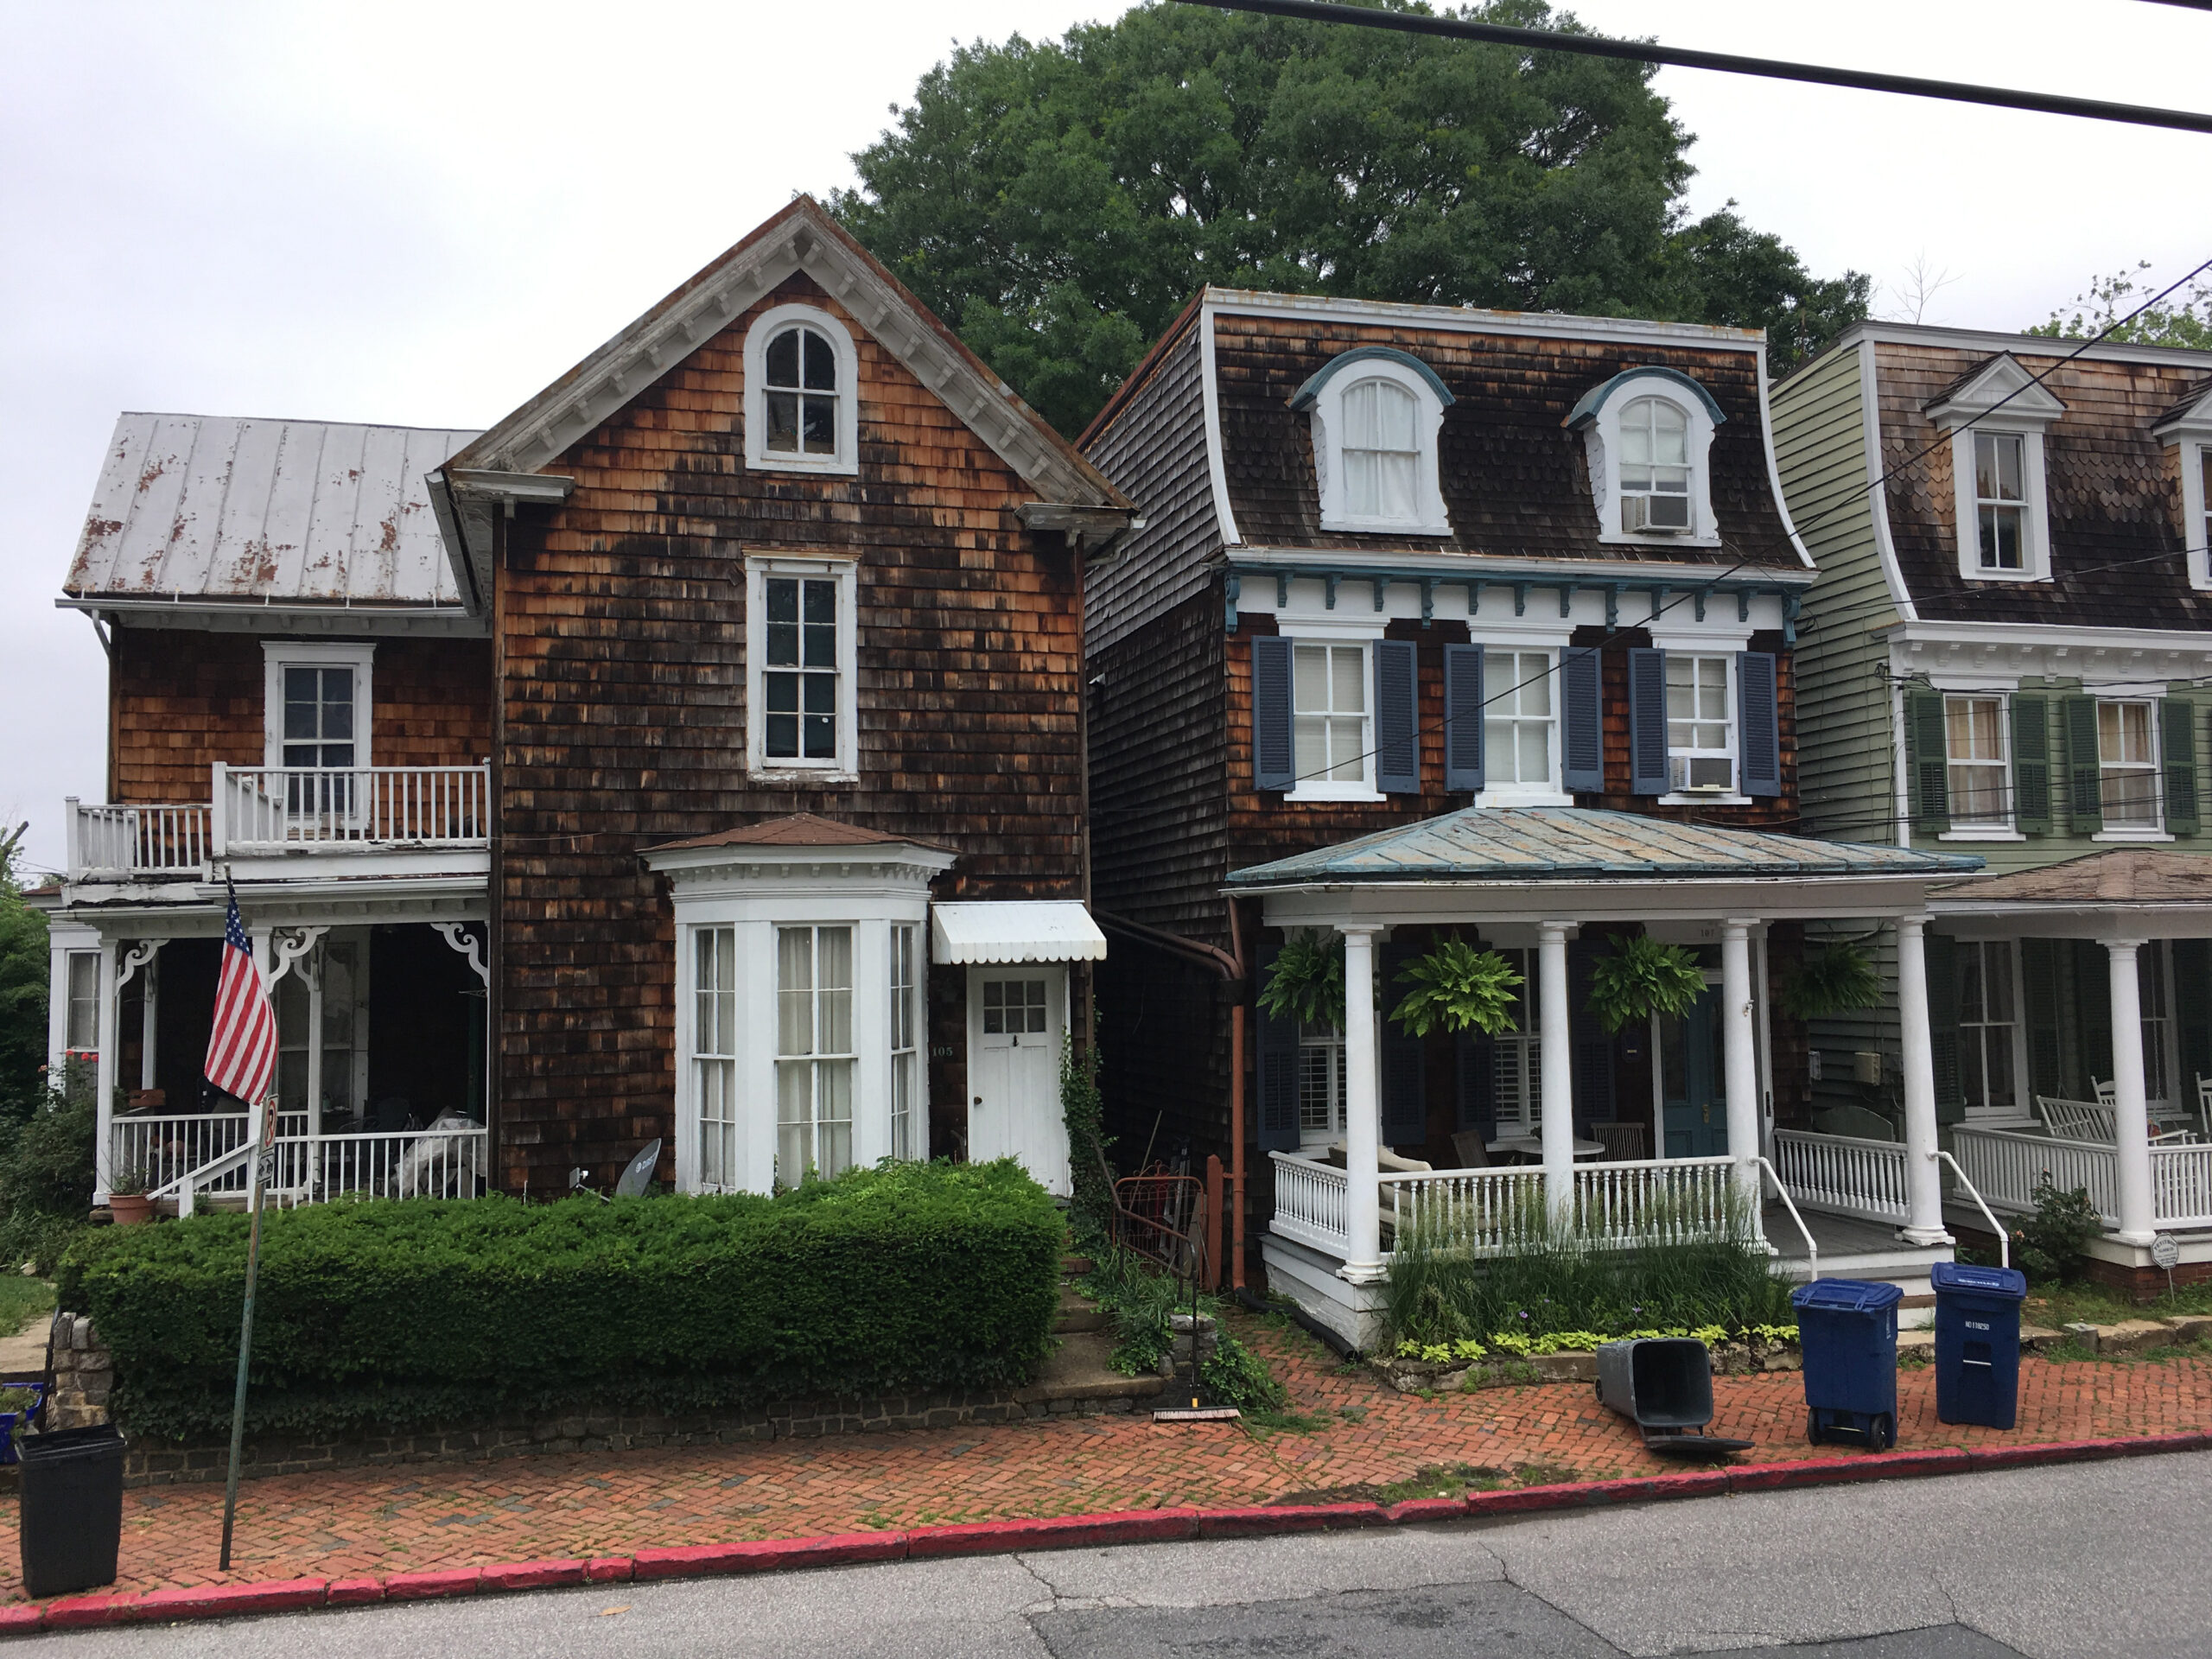
Step 1
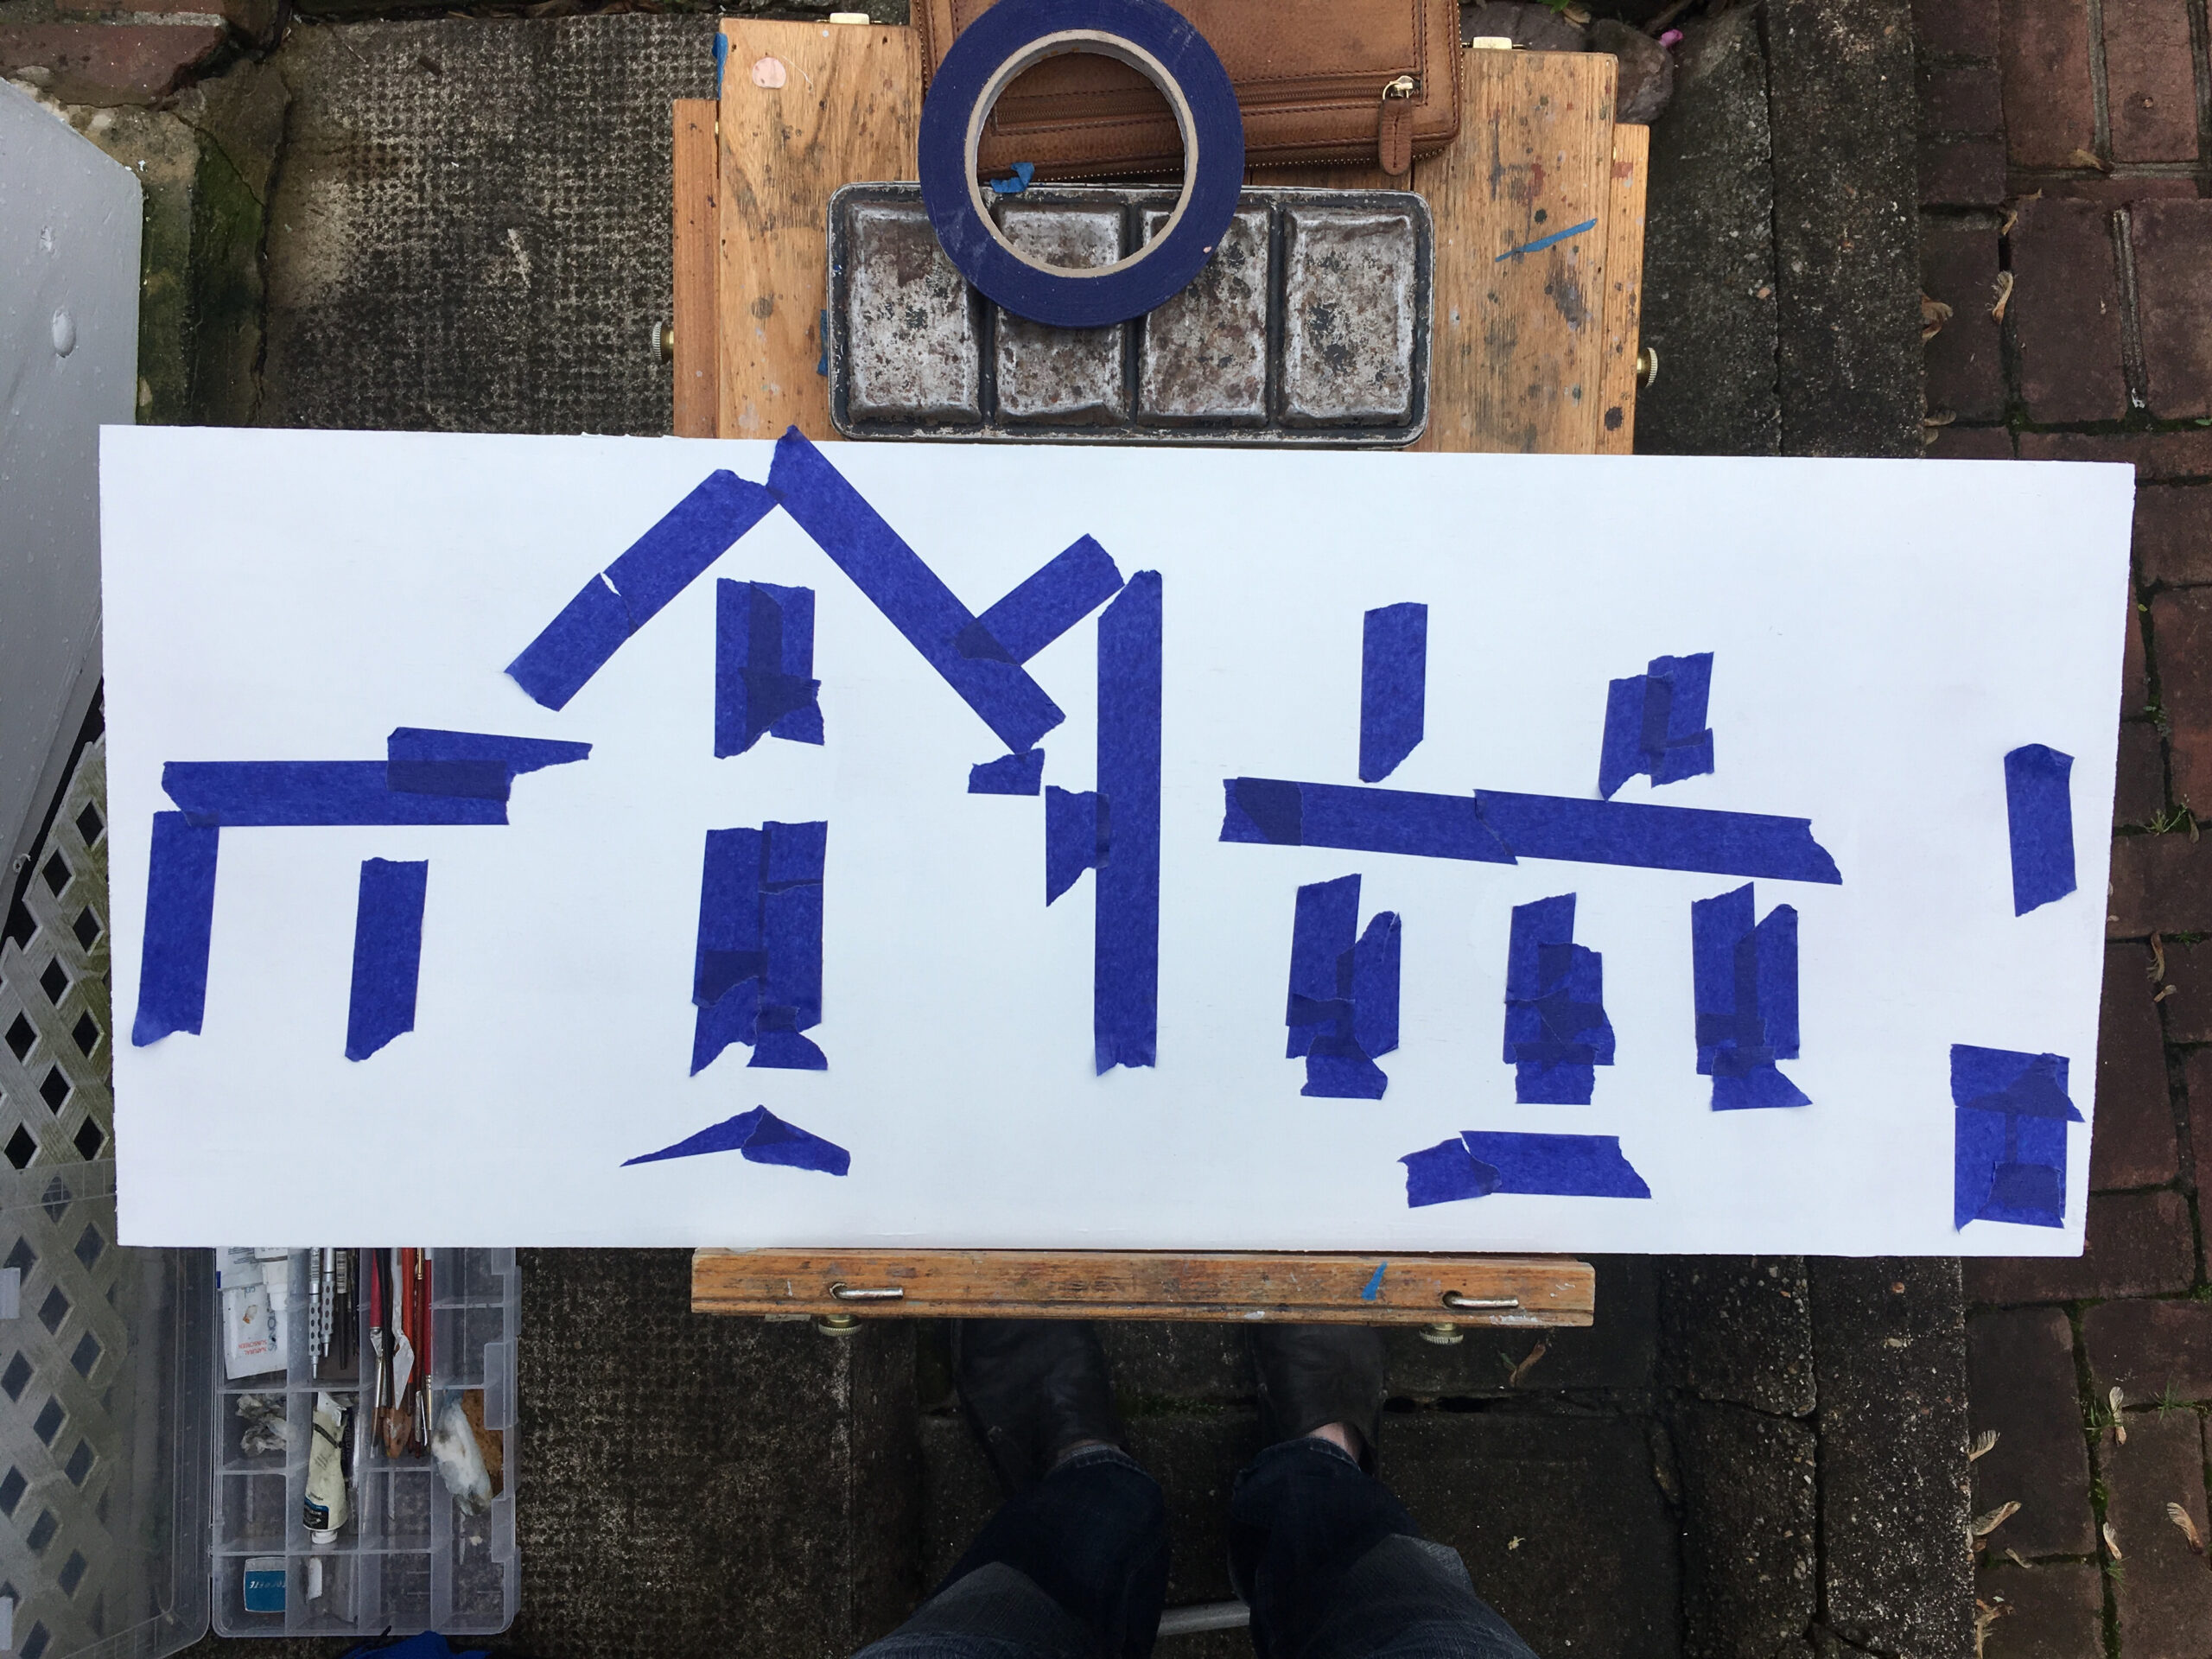
So much of my work involves the presence of the white of the surface. Sometimes there is a need for a long, careful drawing at the outset, though that isn’t my typical process. One of the ways that I like to ‘draw’ is to lay out my compositional structure in masking tape. I use a low-tack artist’s tape and expect some bleeding to occur, which I will turn to my advantage.
Step 2
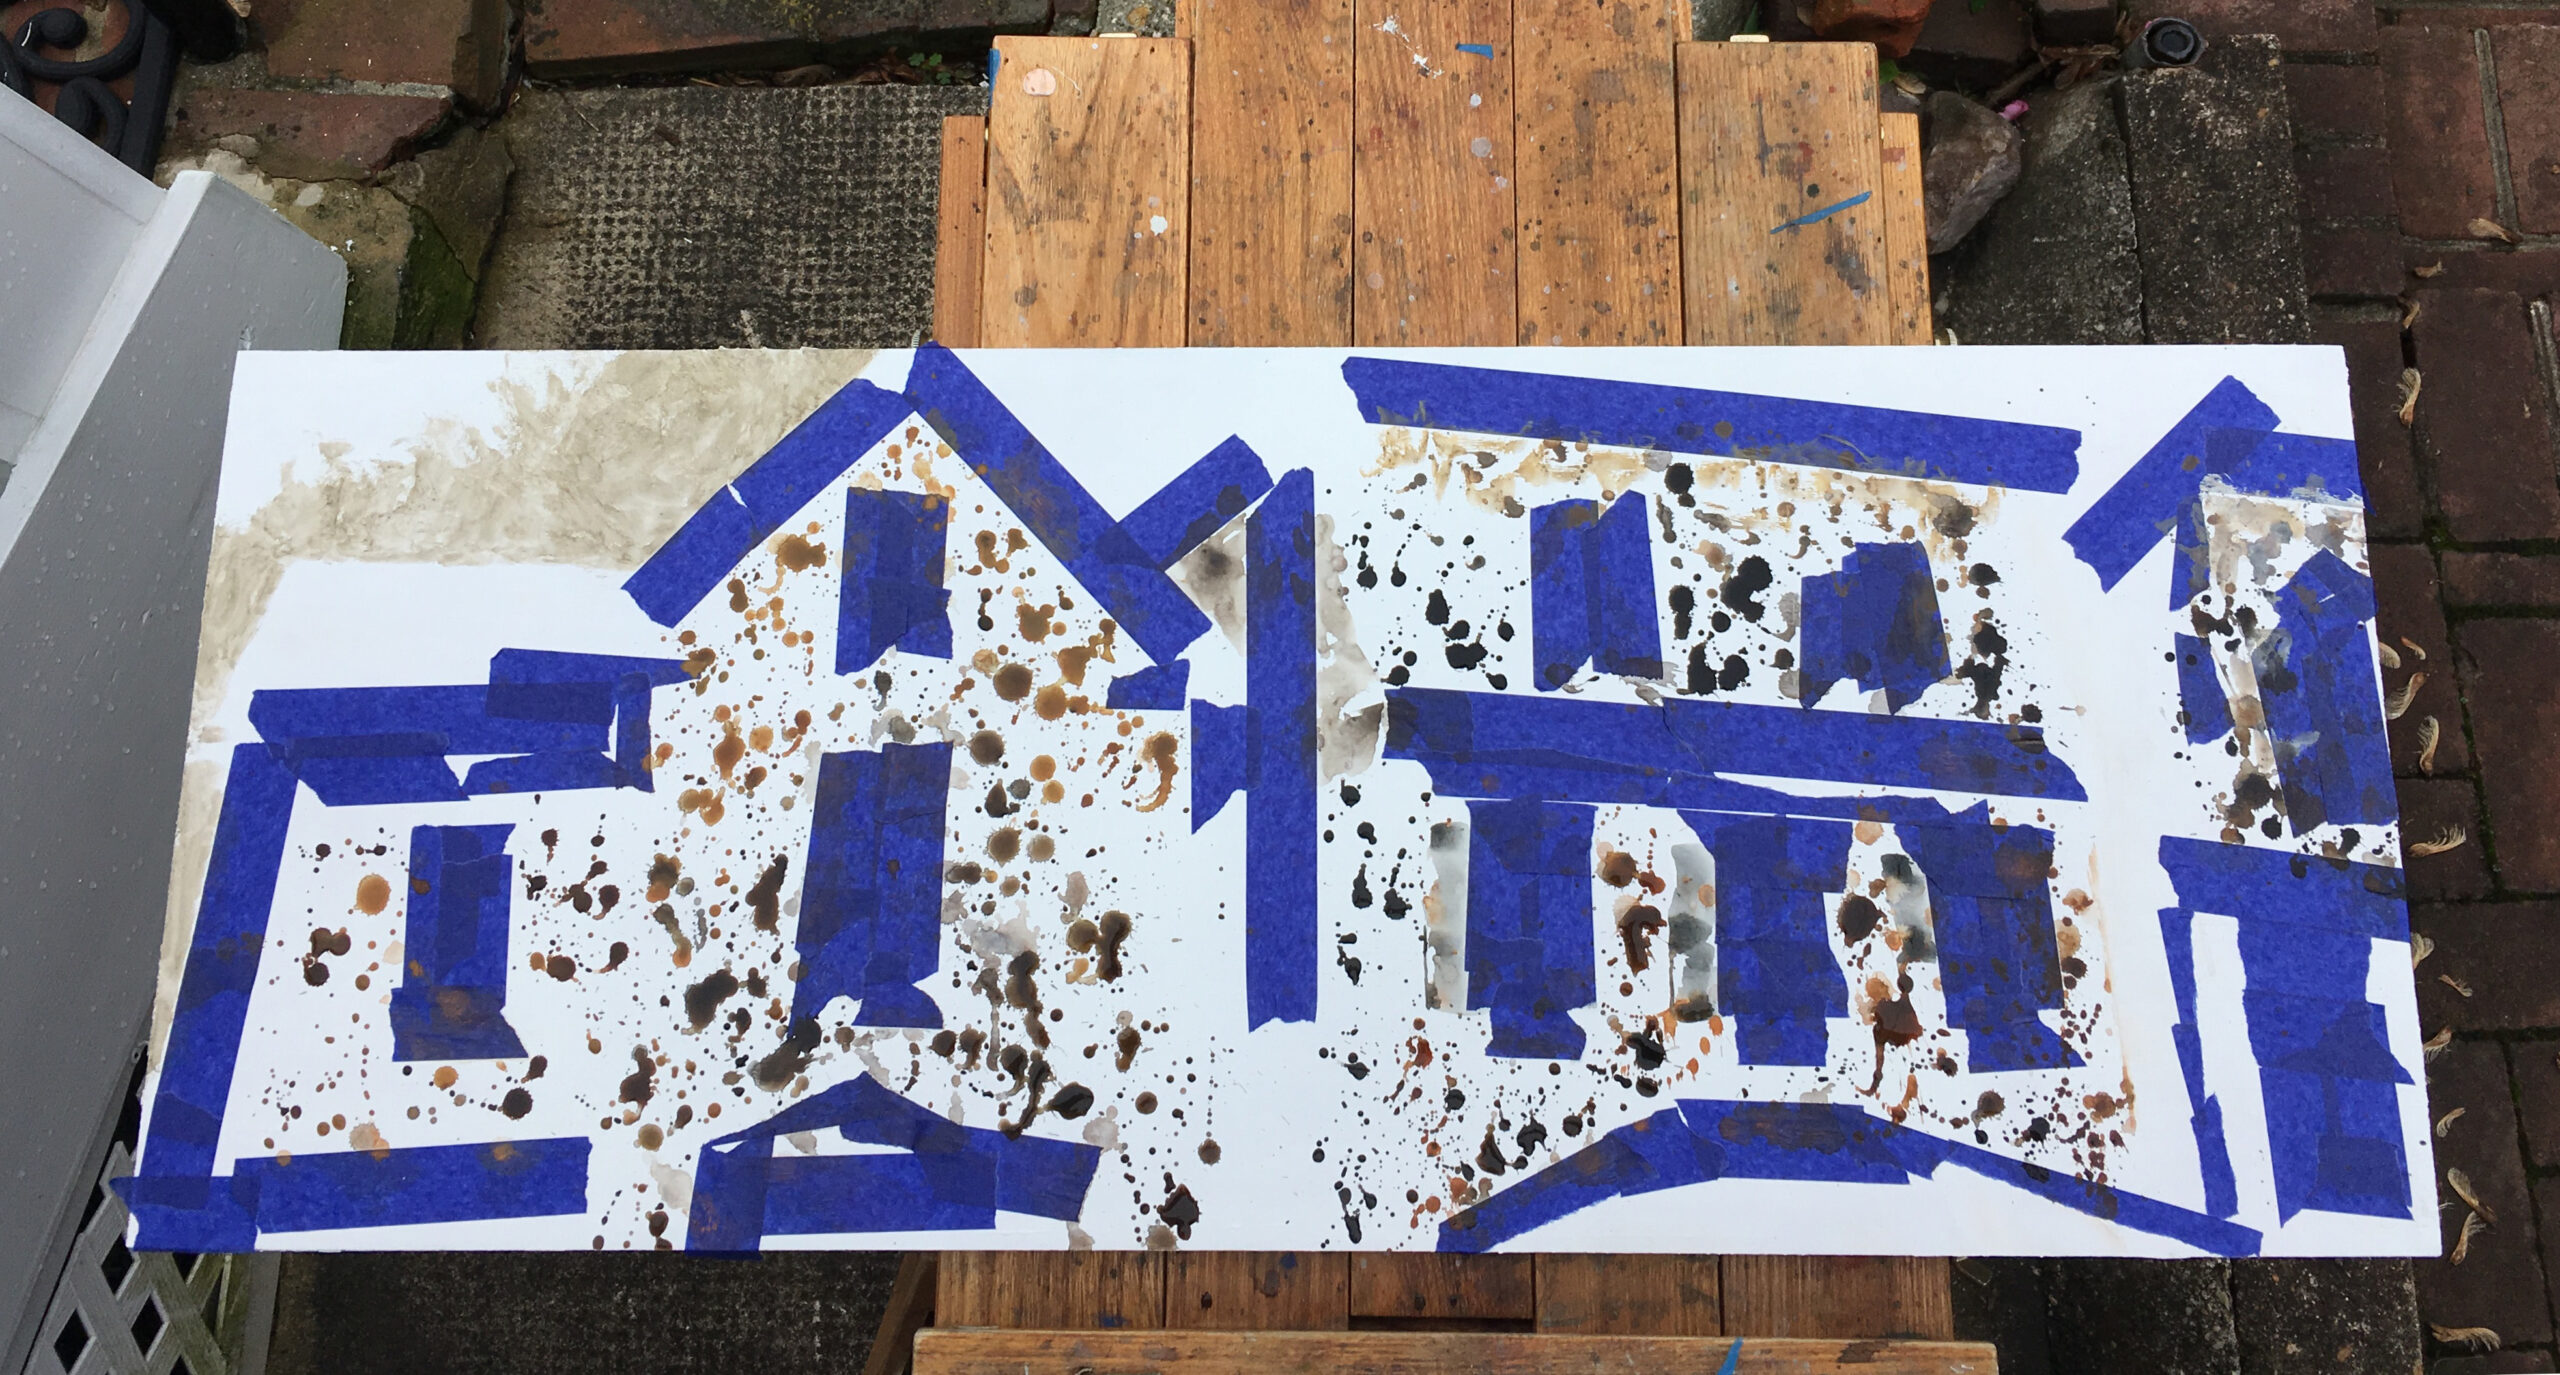
With the major edges ‘drawn’ with tape, I can begin to build my textures and body color without being too precious about details. This stage is very splashy and quick. There’s often a coffee break while the underpainting dries.
Step 3
As I begin to build more intensity into the textured washes, I start to define edges and create shapes. Still splashing, but beginning to draw with the brush wet-into-wet, I pull drops into lines and blocks, allowing colors to run into each other.
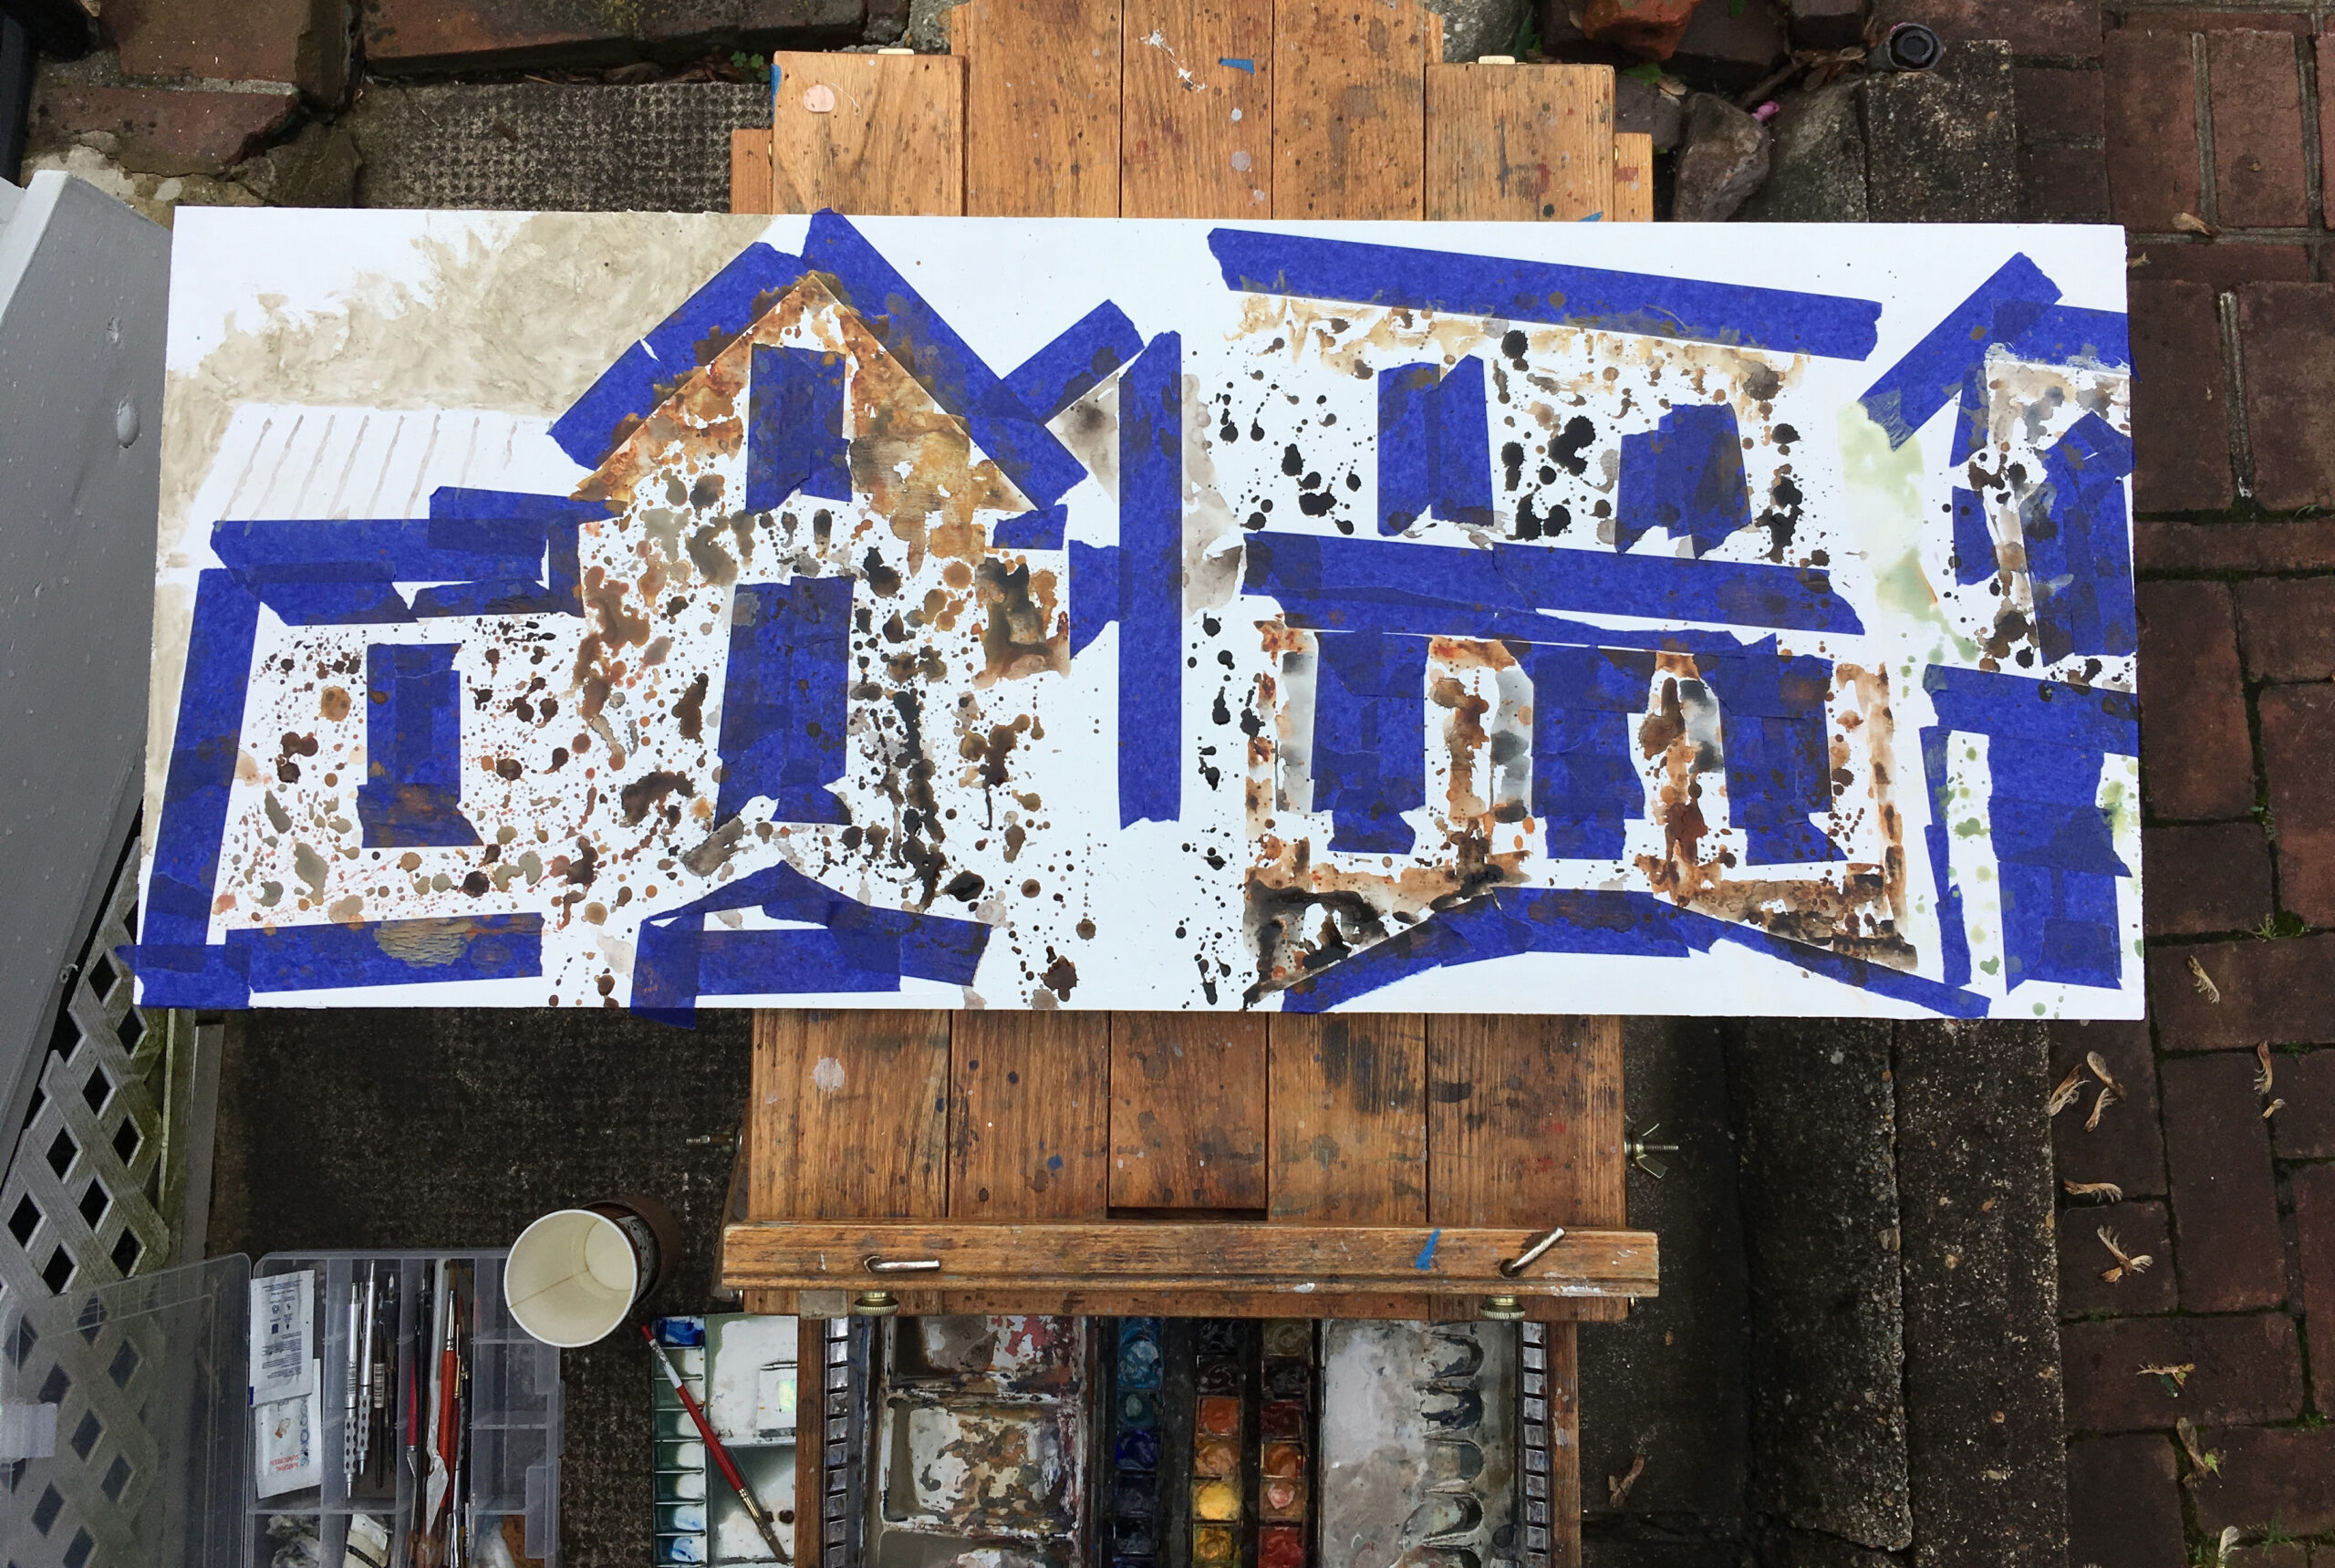
Step 4
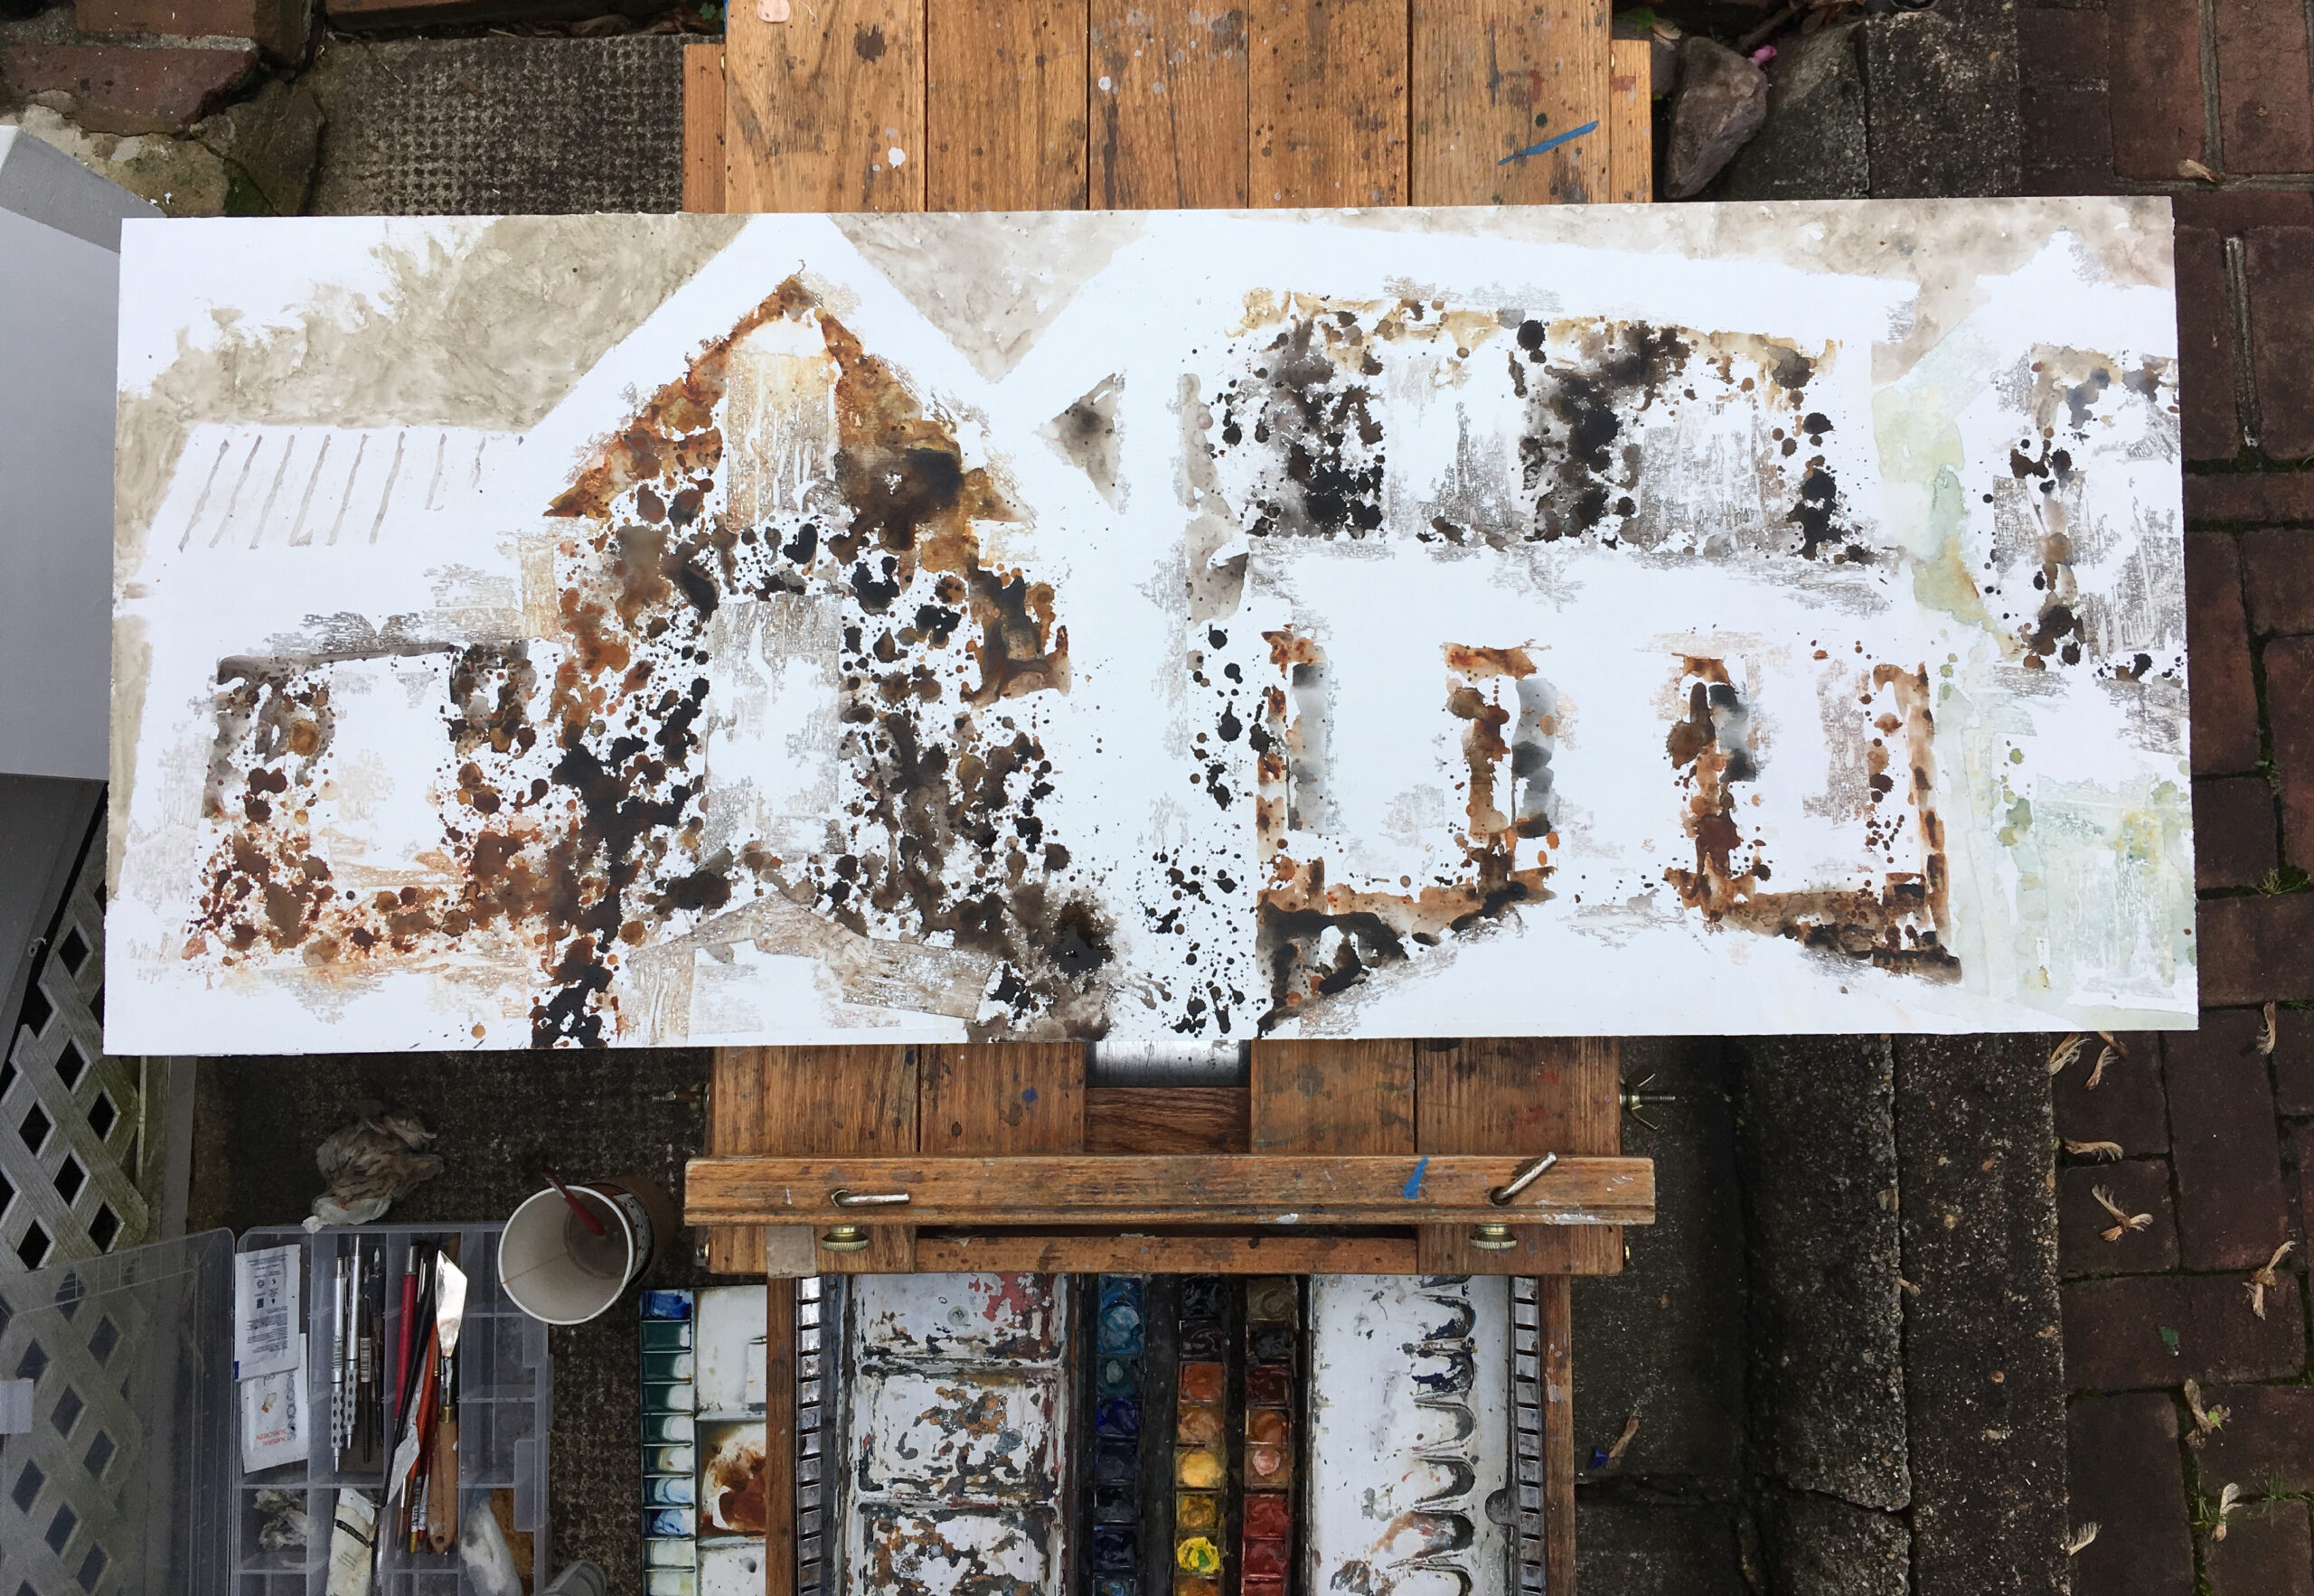
With the tape removed, the painting has the major masses laid in and the defining of the specifics can begin. The first steps may have been completed in little more than an hour, but the development of all the details will take two or three more.
Notice the texture of the bleeding that has occurred, particularly in the central, rectangular window of the building on the left. Some of those marks will become the weathered woodwork of the window frame, and the dark window itself will allow me to lose the rest.
Final Step
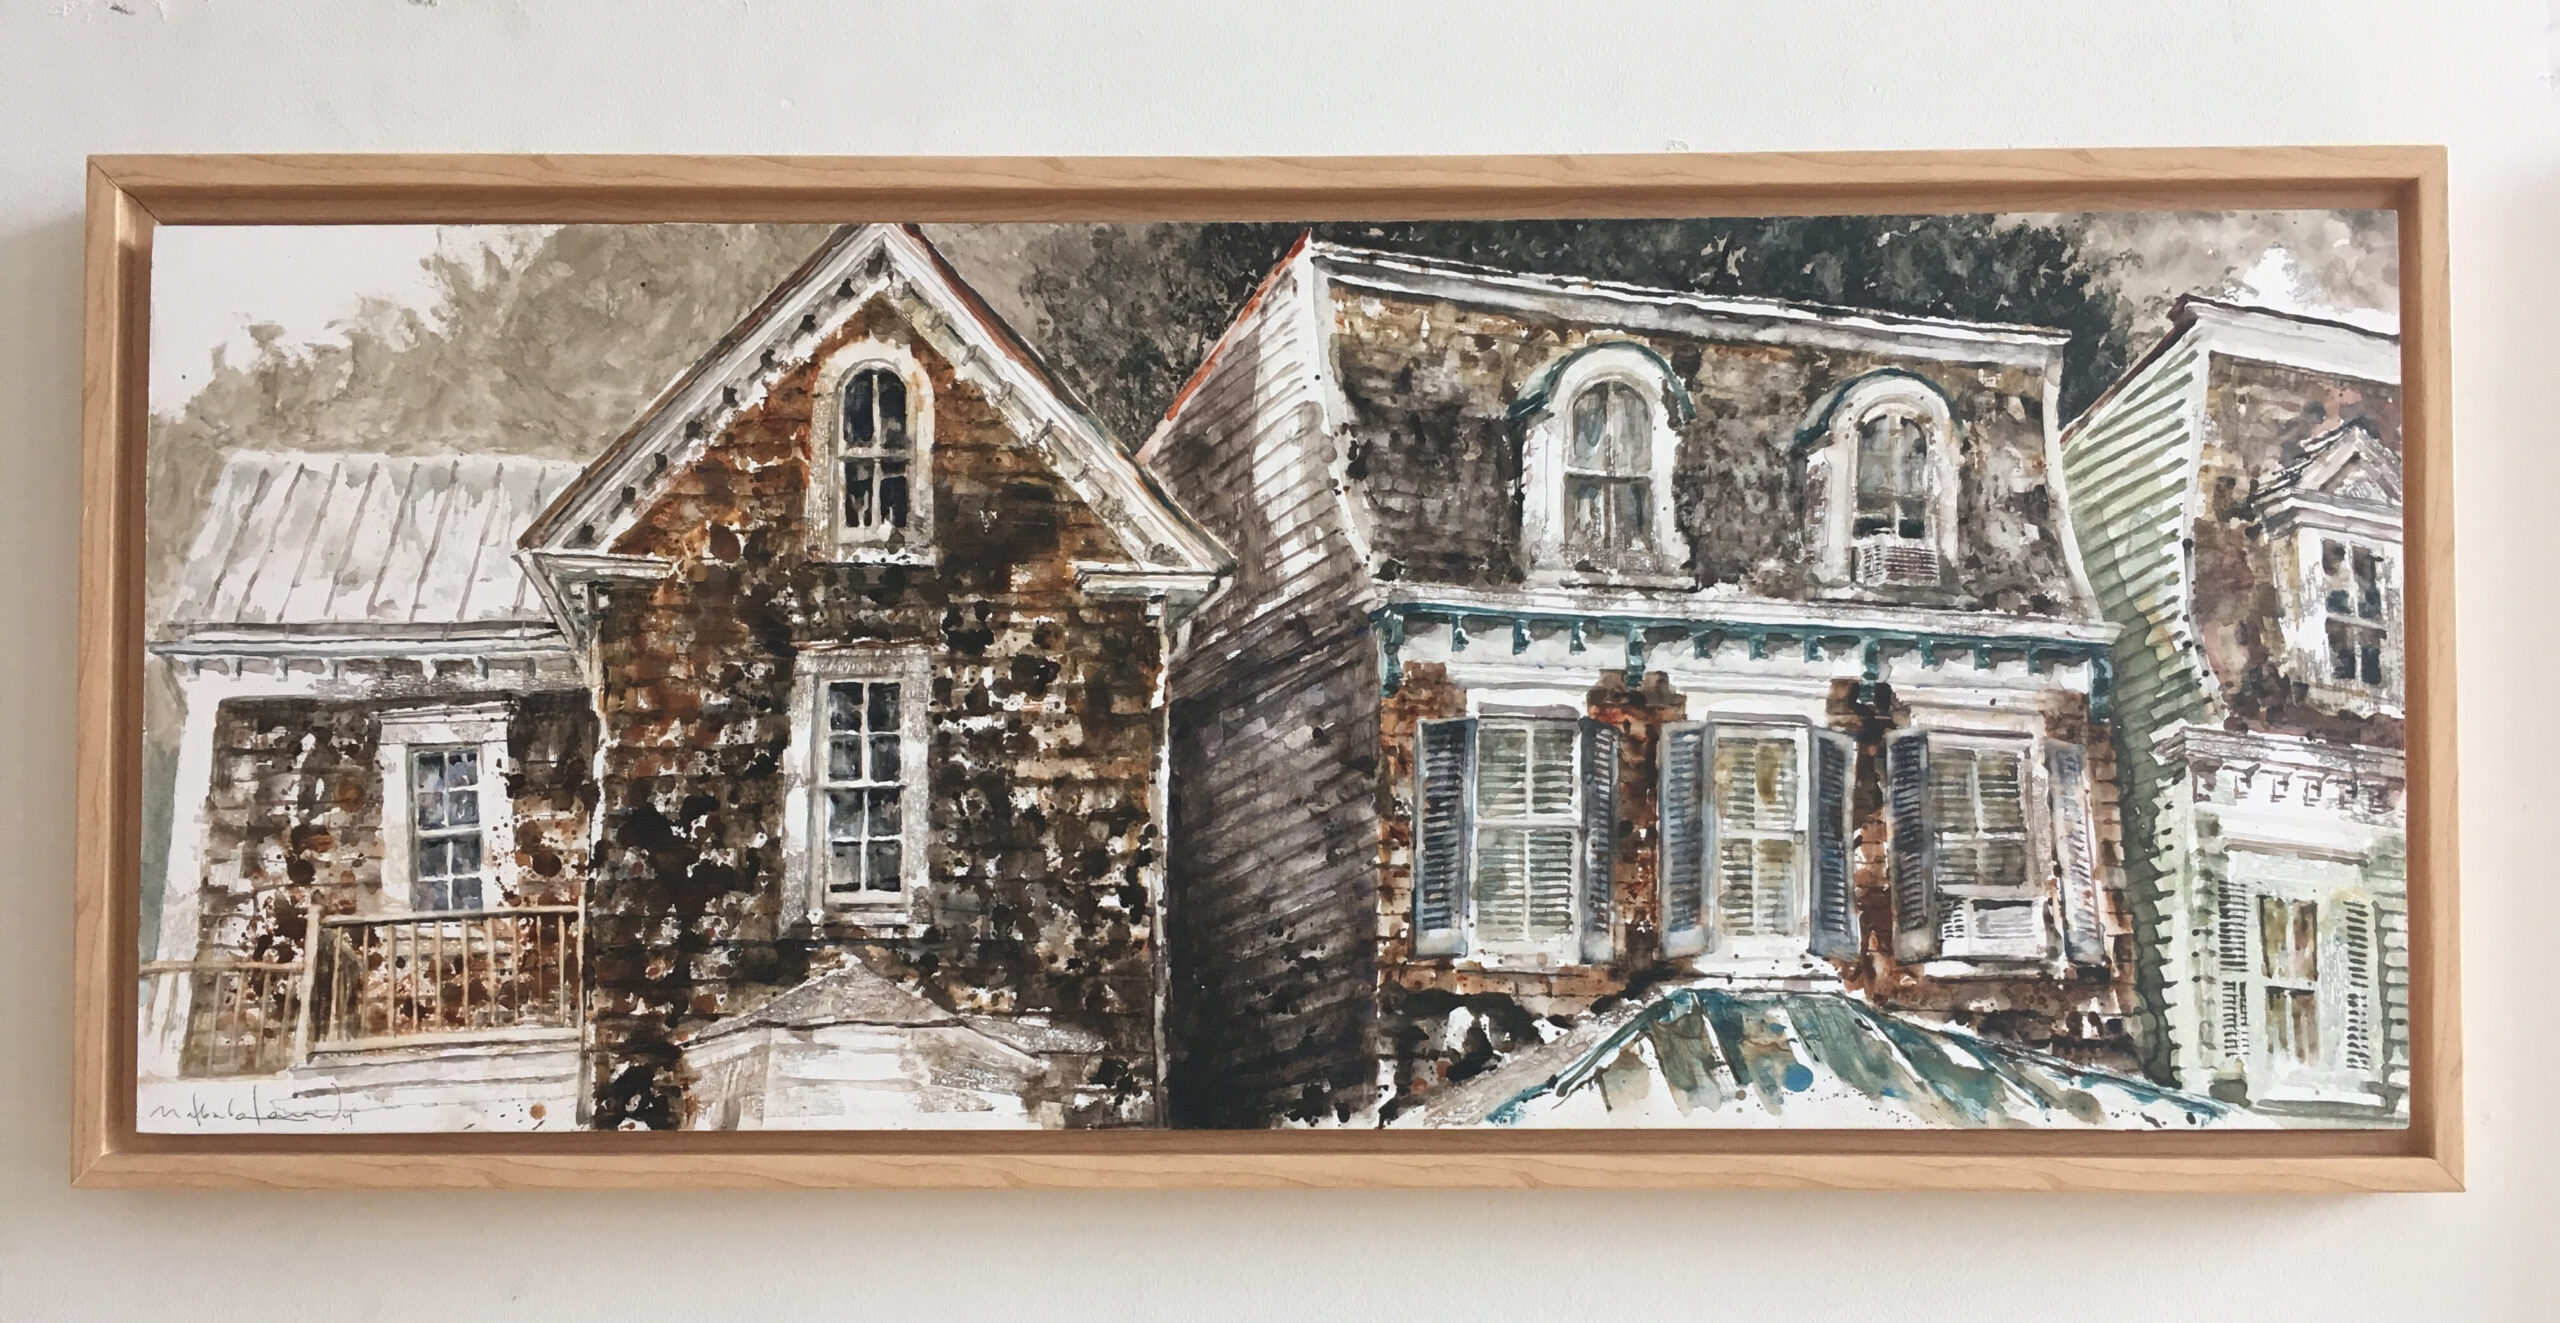
As the painting emerges I am constantly moving across it, bringing elements up together, not finishing anything until I have finished everything. My paintings all work this way, from the general to the specific, building the whole composition at once rather than working piece by piece. It’s how I draw the figure and it’s how I draw a bucket, building the entire composition, finally getting to the darkest darks and the tightest linear details.
Don’t miss your opportunity to create lifetime memories at the Plein Air Convention & Expo! All training sessions are indoors on giant, high-def screens, with plein air paint-outs in the afternoons. Beginners and pros feel right at home, so register at PleinAirConvention.com to join us.
Browse more free articles here at OutdoorPainter.com
Blog post prepared for the web by Cherie Dawn Haas, Editor of Plein Air Today


