

Thomas Jefferson Kitts explains how to trim down your plein air painting supplies and equipment, plan a painting trip, and return home with a collection of useful plein air paintings. Bonus: Learn from his step-by-step landscape painting demonstration!
By Thomas Jefferson Kitts (www.thomaskitts.com)
Years ago my wife and I took a trip to Spain and Morocco, and before leaving home, we agreed I could paint from dawn until noon if I spent the balance of the days being a tourist. If you travel with someone who is not a painter, I recommend striking a similar bargain.
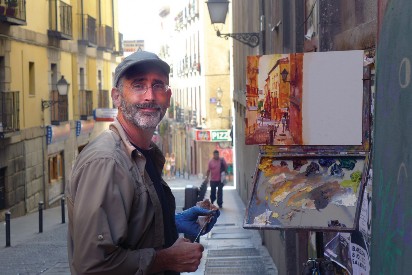
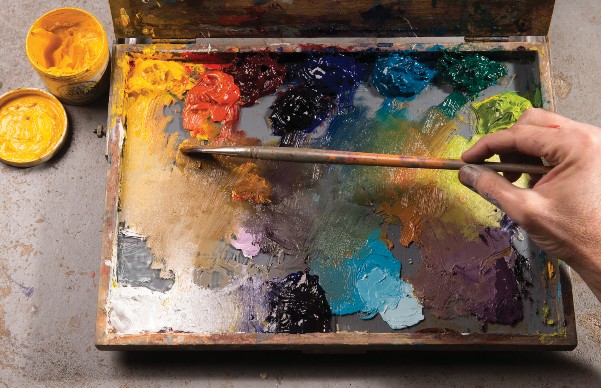
When I prepare for a painting trip abroad, I reduce my gear to the bare essentials and decide what I should take in my carry-on luggage and what can be checked through with baggage. For this trip, I reduced my palette to titanium white, cadmium yellow medium, alizarin crimson, ultramarine blue, cerulean blue (hue), and viridian. I squeezed the contents of 150-ml. tubes of paint into plastic jars to avoid punctures. In the field, I combined the three darkest colors to make a black and mixed complementary hues together to create earth colors.
I packed six brushes, a palette knife, a medium cup, six custom-cut 12 x 16-inch RayMar Feather Lite panels, and an OpenBox M easel and tripod into my backpack. If something couldn’t be replaced in Spain, it went into my carry-on backpack.
We flew into Madrid, Spain, and drove to Toledo and Granada so I could paint and scout workshop locations in Joaquin Sorolla country. We then ferried across the Strait of Gibraltar and hired a taxi to take us to the blue hill town of Chefchaouen in Morocco. After that we ferried back to Spain and took a train up to Ronda.
Because airlines won’t allow anyone to carry liquids, I Googled art stores in advance to locate places where I could buy solvent. I couldn’t find any in Morocco, so I used olive oil to clean my brushes and only had to squeeze out the excess to make that work. At the end of the trip, I left the extra solvent and oil behind for another artist (or cook).
We booked apartments through Airbnb in some of the most ancient neighborhoods we visited; that was cheaper than renting hotel rooms and gave us the use of a kitchen. We made a point of staying in places close to compelling subject matter so I wouldn’t have to go far to paint. Such places are usually in cities where cars are not welcome, so we wound up doing a lot of walking. That was another reason to lighten my load.
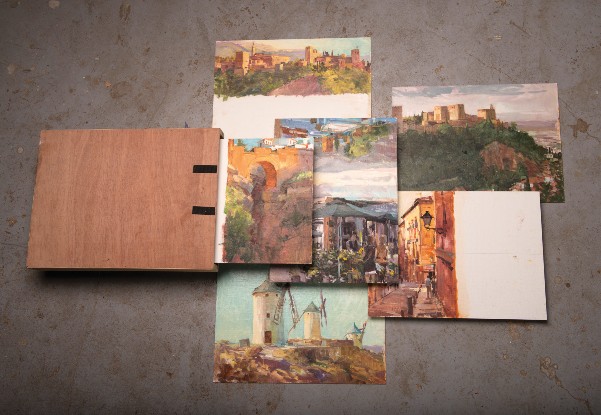
I consider the paintings I made to be quick field sketches that may be useful as color references when creating larger studio works. I say “may” because at heart I am a plein air painter, filled with the urge to travel, and, if given a choice, I prefer to work from life. I love to respond directly to the light and colors of a place while experiencing the art and culture of a people first-hand.
I hope these plein air travel tips and tricks will inspire you to pack up the gear and head off on your own adventure!
Step-by-Step Plein Air Landscape Painting Demonstration:
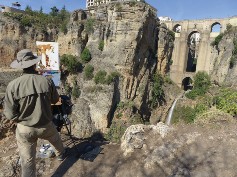
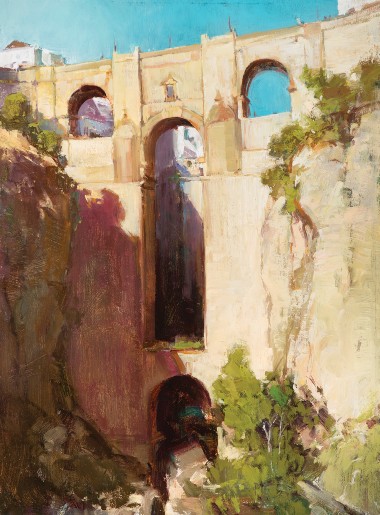
La Puente Nuevo (The New Bridge), in Ronda, Spain
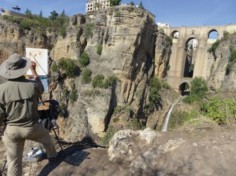
STEP 1: I scouted this location in advance and determined the pattern of light and shadow would be most interesting late in the day. After getting a dispensation from my wife, I set up to paint during what I knew would be rapidly changing light.
STEP 2: It is expedient to work from large to small shapes when painting, but it is not effective to break everything down too far, or too evenly. A painting will be more pleasing if it includes both big and small shapes.
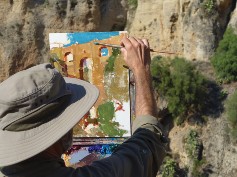
STEP 3: I don’t separate value from hue or saturation while working; I try to establish all three simultaneously. If I see a dark saturated sky, for example, I mix a dark intense greenish-blue. If I see strong raking light across a cliff, I mix a light-value, weak-chroma orange. Every color is expressed as directly as possible.
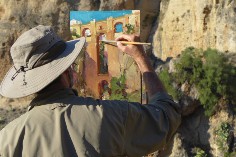
STEP 4: Adjusting my way around the composition without too much jumping around, I reinforce the way I want the viewer’s eyes to flow. If an edge has be softened or a color tweaked, or if some thick paint needs to be scraped off, this is the time to do that.
STEP 5: Finally, I start to apply the top brushwork. I knew that if I launched into this process too soon, I might not be able to adjust something more critical underneath. Addressing a late-breaking concern would require scraping the top work off — which would waste precious light.
***
 My video, “Sorolla: Painting the Color of Light,” extensively covers the concept of painting the temperature of light. In truth, I began working on this video five years ago when I began traveling to view Sorolla’s masterworks and the places he painted. My demonstration is a stroke-by-stroke, fifteen-hour presentation, with some extras. It includes many detailed explanations of what I am about to do, and more information as I do it. Nothing is left out or held back and nothing is dumbed down. Additional topics beyond color temperature are presented in detail. I discuss how Sorolla applied his paint in his mature years; how he altered, edited, and simplified his subjects; how he used his brush at the start of a painting; how he used it at the end; and so much more.
If, like me, you are in awe of Sorolla — or if Sorolla is a new artist to you — you can learn a lot about how he painted from my demonstration. Whether an experienced painter or someone new to the world of painting, you can learn how to see and manipulate color temperature to add vibrancy and life to your own work. [Order here]
Related Article: What is Plein Air Painting?


I subscribed to your magazine several months ago but haven’t yet received it. Is there a problem?
Hi Jean! We’ll send you an email to find out how we can fix this asap!
Thank you so much for this. It’s definitely gonna help with my family trip with my parents and siblings at the end of the year.