Have you heard of the glazing technique, but aren’t sure when or why you’d apply it to your painting? In this guest blog post, Hebe Brooks, a Master Artist of the National Oil & Acrylic Painters’ Society (NOAPS), explains glazing for beginners.
The Glazing Technique
BY HEBE BROOKS, a NOAPS Master Artist
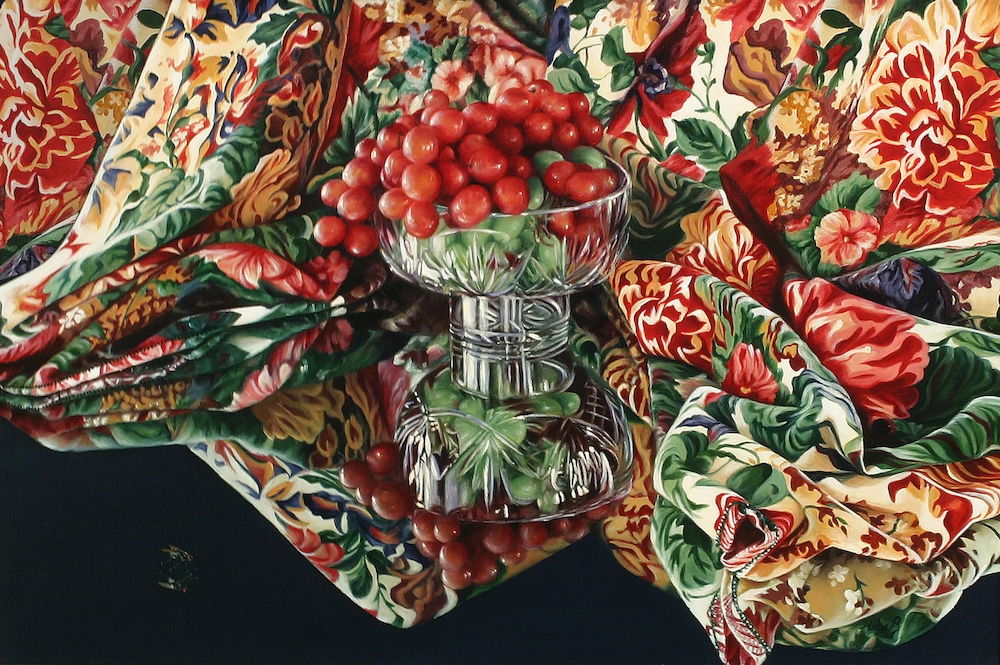
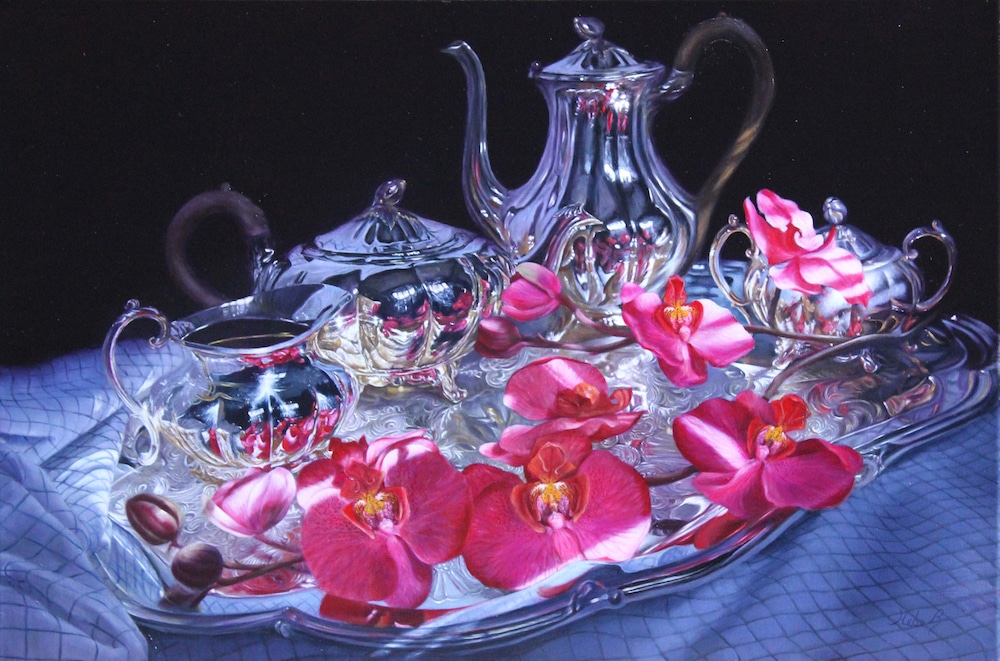
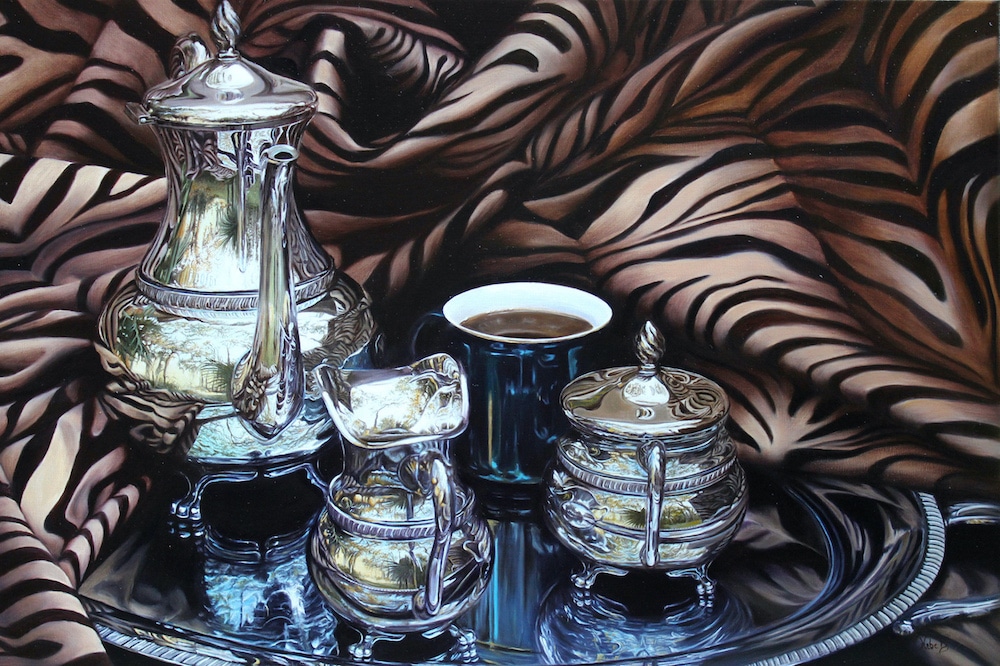
There are some basic characteristics typical of my art, but the three most common are reflections, transparencies, and the depiction of fabric folding and turning throughout the canvas. Achieving the above-mentioned characteristics requires subtle changes in values. It necessitates allowing the light to penetrate the colors and reflect back to the viewer, just as it happens in nature. Glazing, sometimes known as layering, is the technique that I use to achieve the desired results.
What is glazing? Glazing is an old technique, as old as oil painting. Leonardo Da Vinci used this technique extensively, and when you see one of his portraits, you can appreciate the luminosity and smooth value transitions.

The first key to glazing is to know your paints. Each paint has a different degree of transparency. In other words, some paints are seen through and some are totally opaque paints, because they block the light. Think of paints as different types of fabric. Sheers are transparent while a fleece type of material is opaque. Many fabrics fall in between the two and they are semi-transparent or semi-opaque. Now, think about putting very transparent sheers one after the other in such a way that allows your eyes to penetrate the layering. You will be changing the colors, softening the edges, and adding a glimmering impossible to achieve with an opaque material.
It is not hard to learn the transparency of each paint. It is actually written on the outside of your paint tube. The letters are usually very small but you will be able to find the word “transparent” in the paint tubes of a phthalo, a quinacridone, an ultramarine or some of the sienna colors.
The word “opaque” is written on many paint tubes, and an opaque paint will hide whatever is underneath; therefore, the “sheer” effect will be blocked. For example, a titanium white or a cadmium color as a top layer will cover whatever is underneath. Keep in mind that mixing a transparent color with an opaque on your palette will also change the degree of transparency and block the light.

Once you know the transparency of your paints, the second key is to use the colors without mixing them with other colors on your palette. A beautiful glaze is achieved by using the color directly from your paint tube without compromising it and without mixing it. Just add linseed oil or a glazing medium, make sure the paint on your canvas has dried, and then apply a new layer to start transforming your art.
The layers are very thin applications of paint — one over the other. If successive layers of the same transparent paint are applied one on top of the other, that area will become darker, thus achieving folds if painting a fabric. If a transparent color is layered on top of a different color it will transform the base color, allowing you to create smooth transitions, unique luminosity, or perfect shadows. For example, an ultramarine blue on top of a red will create a violet or a perfect shadow for a red object located outdoors. If painting a precious stone, such as a ruby, glazing will help to shape and add darks to the jewel without sacrificing its luminosity and transparency.
Glazing seems easy enough, but where is the catch? Glazing requires time and patience when painting. Each layer must be dried before the next layer is placed on top. Glazing also requires planning since errors can be easily seen underneath transparent layers. And finally, glazing requires not only the knowledge of your paints but it also requires you to follow the rule of fat over lean. In order to avoid cracking, one must start with lean layers and slowly increase the oil content in top layers.

Glazing can give you wonderful effects of luminosity that can not be achieved with colors mixed on your palette or with wet on wet techniques; however, there is no reason not to use the two techniques in the same painting. A glazing can be applied to a dried impressionistic painting. An ultramarine blue glaze can push back an area of an impressionistic landscape, creating distance. Glazing can be used for a portrait, while the background can be done with a wet on wet technique. William Bouguereau, one of the last great masters of the glazing technique, used glazing to achieve incredible skin tones, but he used faster and more direct painting techniques in other areas of his paintings.
Mixing techniques can even be an advantage in that it helps to draw the eyes of the viewer to the glazing areas.
In essence, glazing brings wonderful effects to a painting by harmonizing the work, by achieving subtle hues, by softening edges, by creating distance, by simplifying shadows, and by adding a luminosity by the imperceptible penetration of light through the transparent colors.
ABOUT THE ARTIST
Hebe Brooks (www.ArtbyHebe.com) is a current member of several artists’ associations, including Master Artist of the National Oil & Acrylic Painters’ Society (NOAPS*), Member of the International Guild of Realism (IGOR), the Oil Painters of America (OPA), Signature Artist of the American Women Artists (AWA), Signature Artist of the National Society of Artists, Signature Artist of the Texas & Neighbors Association, and Associate Member of the Allied Artists of America.
Upcoming travel and art events with Streamline Publishing:
> Click here to subscribe to the free newsletter, Plein Air Today
> And click here to subscribe to PleinAir Magazine so you never miss an issue!


Hello,
I liked the article on glazing, but when I went to copy it – some of the words on the right side did not get printed. Is it possible to gat a full copy of this without some of the right hand side words being eliminated?
thank you for looking into this.
Vivian
Vivian, just highlight text & pictures, copy and paste into a word processor. You may need to adjust the size of the pictures.
[…] Painting Techniques: Glazing Basics […]